简介
Follow this guide to replace the battery in your iPad 5 LTE.
Before you begin, drain your iPad's battery below 25% charge. This will minimize the risk of a dangerous thermal runaway in the event that you accidentally puncture or deform the battery.
Lithium ion batteries contain dangerous chemicals and may catch fire and explode if punctured or mishandled. Use caution.
Parts of this guide were shot with a Wi-Fi model and as such the internals may look slightly different from the LTE model. The procedure is the same for both models except where noted.
Warning: the battery isolation method in this guide is outdated, and may result in irreversible damage to the battery pins of the logic board, effectively destroying it. If you choose to isolate the battery this way, heed all warnings and work extremely carefully. If you choose to complete the guide without isolating the battery, avoid using metal tools except when completely necessary (like when removing screws) to prevent shorting the battery and damaging sensitive circuit components.
你所需要的
-
-
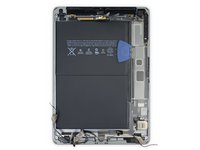
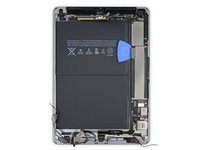
Heat an iOpener and apply it to the left edge of the device for two minutes.
-
-
-
While you're waiting for the adhesive to loosen, note the following areas that are sensitive to prying:
-
Front camera
-
Antennas
-
Display cables
-
-
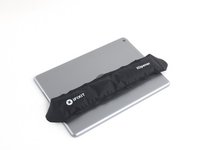
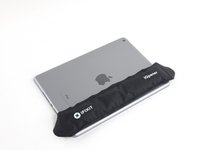
在这个步骤中使用的工具:Clampy - Anti-Clamp$24.95
-
Pull the blue handle backwards to unlock the Anti-Clamp's arms.
-
Place an object under your iPad so it rests level between the suction cups.
-
Position the suction cups near the middle of the left edge—one on the top, and one on the bottom.
-
Hold the bottom of the Anti-Clamp steady and firmly press down on the top cup to apply suction.
-
-
-
Wait one minute to give the adhesive a chance to release and present an opening gap.
-
If your screen isn't getting hot enough, you can use a hair dryer to heat along the left edge of the iPad.
-
Insert an opening pick under the digitizer when the Anti-Clamp creates a large enough gap.
-
Skip the next step.
-
-
-
Once the screen is warm to touch, apply a suction handle to the left edge of the screen and as close to the edge as possible.
-
Lift the screen with the suction handle to create a small gap between the digitizer and the frame.
-
Insert an opening pick into the gap between the digitizer and the frame.
-
-
-
Insert a second opening pick into the gap you just created.
-
Slide the pick toward the bottom-left corner of the device to separate the adhesive.
-
Leave the pick in the bottom-left corner to prevent the adhesive from re-sealing.
-
-
-
Heat an iOpener and apply it to the top edge of the device for two minutes.
-
-
-
Rotate the pick around the top-left corner of the device to separate the adhesive.
-
-
-
Slide the opening pick along the top edge of the device, stopping just before you reach the front camera.
-
-
-
Heat an iOpener and apply it to the right edge of the device for two minutes.
-
-
-
Rotate the pick around the top-right corner of the device to separate the adhesive.
-
-
-
Insert a new opening pick and slide it to the middle of the iPad's right edge.
-
-
-
Heat an iOpener and apply it to the bottom edge of the device for two minutes.
-
-
-
Slide the bottom-left pick to the bottom-left corner to separate the adhesive.
-
Leave the pick in the bottom-left corner before moving to the next step.
-
-
-
Insert a new opening pick into the gap you just created on the bottom edge of the iPad.
-
Slide the pick over the antenna, stopping just before the home button.
-
Leave the pick to the left of the home button before continuing.
-
-
-
Heat an iOpener and apply it to the right edge of the device for two minutes.
-
-
-
While supporting the digitizer, slide an opening pick between the two display cables to separate the last of the adhesive.
-
-
-
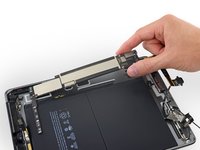
在这个步骤中使用的工具:Polyimide Tape$9.99
-
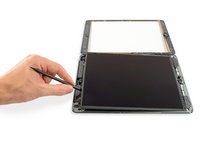
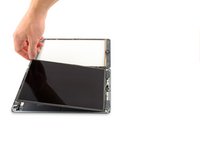
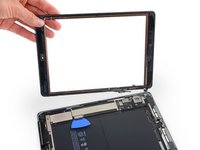
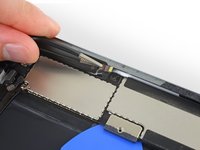
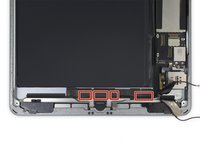
Remove the front panel assembly.
-
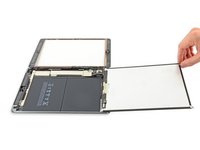
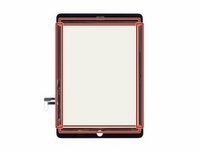
If you experience "ghost" or "phantom" touch input issues with your new display, this can be resolved by adding a layer of very thin insulating tape, such as Kapton (polyimide) tape, to the highlighted areas on the back of the panel. iFixit panels come with the proper insulation, and should not require the addition of any tape.
-
-
在这个步骤中使用的工具:Tweezers$4.99
-
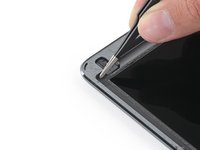
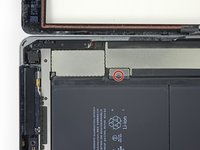
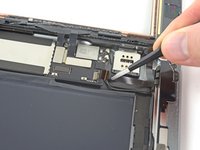
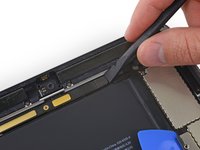
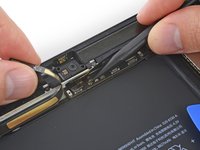
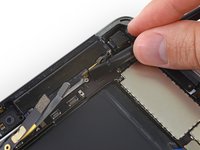
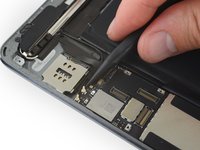
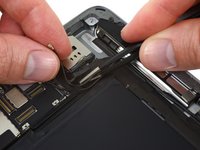
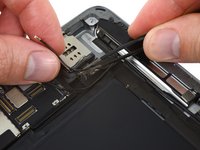
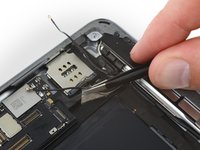
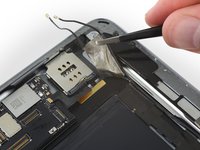
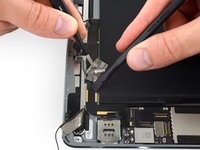
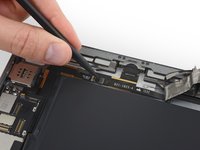
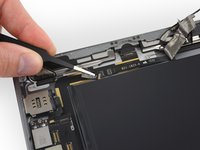
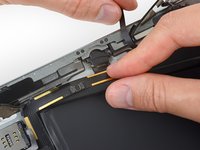
Use tweezers to peel and remove the piece of tape covering the SIM board cable connector on the logic board.
-
-
-
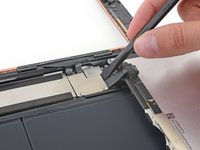
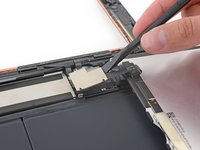
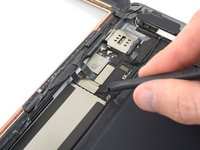
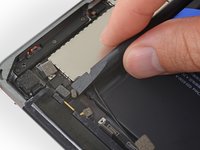
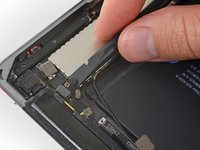
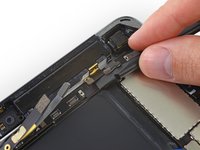
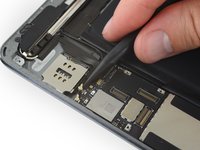
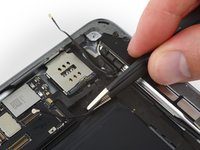
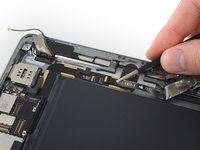
Remove the following screws securing the upper component cable bracket:
-
Two 2.0 mm Phillips screws
-
Three 1.4 mm Phillips screws
-
-
-
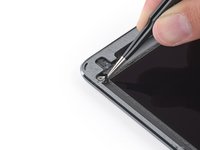
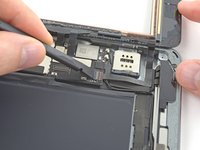
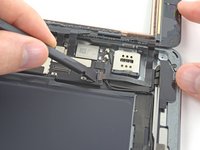
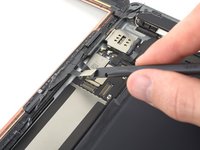
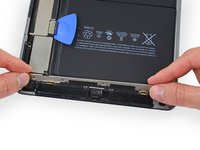
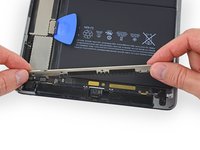
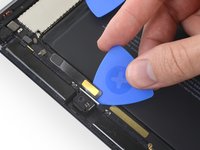
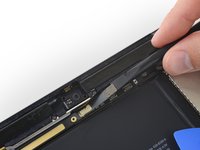
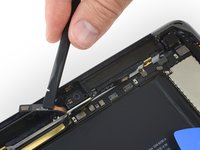
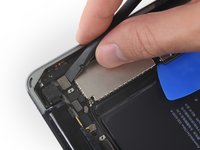
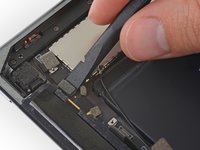
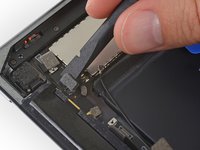
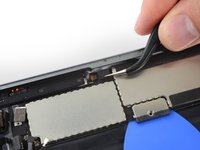
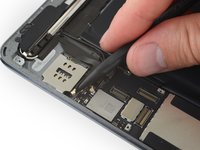
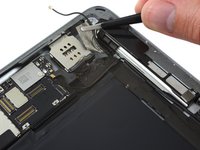
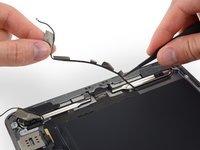
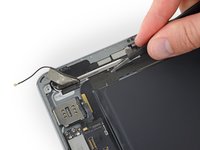
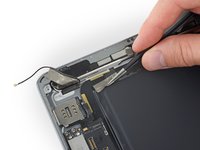
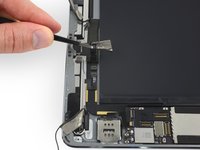
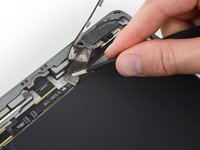
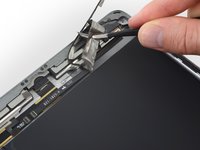
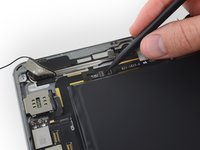
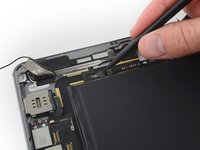
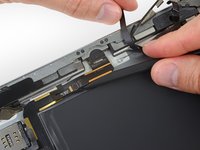
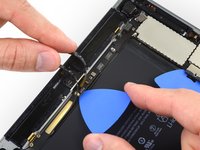
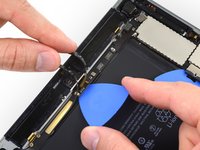
Use the flat end of a spudger to disconnect the front-facing camera connector from its socket on the logic board.
-
-
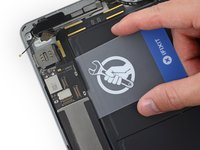
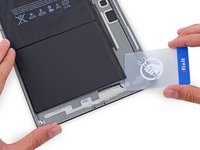
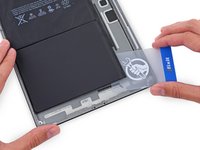
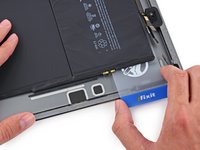
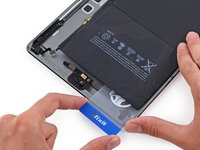
在这个步骤中使用的工具:Plastic Cards$2.99
-
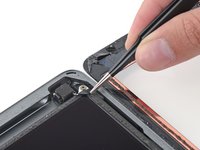
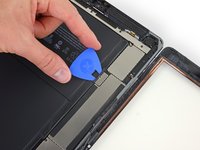
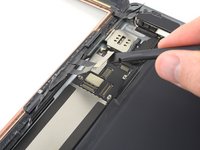
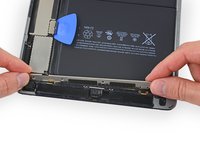
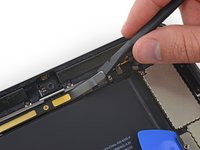
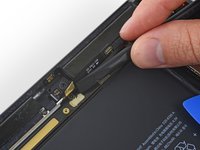
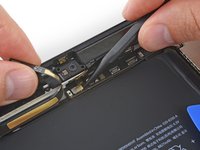
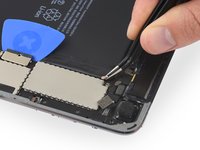
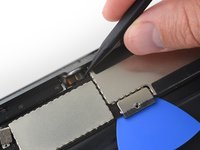
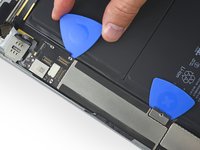
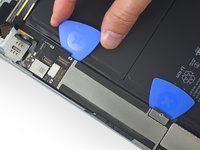
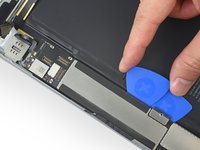
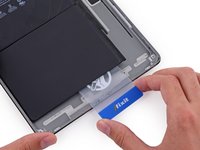
Remove the battery isolation pick.
-
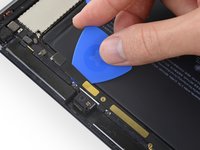
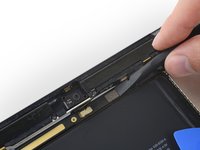
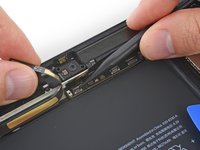
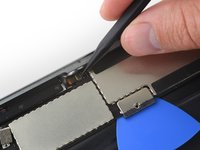
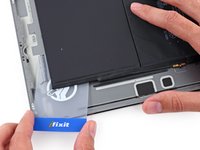
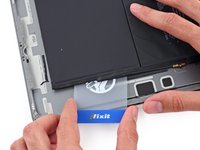
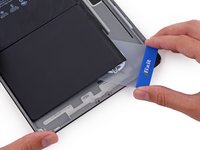
Insert a plastic card underneath the logic board at the battery connector.
-
Slide the card all the way underneath the logic board, separating the adhesive along the outer edge.
-
-
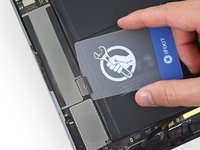
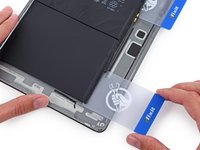
在这个步骤中使用的工具:iFixit Adhesive Remover$19.99
-
Reheat the iOpener in the microwave for 30 seconds.
-
Place the heated iOpener in the center of the back of the iPad. Let it sit there for 90 seconds to soften the battery adhesive.
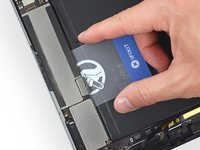
-
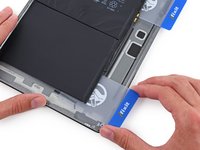
Move the iOpener to the right (away from the rear-facing camera), and let the iOpener sit for another 90 seconds.
-
Finally, move the iOpener to the right-hand edge of the iPad for 90 seconds.
-
-
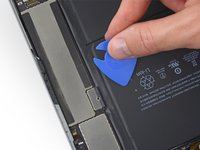
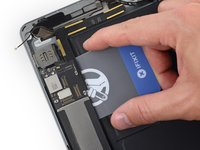
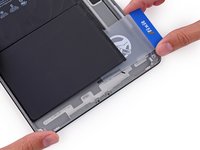
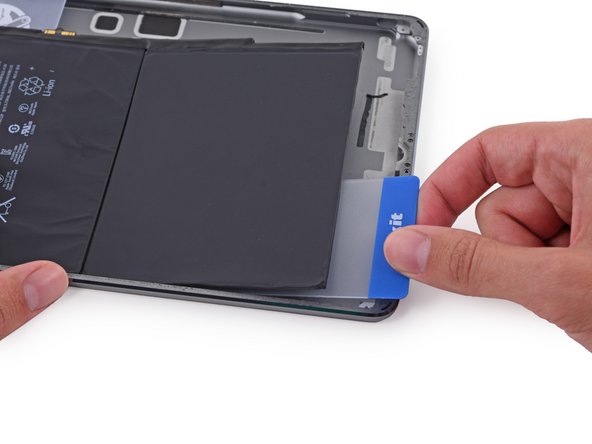
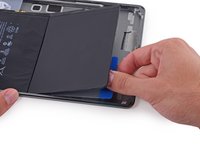
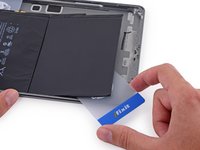
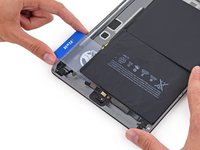
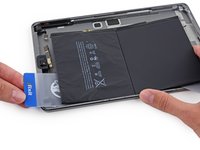
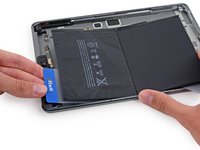
在这个步骤中使用的工具:Plastic Cards$2.99
-
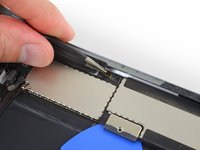
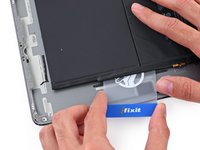
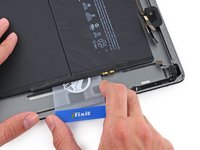
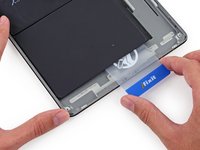
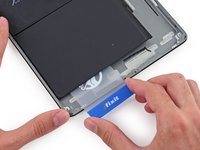
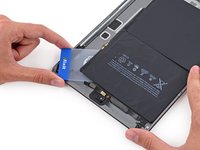
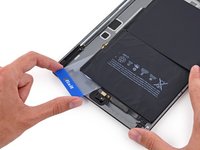
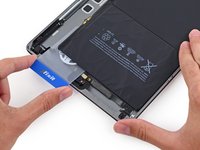
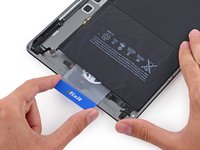
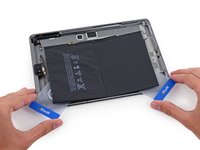
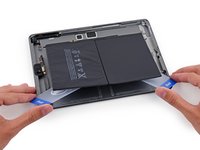
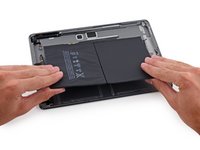
Insert a plastic card under the lower battery cell, at the lower right-hand corner.
-


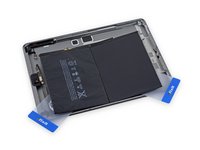


To reassemble your device, follow these instructions in reverse order.
To reassemble your device, follow these instructions in reverse order.
11等其他人完成本指南。


2条评论
The battery replacement went off without a hitch, I’ll be honest, at step 50 I started to look at things with a real tech eye. I stopped disconnecting and removing components and took my hairdryer to the back, the battery came up quite easily so I stopped, popped in the new battery right then. After reconnecting everything, using iso to clean the lcd and inside glass, I “dry fit” everything back together, powered it up… nice. Completed new adhesive install and all is good.
Great tutorial, but if you have a good tech background, you can knock off an hour and do it in just over an hour. PS - Hair dryer is a must - take your time on this, once you get past the initial opening of the left side, the rest is a breeze.