
Apple Watch Ultra 电池替换


-
-
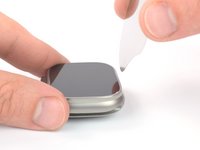
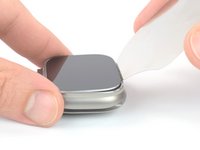
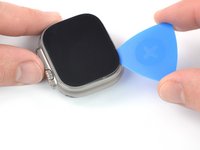
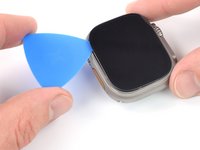
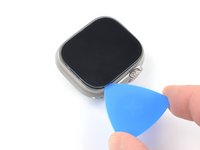
将 iFlex 的尖端放在数字表冠对面的边缘,并将其插入到屏幕和外壳之间的接缝中。
-
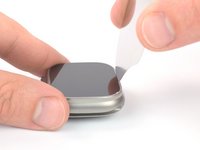
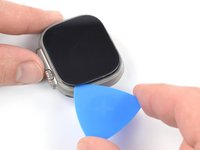
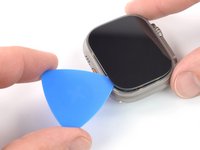
请将iFlex 垂直向下 压入缝隙。
Took around 6-7 reapplications of heat to pry the screen up. I used a razor blade to cut the adhesive on the three sides of the screen first, then used the iFlex to pry.
-
-
-
-
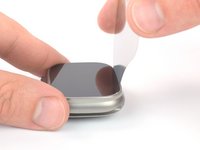
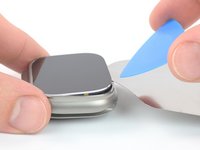
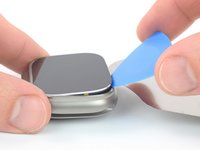
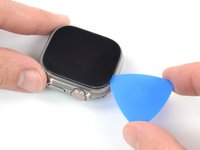
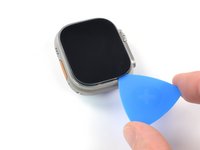
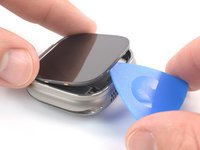
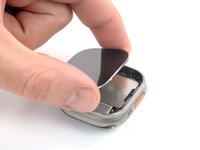
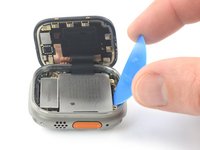
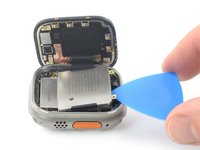
提起屏幕并小心地将其拉向表冠。
-
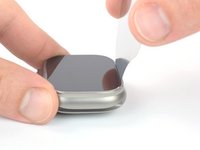
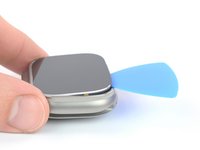
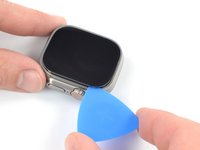
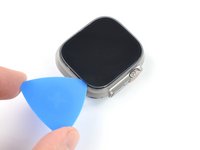
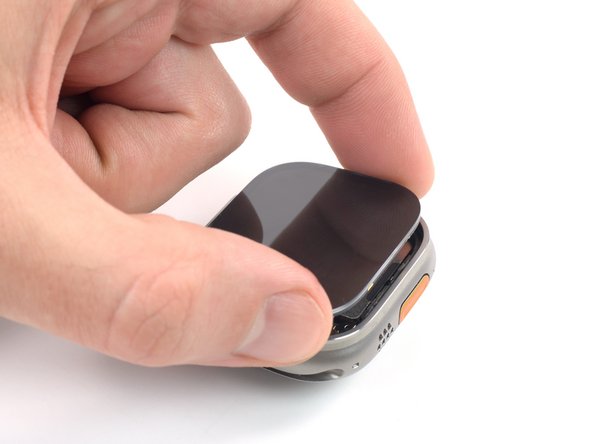
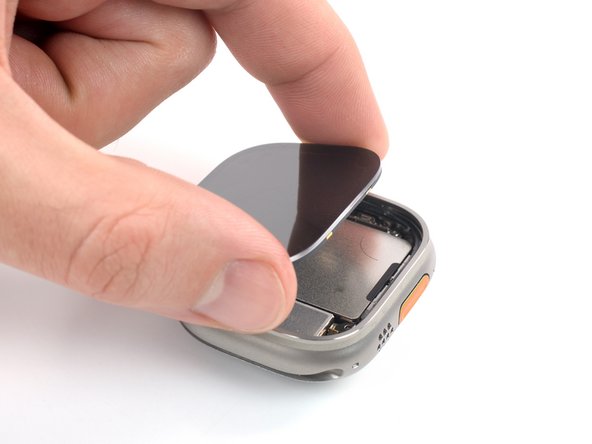
将屏幕打开至垂直向上位置。
Opening the watch like this is just bad and ridiculous advice!
Would not recommend to open it with a steel wedge in a 90 degrees angle.
Or are you guys going to sell screens hoping on some broken screens?
Only way, at home, is with a small enough suction cup. This is just stupidity.
If you manage not breaking the screen you are going to damage the watch anyway with this method.
Hire some engineers iFixit!
Hi Ferdi,
On the guide team, we've completed two successful screen separations (out of two) with this procedure with the screen intact and watch undamaged, so we can confirm that this is a valid method. Is it the most foolproof method? Probably not! We'll revise this guide when we find better tools and procedures. I'll also add a precautionary warning in the introduction for all of these guides.
The process is actually not as difficult as some of the other smartwatches. Patience is key. You must allow the adhesive to thoroughly heat up and apply constant pressure in order to loosen the adhesive.
The screen assembly is actually very strong! The sapphire glass is very durable. In the teardown video, we damaged the screen's OLED panel because we didn't give the adhesive enough time to loosen (the top glass was undamaged!) The rigid adhesive likely pulled against the OLED panel underneath the top glass and cracked it. This would happen whether you used a blade or a suction cup.
-
-
-
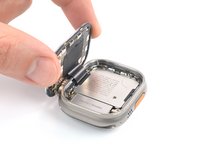
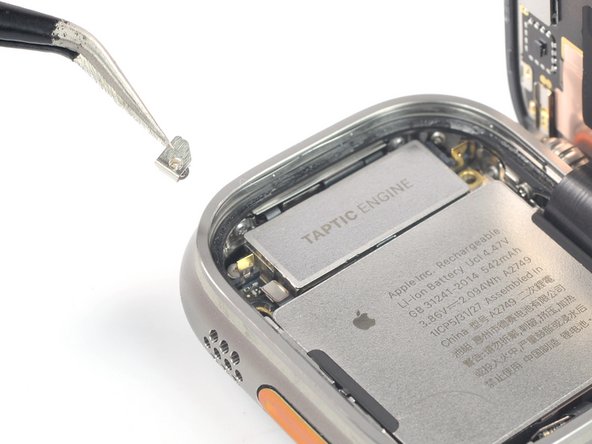
拧下两个 2.3 毫米长的 Y000螺丝。这两个螺丝用于固定手表底部边缘的金属接口盖。
The Y000 screws were difficult. I bought a cheap screwdriver set first, ended up having to get the ifixit set to get the screws out. Key was pressing straight down to initially break the screw, more force than I expected to need.
-
-
-
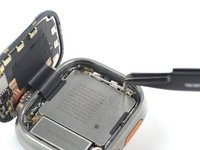
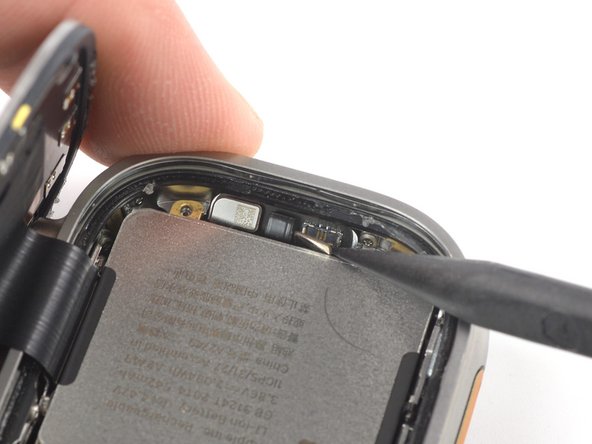
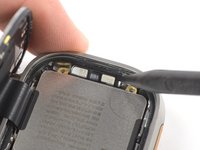
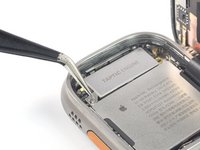
用镊子取下底部接口盖。
This was taped on my watch, and the replacement bracket came with a bracket as well.
-
-
-
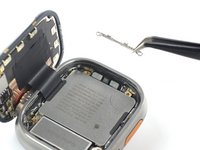
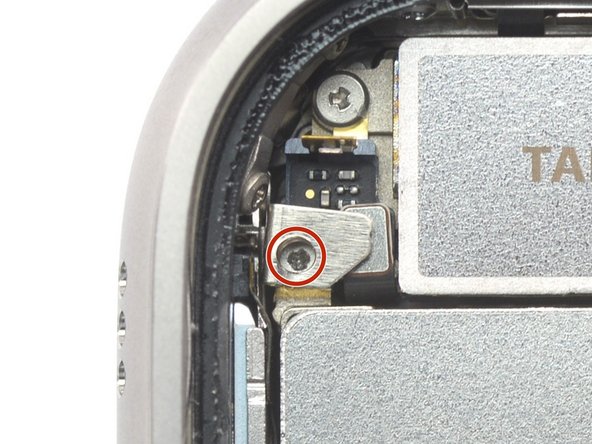
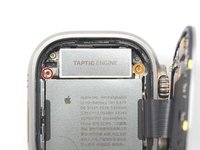
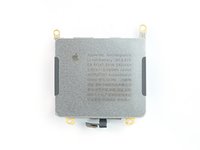
拧下固定电池顶部边缘的两颗 Y000 螺丝:
-
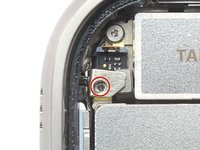
一颗 2.1 毫米长的螺丝,带有 0.8 毫米宽的螺纹,由金属盖覆盖着。
-
一颗 2.9 毫米长的螺丝,带有 1.1 毫米宽的螺纹
I ended up having to bend the top side of the bracket up to get at the screw, both Y000 bits I bought were to large to fit through the hole.
-


请在重新密封手表前将设备开机并测试你的维修是否成功。
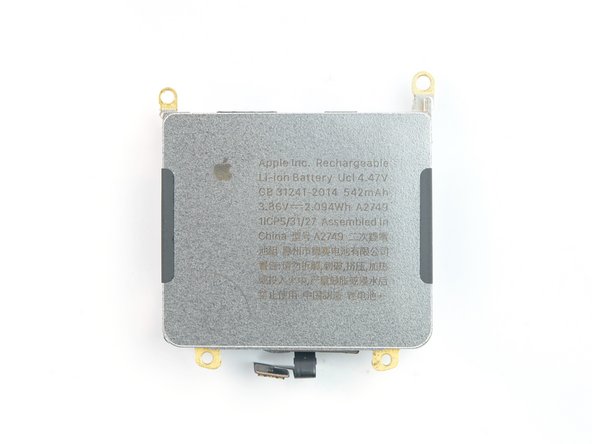
若要重新组装你的设备,请按倒序执行这些说明。在棉签上蘸少许高浓度酒精(>90%) 或使用清洁垫去除外壳边缘和屏幕上残留的胶水,然后再安装新的胶水。
为了达到电池的最佳性能,请在完成本指南后进行新电池 校准 。
请将你的电子垃圾送到R2或e- steward认证的回收商。
请在重新密封手表前将设备开机并测试你的维修是否成功。
若要重新组装你的设备,请按倒序执行这些说明。在棉签上蘸少许高浓度酒精(>90%) 或使用清洁垫去除外壳边缘和屏幕上残留的胶水,然后再安装新的胶水。
为了达到电池的最佳性能,请在完成本指南后进行新电池 校准 。
请将你的电子垃圾送到R2或e- steward认证的回收商。
4等其他人完成本指南。


2条评论
Man... i knew seeing screws on the back side of it were a false sense of security...