学生贡献的维基
此维基页面由我们教育项目的学生团队编写。
Error 99 message
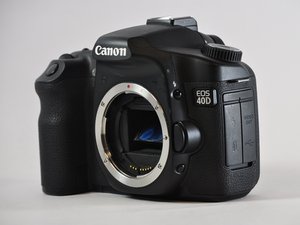
This is a general error message for the Canon EOS 40D
Internal issue
Turn the camera off and remove the lens, battery and the CF card. Let sit for 20 minutes without power. Put a freshly charged battery into the camera and power on. Press the shutter button like you would to take a picture. If the error 99 message appears the issue is internal. If the message fails to appear then the issue lies with either the battery, lens, or CF card.
Bad CF card
Turn off camera and remove lens, battery and CF card. Let camera sit for 20 mins powerless. Put in freshly charged battery and CF card. Format CF card in camera. Press the shutter button as to take an image. If error 99 appears the CF card is bad and needs to be replaced. If no message appears, the issue may be with your lens.
Improper lens attachment or broken lens
Make sure you are using one of the manufacturers compatible lenses and that the lens is correctly attached to your camera’s body. If your compatible lens is correctly attached to the camera, this error message may be due to a broken lens or dirty contacts between the camera and lens. To change the LCD monitor follow these steps Canon EOS 40D LCD Replacement.
Dirty contacts between lens and camera
To appropriately clean the contacts between the lens and camera, first use a lens brush or compressed air to remove dust, then a lint free cloth or lens tissue may be used to wipe clean the gold elements. It is best to use a disposable tissue made for cleaning camera lenses to reduce the transfer of dirt and scratching of elements.
The camera does not operate when the power switch is set to <ON>
No camera actions are possible even though it is switched to power on mode.
The battery is dead
If the camera does not work while switched on, you may be using a dead battery. Recharge the battery. It may need to be replaced as well. Replace battery by following these steps Canon EOS 40D Battery Replacement
The camera battery is not installed correctly
Slide over the lever on the battery compartment door to open. Insert the battery downward with the contacts side in first, until it locks in place. Press the cover over the battery until it snaps shut.
The CF card is not installed correctly
Slide open the CF card door on the side of the camera. As you slide the card into the slot make sure to face the labeled side of the CF card towards you and put the side with holes into the camera first. Once the card is in place, shut the CF card slot door completely.
The internal battery component needs replacing
If you did the above suggestions and still the camera will not power on, you may need to replace the internal battery component. See Canon EOS 40D Date and Time Battery Replacement for step by step instructions on how to replace the internal battery.
Built-in flash does not fire
When taking picture, the built-in flash does not pop up.
External flash is attached
If external flash is present, the built in flash will not fire. Turn the camera off and remove it. Turn camera on and take a picture. If flash does not fire automatically check menu, control, built in flash function. If it says external flash attached, the spring in hotshoe (the popup flash socket) may be dirty or stuck.
Dirty hotshoe
Power off camera. Check if any foreign objects are stuck in the hotshot. If an object is found, remove it carefully with the help of a toothpick. If dirt is found, clean hotshoe and railing by using compressed air or a soft brush. Power on camera and take picture, if built-in flash does not fire the spring that enables the popup may be stuck.
Metal spring stuck
Power off camera. Locate the metal switch spring in the hotshoe. Use a toothpick to un-stick the spring and return builtin flash to original state. Power on camera and take a picture. If built-in flash does not fire the entire hotshoe may need to be replaced. See Canon EOS 40D Flash Hot Shoe Replacement for step by step instructions on how to replace the entire built-in flash hotshoe.
Image can not be erased
Image cannot be erased or cannot be seen
Basic erase image technique
Playback the image to be erased. Press the erase button. Select [Erase], then press <set>. If the image displayed does not erase, it may be erase-protected.
Image erase-protected
Check menu, image settings, erase-protected. If images set to erase-protected, turn setting off. If setting is not set, check if shooting date and time is correct.
Incorrect shooting date and time
Check menu, settings, date and time. If the date is incorrect no image will be displayed to be deleted. Correct the date and time on the camera. Power off the camera for 5 minutes then power on and delete images.
No images can be shot or recorded
When pressing the shutter or record button, images and videos are not shot or recorded
The CF card is not properly inserted
Turn the power switch off and make sure the access lamp is off. Slide open the cover on the CF card door. Insert the CF card with the label facing toward you, pushing the side with the tiny holes inward first. Close the the cover.
The CF card is full
Delete older images in order to make room. Click the <playback> button (the second to left button) on the screen. Press the button that appears as a "trash can" to erase the select image. Select "erase" and click the <set> button to delete the desired image.
Replace the old CF card with a new one. See "CF Card is not properly inserted" for instructions on installing a new CF card.
Auto-focus (AF) mode is not working
Switch the AF mode off by sliding the switch to manual (MF) mode.
Hold shutter button halfway down to focus camera.
The camera turns off by itself
The camera powers off when it is set to <ON>
The battery is not properly installed
Slide over the lever on the battery compartment door to open. Insert the battery downward with the contacts side in first, until it locks in place. Press the cover over the battery until it snaps shut.
The battery is dead
If the camera does not work while switched on, you may be using a dead battery. Recharge the battery.
The “auto power off” setting is enabled
The “auto power off” setting can be turned off. Under the [5] tab, select [Auto power off], and then press the <set> button. If not, follow these steps to replace the shutter button Canon EOS 40D Shutter Button Replacement.
团队

USF Tampa, Team 12-3, Blackwell Fall 2015 USF Tampa, Team 12-3, Blackwell Fall 2015 的会员
USFT-BLACKWELL-F15S12G3
4 名成员
创作了16篇指南
8条评论
It won't stay on long enough to change anything
dannyjohnson - 回复 分享
It won't stay on long enough to change anything
dannyjohnson - 回复 分享
I have D40 it was working al right but when i chrge mh battries and on the camera it works all but when i click a picture the camera shut downs and a blue light blinks
Kindly help me
After chnge new battery same problem
But one of the battery give 99 error
Ghufran Nadeem - 回复 分享
On my 40D there is no image showing on my LCD screen when the camera is on and in
when in the picture taking mode.
Charlie - 回复 分享
I switch camera on but screen on the back is black . screen top of camera is working ? many thanks
bryanrmn - 回复 分享