
iPhone 13 Pro Max 电池更换

你所需要的
修复工具包
本套装包含完成指南所需的所有零件和工具。

配件


工具


查看更多...
-
-
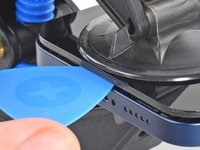
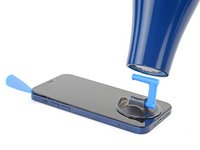
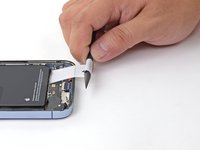
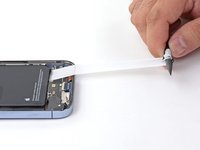
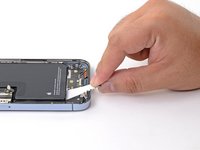
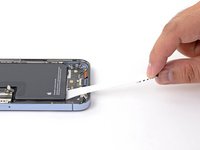
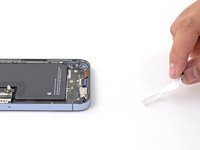
从尖端测量 3 毫米,并用永久性记号笔标记三角撬片。
Got to step 2 and realized the fix kit doesn't include an opening pick! Looks like a guitar pick, and I have those lying around. Is that expected? Looks like the pick is used in many steps below. There's a little blue crowbar that isn't mentioned in the instructions. Perhaps that replaces the opening pick?
Hi! I can't see which guide you were using when writing this comment. Can you reply here with which guide and fix kit you used?
I see you posted this in Meta. I hope it's resolved soon! In the meantime, a guitar pick may work well enough for your repair.
what fix kit?
My fix kit didn't include an opening pick either
My AliExpress refurbished screen came with a pick that has a coin-like circle that pops out, so no modification was necessary
It's not an Ifixit KIT if it doesn't include everything. You'll need to order the opening pic separately. Or head to Walmart like myself and look for guitar pics. Hopefully, this will work just as well.
No pick in mine as well. It’s really not clear that you have to order this separately when ordering an IPhone SE 202/2022 screen repair kit. Is this the case?
Frustrated, I ordered a compact package where everything was encapsulated. Useless suction tools could not separate the screen. If it is unable to decouple the screen, then why sucking suction tools you have provided.
For my kit the triangle pick was stuck inside the box with the screen not with the other tools maybe it's also there for you
Y’all are getting far, FAR too detailed with some of this stuff…. Measuring and marking the pick that you won’t actually use to open the device?!? lol that’s kinda funny. Just heat it up, grab a spudger, and the back just pops right off! The iFixit tech need to stick to the KISS method more often, you know KEEP IT SIMPLE STUPID!!! Like l, for reals, I’ve been doing this stuff for YEARS and using iFixit guides regularly and this is just ridiculous at this point!
Will the phone still work if the sensor assembly on the back of the screen is damaged?
-
-
-
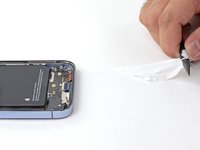
将重叠的透明包装胶带条黏在 iPhone 的后玻璃上,直到覆盖整个手机后部。
-
如果在接下来的几个步骤中无法让吸盘粘在手机上,请将强力胶带(折叠到把手中,然后用它提起后玻璃。
-
-
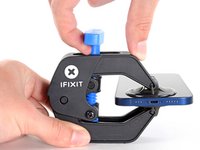
在这个步骤中使用的工具:Clampy - Anti-Clamp$24.95
-
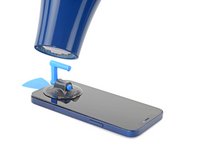
将蓝色手柄拉向铰链以解除开启模式。
-
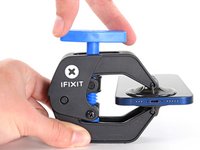
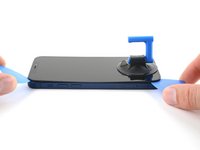
将反向钳手臂滑过 iPhone 的左边缘或右边缘。
-
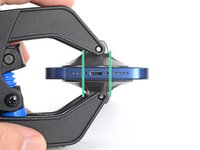
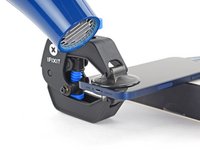
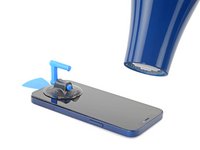
将吸盘放在靠近 iPhone 底部边缘的位置——一个在正面,一个在背面。
-
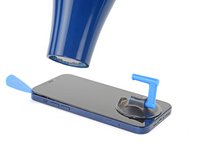
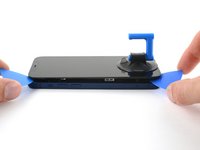
向下推吸盘以将吸力施加到所需区域。
-
-
-
-
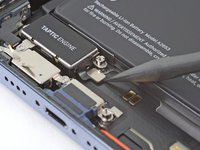
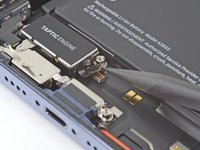
用手指或撬棒的中心抓住第二个拉条,将其从电池中拉出,朝 iPhone 底部拉。
-
按照与之前的条带相同的步骤进行操作:不要向下压电池,保持小拉条平整无皱,并以低角度拉动。
-
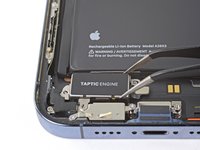
如果胶带断裂,请尝试用手指或钝镊子取回它,然后继续拉动,但不要撬动电池下方。
I have done hundreds of battery replacements in iPhones and since the iPhone 7, these command strips are designed NOT to work. My method now is to run isopropyl down behind the battery from the top, wait for several minutes and then gently prise the battery up from the top edge using a stiff but thin piece of plastic. Don't bent the battery and add more iso as it comes up. It very easily releases if you are patient. This method doesn't require removing the speaker and taptic engine.
-
-
-
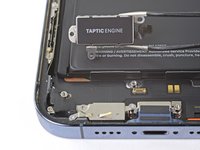
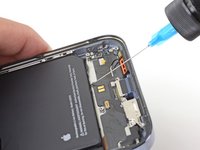
如果你仍然无法取出电池,请在电池边缘下胶条破损区域滴几滴高浓度(超过 90%)的异丙醇。
-
等待大约一分钟,让酒精溶液削弱粘合剂。
-
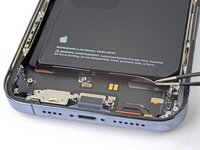
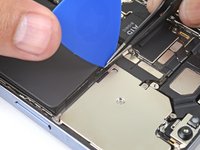
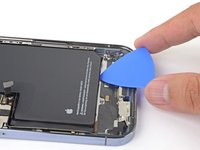
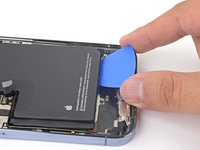
使用撬片或撬棒的平头轻轻提起电池。
-


将你的新更换零件与原始零件进行比较——你可能需要在安装前转移剩余的组件或去除新零件的背胶。
要重新组装你的设备,请按逆序执行上述步骤。
将你的电子垃圾送到 R2 或 e-Stewards 认证的回收商。
将你的新更换零件与原始零件进行比较——你可能需要在安装前转移剩余的组件或去除新零件的背胶。
要重新组装你的设备,请按逆序执行上述步骤。
将你的电子垃圾送到 R2 或 e-Stewards 认证的回收商。
31等其他人完成本指南。


9条评论
my battery got small leak and smelly stab by screw driver.. still ok or not?
No the battery is not okay, the battery is dangerous and needs to be disposed of appropriately and safely
Does this come with the bms, I know usually to report the battery health data you need to weld the genuine apple bms on the the battery, I am assuming that it has one but just not the apple one hence why it wont track the battery health? is this correct? i would just like to know before purchasing
I replaced the battery and phone wouldn't charge with cable or wireless is this a problem with the battery or something else and has anyone seen this problem before
raja singh - 回复
How Apple could make this SO %#*@ convoluted, and difficult, extensively pulling out near everything else in the phone, BEFORE you can get to take out the battery?!?
This is UNBELIEVABLE.
I cant believe no one has commented this here before me , also!!
PS, did you guys used to give difficulty score ratings on each teardown? now I see a tiny little "moderate" there but...idk. this is pretty heavy repair for anyone if you're not already familiar and have also kept up to date or at least fixed an iPhone 11 or/preferably and, a 12 Pro Max.
Such a drag....
thanks for the teardown and I'm probably going to buy the battery from you guys , but I really thought id be going into this, pop out those pentalobes and be halfway done already! f%&k!
I feel your frustration dude. Removing the Loudspeakers was helpful, but I think was unnecessary. But just take your time and do it and it'll be worth it at the end (If you're successful of course)
+1
非常同意你的看法,由于需要拆除过多零件我开始想把它交给专业维修人员了。
Ace Ace -
Okay a couple of notes from my install.
The battery kit comes with one application of screen adhesive. Which is nice. And I was lucky enough to put it in correctly, but it’s a hassle and afterward realized… my phone back is cracked.. a lot. So waterproofing is off the table.
I should have skipped it.
Not sure if it’s the battery, or my install but Apple Device repair assistant won’t recognize the new battery.
Maybe related: charging from 0 to 100% takes about 6 hours. Which feels really long. And that’s after calibrating the battery a couple of times.
I’m going to open it up again and inspect the battery connector. Pity about the screen adhesive. But the second time is going to go way faster.
Are waterproof seals part of the replacement kit, if not why?
Jim Langston - 回复
I ordered the screwdriver for the 13 ProMax (Y000) as well as the full kit which has this Y000 head. Neither tip works to remove the screws. Any suggestions?
Barbara Nuckles - 回复