
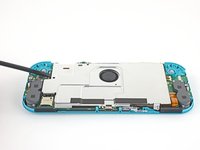
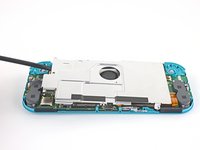
Nintendo Switch Lite LCD 显示屏更换

简介
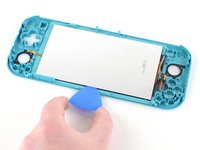
转到步骤 1请按照本指南更换 Nintendo Switch Lite 上的故障或损坏的 LCD 显示屏。
Nintendo Switch Lite 使用 JIS 规格螺丝。如果没有 JIS 螺丝刀,也可使用普通十字螺丝刀头。但操作时注意不要用力过度拧花螺纹。 iFixit 十字螺丝刀头专为兼容 JIS 螺丝而设计。
注意: 本指南仅为更换 LCD 显示屏。如要更换整个屏幕模组(包含 LCD 显示屏和触控传感器),请参照此指南。如果屏幕上的玻璃破损,但显示功能正常,请参照以下指南更换触控传感器。
注意:此维修无需拆下摇杆和按键,但将其拆下可以让维修更容易。
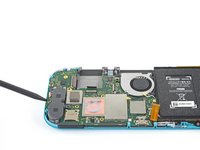
注意:此过程需要卸下屏蔽板和散热器。在重新安装屏蔽板和散热器之前,需要完全清理并重新涂抹屏蔽板、散热器,以及CPU上的导热膏。
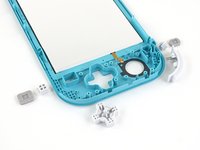
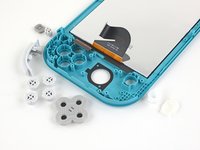
你所需要的
配件


工具


查看更多...
-
-
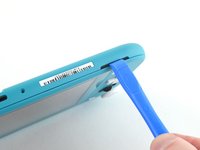
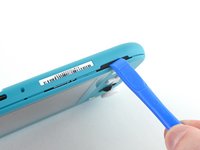
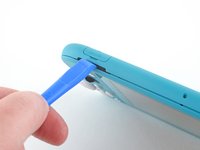
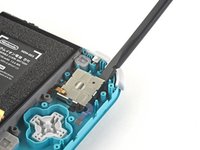
用 JIS 000 螺丝刀或官方 iFixit PH 000 螺丝刀卸下固定后面板的螺丝:
-
设备顶部的两个3.6毫米长的螺丝
-
设备底部的两个3.6毫米长的螺丝
-
为防止这些拧的很紧的螺丝滑丝,请向下用力,缓慢操作,如果螺钉无法卸下,请尝试使用不同的螺丝刀。
I accidentally stripped the back screw and now I can't open it. I removed all the other screws. What should I do?
-
-
-
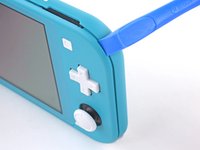
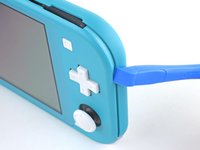
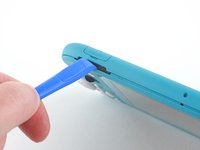
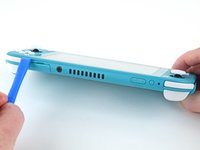
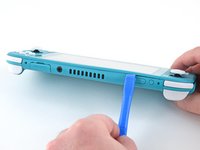
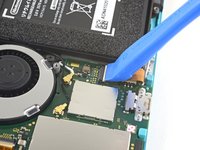
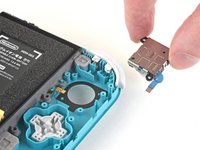
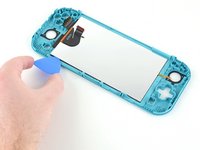
继续沿着设备顶部的间隙滑动撬棒,以释放夹扣。
The headphone jack prevents you from completely freeing or lifting the back panel straight up. Unclip your way around the back cover, then lift from the side with the US port and slide it off the heaphone jack.
-
-
-
使用 JIS 000 螺丝刀或官方 iFixit PH 000 螺丝刀卸下以下四颗螺丝:
-
三颗3.1 mm 螺丝
-
一颗4.5 mm螺丝
There are four screws instead of three mentioned
With how easy it seems to be to do serious damage with the next few steps, I figured I'd say that realistically you can skip steps 9-13 when doing this repair. While they provide a bit of extra security by disconnecting the battery, the left stick is completely accessible and replaceable without touching the heat shield or anything underneath (And steps 17 and 18 disconnect power from the daughter board regardless).
i stripped a &&^&^$^ screw
Well I actually removed the screw right next to the 4.5 screw. I did not realize it till my son showed me why the plate wouldn't release. Ha ha, it's funny now but yeah not a big deal. I could have bent it badly assuming I took all screws out though. For anyone reading this before going in. 👍
Toastninja - 回复
the one in the middle rounded out .-.
-
-
-
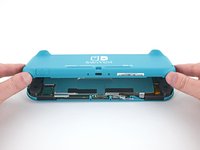
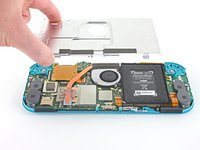
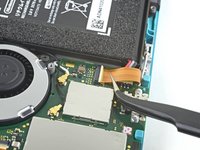
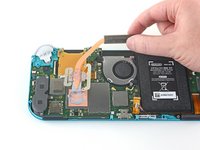
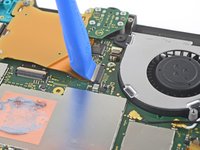
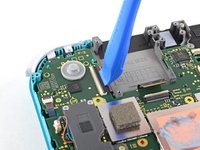
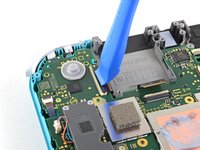
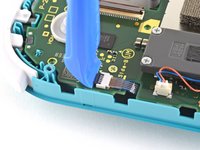
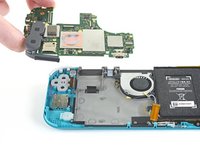
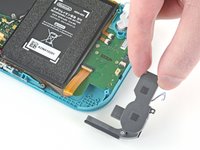
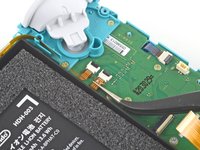
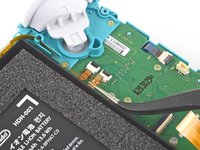
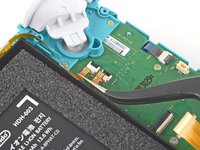
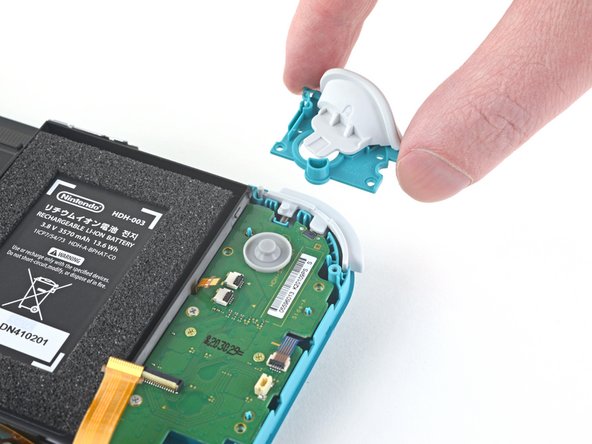
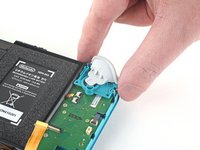
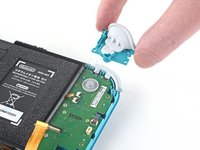
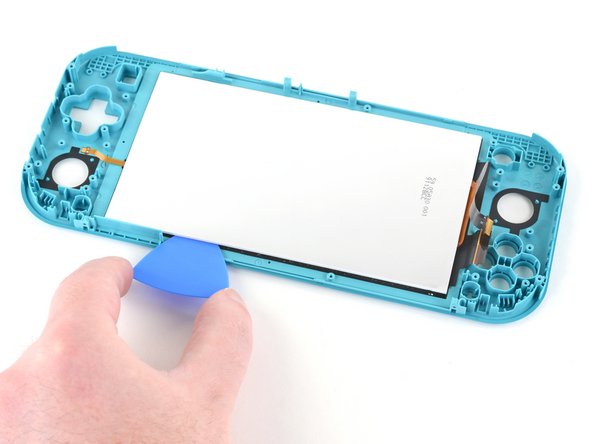
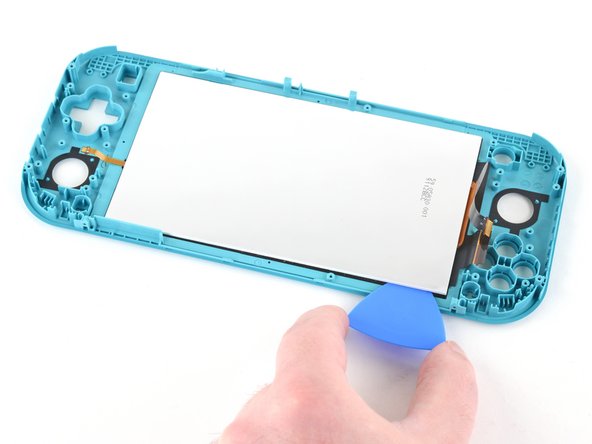
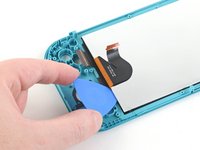
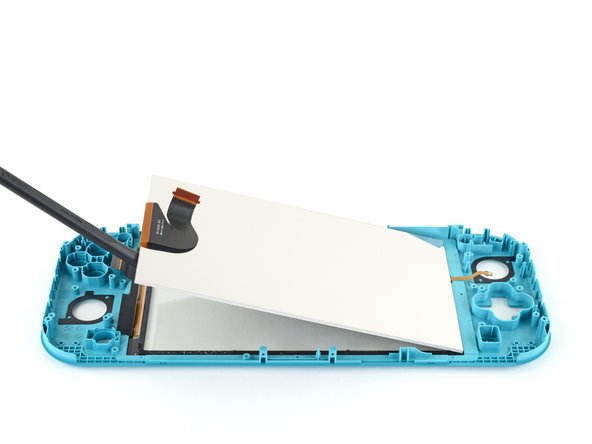
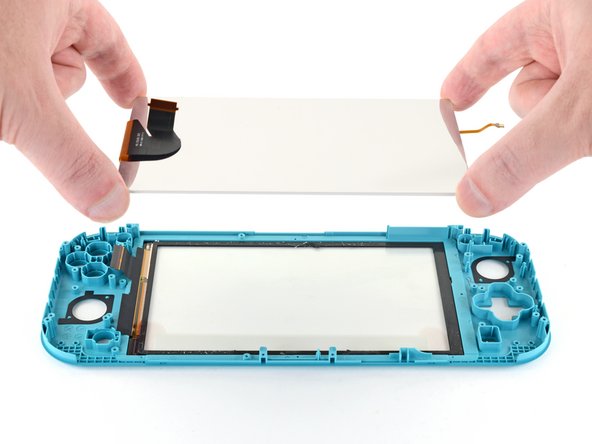
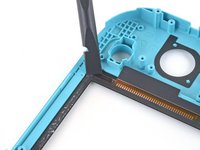
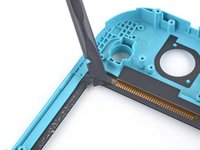
用撬棒或手指将屏蔽板向上提起并从设备中取出。
-
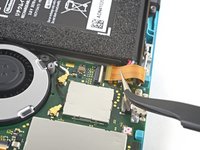
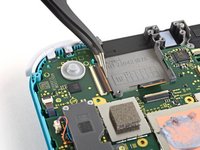
拆下屏蔽板。
What type of Thermal Paste would you guys recommend? I clicked on the picture but nothing.
Personnaly i use some Mx-6 from Artic, really good quality/price, never have to complain.
Nothing -
-
-
-
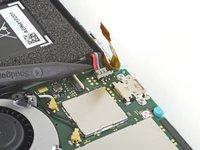
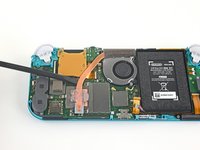
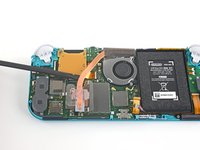
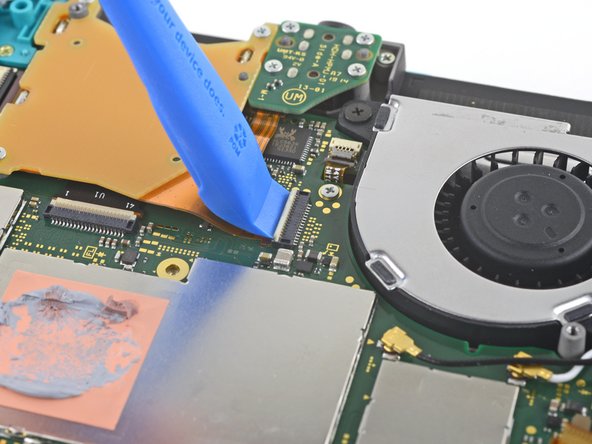
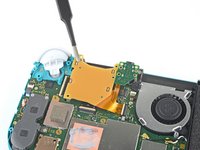
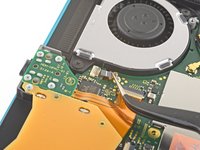
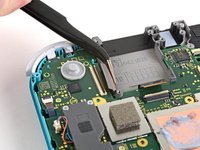
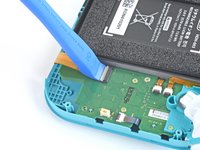
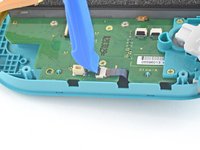
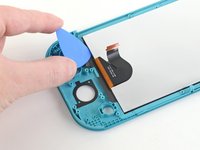
使用打开工具或指甲翻转主板互连电缆ZIF接口上的小铰链锁片。
The clip broke off when trying to remove this cable. Audio only works through headphones and the display now won’t turn on after the clip broke. Does anyone know where I could get a clip or how I could fix it without it?
Mi è successa la stessa cosa è non so come ripararla! Chissà se c’è un modo!
-
-
-
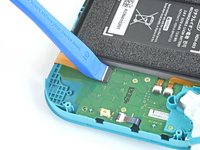
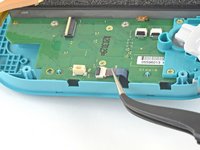
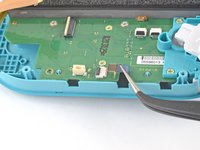
使用镊子将排线从主板上的接口上取下。
I turned the unit off beforehand, I used tweezers just like the instructions said (ifixit branded) , my device sparked and now it won’t turn back on
The flap came off is it important or is there a way t fix it?
We're you able to get it working without the white flap? My screen is not working after putting it back together and i noticed this white flap was falling off
Did you get it working without the white flap? Everything on the switch works fine except for audio going through headphones and the display not turning on.
do not use metal sharp pointed tweezers! you will rip your ribbon cable. Use the inside of a Bic type pen or something else dull and plastic to pull the cable away by putting the pen part where the first bend is.
Maybe tape the Tweezers or smear some hot glue on them to insulate them to save you time and money.
Maybe put all the Warnings at the start of the guide as well. We fix it geeks tend to get excited when fixing things 😁
-
-
-
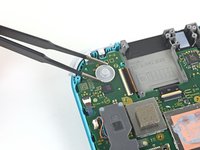
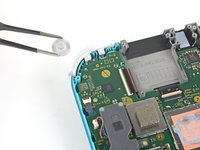
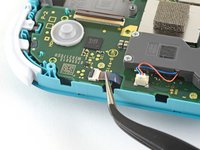
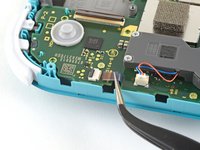
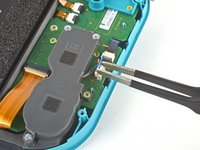
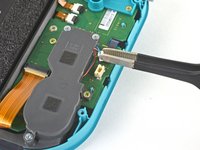
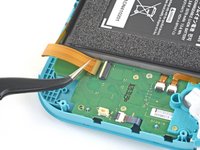
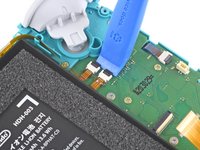
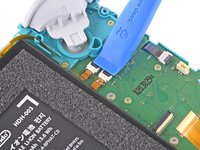
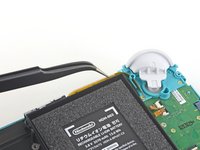
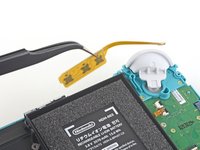
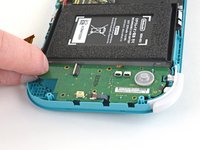
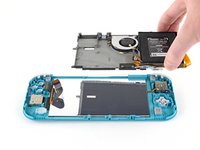
用撬棒尖将电池连接器直接向上撬出主板上的插座。
Caution the connector may not be properly soldered onto the motherboard. For me it snapped off the pins and now have to find a place to get that fixed if even possible. may have bricked it.
Yup, broke the connector right off the motherboard. Thanks, ifixit -_-
I backed out when I reached this point. I couldn't risk damaging it. Do u just need to pull it up? Did you mean that it might have been soldered shut below?
Jannalyzer - 回复
You should just need to pull straight up, but make sure you’re pulling on the wires or the gray plug—do not pull on the black socket or it can snap off of the motherboard.
With how easy it seems to be to do serious damage at this point, I figured I'd say that realistically you can skip steps 9-13 when doing this repair. While they provide a bit of extra security by disconnecting the battery, the left stick is completely accessible and replaceable without touching the heat shield or anything underneath (And steps 17 and 18 disconnect power from the daughter board regardless).
just broke my connector... ifixit PLEASE put a warning on how fragile the solder on this connector is.
Note for this step, you do not need to apply a lot of force. I used two tools here: small screwdriver to hold down the black base, and one side of fine-tipped tweezers to get under all 3 wires. Gently, push down on the tweezers to push the wires upwards, which should force the gray connector up and off the base. It did not take a lot of force. Take your time and it will be fine. Again, like others have said, do NOT pull or pry up the black base.
-
-
-
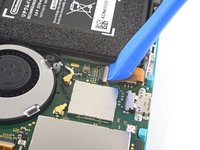
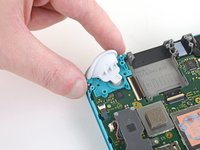
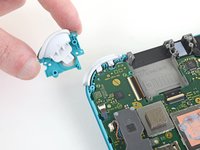
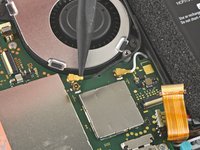
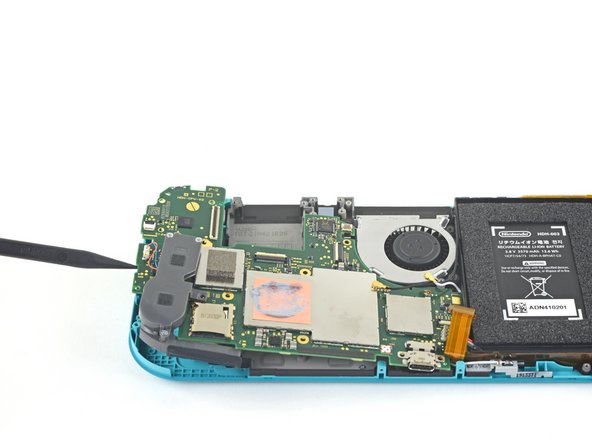
用撬棒或手指的扁平端小心地剥去轻轻粘在风扇上的泡沫。
When reassembling, the foam may fold down between the fan and heatsink, blocking airflow. Gently lift the foam back up on top of the fan. The adhesive film should hold the foam together.
Kean Stump - 回复
Is removing the heat sink absolutely necessary?
It’s not necessary, but it makes it much easier to remove and replace the game card reader, since the heat sink partially covers the connector.
Not really…….. I never remove it. It slides out quite easily once disconnected.
Alan Sears - 回复
-
-
-
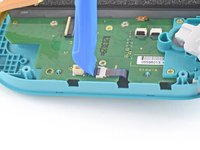
用JIS 000螺丝刀或iFixit官方的PH 000螺丝刀拧下将散热器固定至主板的三颗3 mm螺丝。
Non le tre ventole ma le tre viti
Grazie per avercelo segnalato! Ho apportato la modifica. iFixit è una wiki, quindi ogni utente può modificare le pagine: se trovi altri errori in futuro, sentiti libero di fare la modifica tu stesso!
-
-
-
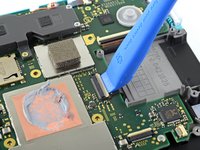
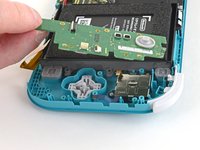
用撬棒或手指将散热器提起并从主板上卸下,以将其卸下。
16.5 remove cartridge / headphones jack……….
My kit did not come with thermal paste..
-
-
-
使用 JIS 000 螺丝刀或 iFixit PH 000 螺丝刀,取下固定右扳机键总成的两颗4.5mm螺丝。
I think a whole step to remove the game card reader and speaker jack was skipped here…
yes, just found that sadly these comments do not show unless we click on the , which is unhelpful
also, you need to remove the left trigger button
No you don't actually as left trigger button is not obstructing the motherboard. Left trigger button sits on seperate board.
-
-
-
-
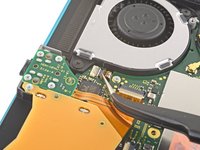
用镊子将风扇线缆从主板上插槽中取出。
There’s a step missing after this to remove the screws that hold the orange game cartridge slot. Those 7 screws have to be undone and the ribbon unclipped first before moving on to the next step.
Good Looking out!
-
-
-
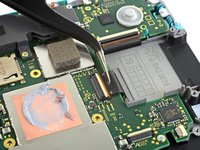
使用塑料拆机工具或指甲,将主板上屏幕线缆ZIF接口上的一片微小锁定卡扣掀起。
skipped a step or two about removing the golden piece in the photo above, and the other little board
If I broke the clasp on the ZIF connector can I elec tape it down?
What did you do to fix it if the ZIF connector broke?? Mine did too and I worry that is why the screen won’t turn on now
Missing the card reader + audio jack board removal. Just remove the 4 screws around the audio jack + 3 screws around the card reader and disconnect the ZIF connector from the motherboard.
-
-
-
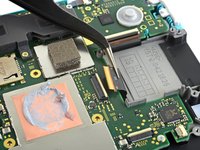
使用塑料拆机工具或指甲,将主板上触摸屏传感器线缆ZIF接口的一片微小锁定卡扣掀起。
-
-
-
使用 JIS 000 螺丝刀或 iFixit PH 000 螺丝刀,取下固定主板的六颗螺丝:
-
3颗 3.1mm 长螺丝
-
3颗 4.5mm 长螺丝
how to get the c port off
When re-assembling, be sure the fan cable (step 25) is completely pulled through prior to tightening the screw that’s right next to it.
-
-
-
使用 JIS 000 驱动器或官方 iFixit PH 000 驱动器卸下固定操纵杆的两颗 3.5 毫米螺丝。
-
-
在这个步骤中使用的工具:Tweezers$4.99
-
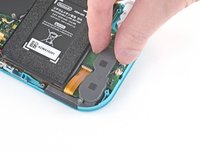
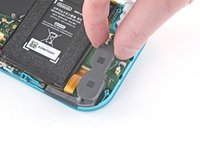
用镊子或手指将左扬声器电缆笔直向上拉出,并从子板上的插槽中拔出。
pulled from the connector, not the wires, and ended up ripping them off the connector anyways since it encountered tension from the other end (the gray chamber on the left)
consider doing step 15 before pulling the wire, just in case.
Why even disconnect this cable. Not worth the risk leave it connected to daughter board.
while doing this I ripped the pad on the circuit board off. Should i risk trying to repair it or should i just try to go without the speaker???
I also accidentally ripped off the connector, disabling the left speaker. However, that will not break any functionality of the switch. The right speaker works just fine on its own (just remember to turn the audio to mono in system settings) and I was successfully able to replace the joystick. Although the audio quality is a little bit depleted, you barely notice it if you turn up the volume a little, and I think being able to actually MOVE FORWARD in my games is a better plus than having louder, stereo, audio.
Went to pull the speaker connector and it pulled right off the motherboard. Would not come loose.
I'm gonna echo what others said here and suggest that you skip this step. After you complete Step 15, you can just move the speakers enough with your fingers to complete Step 26, which involves a screw half underneath it.
Regarding the ribbon cable in Step 17 & Step 18, you can honestly use your fingers if they're small enough. The ribbon cable is wide enough for you to press down on it a little and slide it out bit by bit.
Overall, this makes the disassembly and eventual reassembly process easier and lets you avoid running the risk of damaging or completely tearing out the wires, like I almost did.Removing the screw from 37 is enough to give you space to remove the board, I honestly think you shouldn't try to remove this connector.
Unfortunately, I had to reinstall multiple daughterboards on the same Switch Lite. I strongly recommend orienting your straight tweezers with ridges (like the ones in the picture) perpendicular to the device. Grab the plastic connector with the tip of the tweezers from the top. It makes inserting and removing this connection significantly easier.
-
-
-
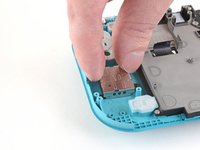
使用镊子将左操纵手柄电缆从子板上的接口中滑出。
The connector for my left joystick broke. Is there a way to fix it?
How badly did it broke?
-
-
-
用 JIS 000 螺丝刀或官方 iFixit PH 000 螺丝刀拆下以下四个螺丝:
-
两个 4.5 mm 螺丝
-
两个 6 mm 螺丝
The two 4.5 mm screws were very difficult to remove here and ended up getting stripped. I CANNOT remove them, help!
-
-
-
用手指向上提起子板并将其从凹槽中取出。
Stop here if repairing Switch Lite for joycon drift. After removing daughter card you can see the bottom of the joystick. This thin metal actually bends during use causing bad connection of joystick. If you cut out a business card the same size as the joycon and put it on the bottom of the joystick it gives the metal enough backing to fix the issue. I used two layers with just a small bit of glue stick to adhere it. Put it all back together and you will find your issue is fixed.
That's great, but it's only Temporary.
You may as well put a New Stick in (preferably Hall Effect) after going through Hell to open the darn thing.
If you do choose the cardboard route, you may as well clean the innards of the Joystick, BUUUT, it's not easy getting the Joystick back together.
Daughterboard. That's a new one for me.
-
-
-
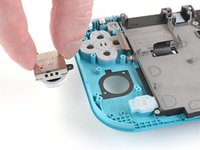
使用定位铲的平端将操纵杆向上提离凹槽。
-
用手指拆下操纵杆。
During reassembly when putting the screws back in, slowly turn them CCW until you feel it drop into its thread. You will never crossthread them by doing this.
-
-
-
使用十字螺丝刀卸下以下四个螺丝:
-
三颗2.5毫米螺丝
-
一颗6毫米螺丝
-


52等其他人完成本指南。


21指南评论
Followed the guide to replaced a cracked screen on a Switch Lite, all good, guide was easy to follow and refitting wasn't too hard either, just a reversal of the disassembly
Fantastic guide, exactly what I was looking for! Unfortunately I managed to make the tape unusable and I need tape to connect the lcd to the digitizer and the digitizer to the case. I will likely use 2-3mm tape for the lcd to digitizer but I'm unsure what to use to connect the digitizer to the case. Any suggestions?
Thanks for taking the time to type this up. Really appreciate the effort that went in to this guide.
Great guide, I wish it would mention some of the procedures to tape the screen back in. After that, reversing the process was easy.
For gluing the screen and digitizer back in, I would strongly recommend liquid glue, like Zhanlida T-8000 for example. You can apply it very precisely and you can also correct/remove it if needed pretty easily. I used this stuff to repair around 200 phones and tablets in the last couple of years and were never disappointed.
Also I would remove the digitizer AND the screen together, before removing the screen first from the digitizer… This will make the process of removing the screen from the digitizer a lot easier and safer.
I have ordered a crystal replacement case and a used lite with a scratched digitizer.. Have glued in the replacement digitizer so far, the console should arrive tomorrow.
Gluing in the digitizer was a breeze, just applied some glue all around (be careful not to use too much) and then just pressed down the digitizer all around and put a book on the top… Let the glue harden for around 24 hours and you are good to go.
Will leave some feedback how the screen removal went tomorrow. ;)
Yeah.. The display was actually glued completely together with the digitizer! So not just only on the sides, but on the whole display with an UV reactive transparent glue, like with most smartphones nowadays…
This way this whole tutorial obsolete, because there is almost no way you can remove the digitizer from the display an vise versa…
Also my suggestion was totally right to remove the digitizer and display together.. The way it is shown here is absolutely over complicated.
Maybe the UV glue is used in a new revision ifixit wasn't aware of, but this has to be updated!!!
So I Need to replace Just the glass over the screen but I cant find a replacement or a guide
Jack Hadad - 回复
I just did this repair the other day. You would still need to follow this guide because of the ribbon cable you need to plug in. You just need to take the digitizer off in the end. I would buy an lcd just incase it breaks while trying to get it separated which there is a good chance that will happen.
I was wondering if 99% IPA could be an issue to a screen, I am definitely an amateur at this but originally I was going to replace the joysticks and wanted to clean the console.
In a moment of carelessness I spilled IPA on the midframe assembly and some on the side, which seeped to the screen. I had accidentally doused the screen with a relatively small amount of IPA but I dried off what I could and turned on the screen successfully but there was a light colored splotch on the screen. After a couple of days the splotch on the screen is much smaller but it doesn’t seem like it will go away, is this permanent damage? I am wondering if it is possible to clean or fix this, if I get under the screen is it possible to clean, fix it or do I need a new LCD?
Thank you for any guidance in advance.
What about the outer screen part of the switch lite?
I bought the digitizer and screen all in one from IFIXIT and replaced the screen and now only the backlight comes on and the screen does post battery level or see anything on it other than backlight on. I can hear the buttons work and the touchscreen works. I tried the hold 15 seconds and restart with plugged in and power cable out, it did not work. Does anyone know what may have gone wrong, reseat the cables or do I need a another new screen?
Excellent guide simple to follow and in the end an easy repair. Thank you
please don't follow this guide. I should've read the comments before attempting anything. Heat the front instead and remove the whole assembly. Couldn't get properly in between with the pick to slice the adhesive so the lcd cracked..
Followed this guide and worked for me despite the difficulty in separating the digitizer from the LCD. I wonder how this can be avoided in the first place - my kids have 2 switch lites and both had the exact same LCD problem.
I’ve been given a Switch Lite that powers on but there is no display. It sounds like all the controls and touch screen are working fine but there is clear signs of drop damage on the rear casing.
I have reseated the ribbon cable in step 27 but there is not the lower ribbon cable in step 42. It just isn’t there or underneath the daughterboard. What is this ribbon for?
I have discovered that the backlight is not working as I can see the OS if I shine a torch on the screen.
Any thoughts?
Found the backlight ribbon cable sandwiched between the glass and plastic casing!
Fully working!!!
Merci! Je n'avais jamais cait ce genre de truc avant et en suivant les étapes, j'ai réussi à réparer la switch de mon garçon. 😊 Ce guide est super bien fait, j'adore
I swapped out the thumbsticks in a Switch Lite, yet it will not power on now. I'm thinking I used metal tweezers which shorted it out. How can I remedy this?
Tip, flip the switch over when doing the last few steps with the picks, LCD has two parts and it could be difficult to see if it is getting under the adhesive. Ended up destroying my LCD this way, as it wasn't completely under it.
All my screws got stripped any ideas on how to remove?
Almost A Mammal - 回复
A Y0 screwdriver seemed to work better for me.
Tommy Morrill - 回复
What type of screw driver do I use to un screw the screws and which way
Luca Capito - 回复
Y 0.6 was all I had but it seemed to fit perfectly
Trevor - 回复
Like really snug? I've gotten away with using Drivers either bigger or smaller but I hate doing it. But if 0.6 is the exact size I need, then I'll get that. I don't wanna strip my client's Switch Lite's screws.
Vincent Valodze -