简介
Use this guide to safely remove the glued-in battery from your MacBook Pro with the help of an iFixit battery replacement kit. The adhesive remover in your kit will dissolve the adhesive securing the battery, allowing you to remove it with ease. The battery is made up of six distinct cells, four of which are adhered to the upper case.
iFixit adhesive remover is highly flammable. Perform this procedure in a well-ventilated area. Do not smoke or work near an open flame during this procedure.
To minimize risk of damage, turn on your MacBook and allow the battery to fully discharge before starting this procedure. A charged lithium-ion battery can create a dangerous and uncontrollable fire if accidentally punctured. If your battery is swollen, take extra precautions.
Note: The solvent used to dissolve the battery adhesive can damage certain plastics, such as the MacBook Pro's plastic speaker enclosures. Take care when applying the solvent.
If you're using the old-style iFixit adhesive remover with separate bottle and syringe (no longer sold), click here for a slightly modified set of instructions.
你所需要的
-
在这个步骤中使用的工具:Magnetic Project Mat$19.95
-
Remove the following ten screws securing the lower case to the upper case:
-
Two 2.3 mm P5 Pentalobe screws
-
Eight 3.0 mm P5 Pentalobe screws
-
-
在这个步骤中使用的工具:Tweezers$4.99
-
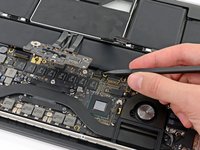
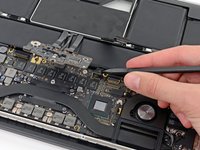
Grasp the Interposer with tweezers.
-
Lift the Interposer off the logic board and remove it.
-
-
-
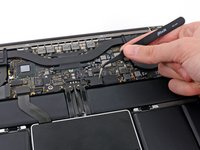
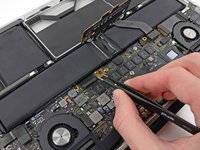
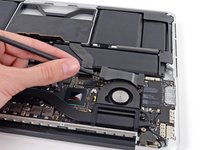
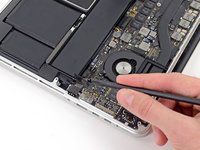
Use the flat end of a spudger to pry the right side of the I/O board data cable connector up off its socket on the I/O board.
-
-
-
-
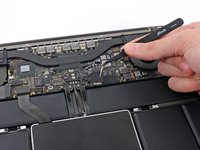
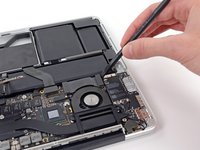
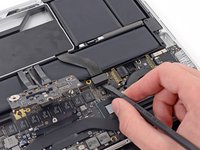
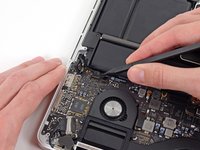
Use the flat end of a spudger to pry the SSD cable connector up from its socket on the logic board.
-
Move the SSD cable connector out of the way.
-
-
-
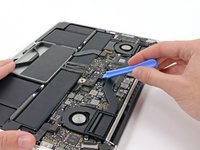
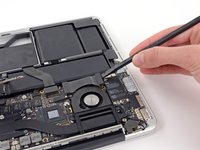
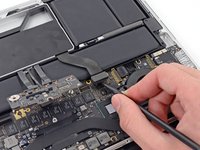
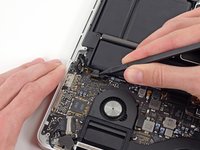
Use the flat end of a spudger to pry the headphone jack cable connector straight up off its socket on the logic board.
-
-
-
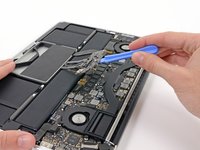
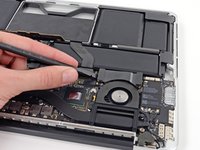
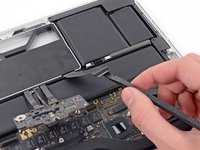
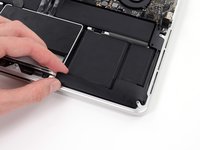
Use your thumb or finger to bend the plastic spring bar on the SSD tray, freeing the two clips at the front side of the device.
-
While holding the spring bar depressed, tilt the SSD assembly up out of its cavity.
-
-
-
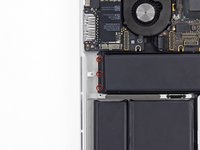
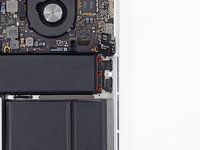
Remove three 2.2 mm T5 Torx screws from each side of the battery (six screws total).
-
-
-
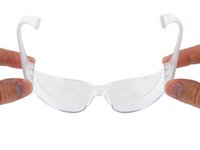
Now that your MacBook Pro is fully prepped, it's time to prep yourself.
-
Wear eye protection when handling and applying the adhesive remover. (Eye protection is included in your kit.)
-
Do not wear contact lenses without eye protection.
-
Protective gloves are also included in your kit. If you are concerned about skin irritation, put your gloves on now.
-
-
在这个步骤中使用的工具:Plastic Cards$2.99
-
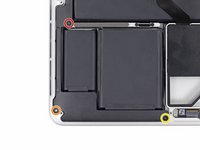
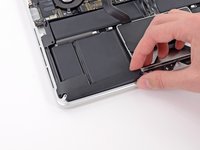
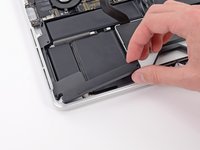
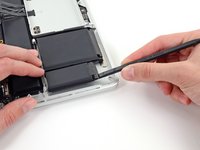
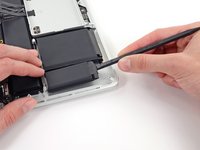
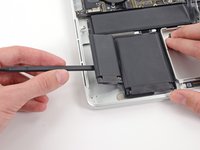
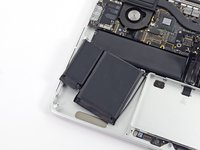
Insert the flat edge of a spudger or plastic card underneath the leftmost battery cell.
-
Run your tool along the bottom perimeter of the battery cell and lift to begin separating the adhesive.
-
-
-
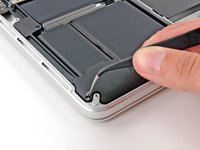
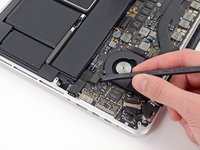
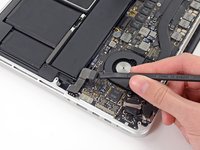
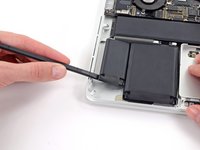
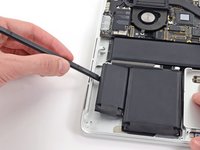
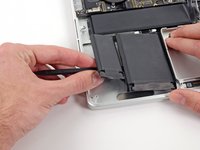
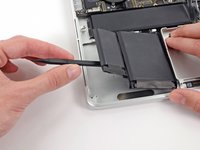
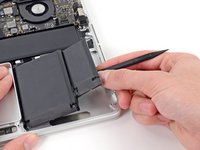
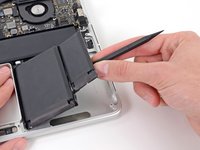
Repeat the above steps to separate the adjacent battery cell from its adhesive:
-
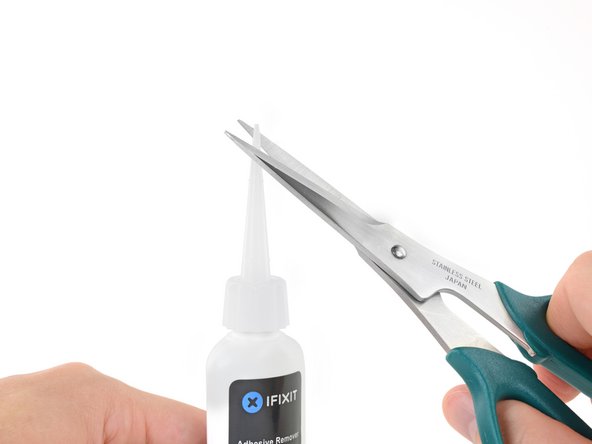
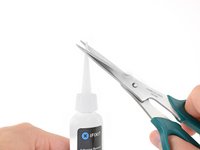
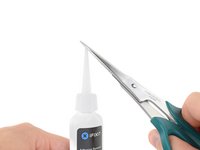
Apply a few drops of liquid adhesive remover under the battery cell.
-
Wait 2-3 minutes for the adhesive remover to penetrate and soften the adhesive.
-
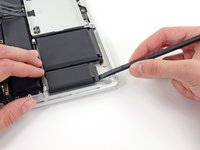
Carefully wedge a spudger or plastic card inwards, being careful to not damage the battery, and separate the battery cell from the adhesive securing it to your MacBook Pro.
-
-
-
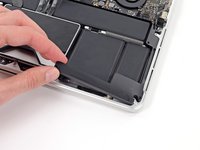
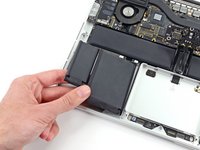
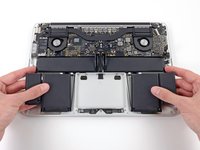
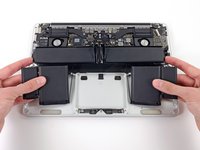
Lift the battery as a whole up out of the upper case, and remove the battery.
-
With a little luck, you can slowly pull out each strip of adhesive with your fingers.
-
Otherwise, soak each section of adhesive with a bit of adhesive remover for 2-3 minutes, and then scrape it out with an opening pick or one of the other tools in your kit. This can take quite a bit of work, so be patient.
-
Mop up any remaining adhesive remover and give your MacBook Pro a few minutes to air dry.
-
Calibrate your newly installed battery: charge it to 100%, and keep charging it for at least 2 more hours. Unplug and use it normally to drain the battery. When you see the low battery warning, save your work, and keep your laptop on until it goes to sleep due to low battery. Wait at least 5 hours, then charge your laptop uninterrupted to 100%.
-


To reassemble your device, follow these instructions in reverse order.
For optimal performance, calibrate your newly installed battery: Charge it to 100% and keep charging it for at least 2 more hours. Then use your device until it shuts off due to low battery. Finally, charge it uninterrupted to 100%.
Take your e-waste to an R2 or e-Stewards certified recycler.
Repair didn’t go as planned? Try some basic troubleshooting, or ask our MacBook Pro 13” Answers community for help.
251等其他人完成本指南。

63指南评论
There is a much easier way to get the batteries out. If you look at the 2 cells on either side (left and right), you will notice that they put them in an area that is slightly lowered. This is by design. To remove the batteries, pour a small amount of 90% isopropyl alcohol on both sides and let it sit for about 30 to 45 mins. It will dissolve the glue and you can gently then lift out the batteries without any prying. After you remove the batteries, simply wipe up any remaining alcohol, let it dry, buff it clean, and insert the new battery. Considerably easier and safer than potentially damaging the battery packs. If you are putting the same battery pack back, just use double sided tape. IMPORTANT NOTE: ALWAYS BE SAFE USING ISOPROPYL ALCOHOL AROUND FLAMES OR ANYTHING THAT MIGHT MAKE IT BURN. ALSO, NEVER ATTEMPT TO PRY THE BATTERIES IN ANY WAY IF ANY ALCOHOL IS STILL POTENTIALLY PRESENT!! WAIT UNTIL IT IS EVAPORATED!!
jimhoffa69 - 回复 分享
I poured isopropanol into those lowered areas but unfortunately it soaked up along the battery leads and got all the way under the keyboard and elsewhere where it shouldn’t. It made some other plastic parts of the computer swell which isn’t good so I would not recommend pouring any solvent in there. Add a very small amount of solvent (0.25 ml) just enough to soften the adhesive, and let it sit for about 30 min and then pry carefully and add a little more, making sure it doesn’t get soaked up by the battery leads.
Another important thing: when you buy a battery, make sure it’s new, up to 1 year from date of manufacture because they have a limited shelf life and get permanently damaged when sitting uncharged.
Prying the battery out is HARD! and VERY dangerous. I tried using a flat head screwdriver, put it under the battery and twisting the thing out. DO NOT DO THAT!! as it can punch a hole in the battery if you twist it too hard. I had a small smoke coming off by doing that and was lucky enough it didn't burn. Using isopropyl would be an ideal solution. But to bad I can't find that around here :(.
[DO THIS ON YOUR OWN RISK] What I ended up doing is using the screwdriver to gouge the underlying glue out as much as I can on the side (about 10%) and use fingers to pry it up. Good luck!
Perfect! not as difficult as it looked first, especially with the proper tools. To take the batteries out the alcohol (I used ethanol used for cleaning purposes) works like charm. I put a few ml in nearby the batteries, waited maybe 20min and was able to pry them out easily. Tried before without the alocohol and nothing moved. I ordered the battery on ebay for 70€ and it has the same numbers and text as the original it says apple japan as well. My old battery had more than a thousand cycles after 3 years and did not last vey long. Now the software shows 0 cycles and it is charging starting at 15% and will be fully charged in 2:45h. I think apple charges 249€ for the job here in Gernany. It took me about 1 hour to replace it (with waiting).