简介
This repair guide was authored by the iFixit staff and hasn’t been endorsed by Google. Learn more about our repair guides here.
Use this guide to replace a worn-out or dead battery in your Google Pixel 6.
If your battery is swollen, take appropriate precautions.
For your safety, discharge your battery below 25% before disassembling your phone. This reduces the risk of a dangerous thermal event if the battery is accidentally damaged during the repair.
Caution: The Pixel 6 contains class 1 lasers. Disassembly could result in exposure to invisible infrared laser emissions.
Retaining water resistance after the repair will depend on how well you reapply the adhesive, but your device will lose its IP (Ingress Protection) rating.
You’ll need replacement adhesive to reattach components when reassembling the device.
你所需要的
-
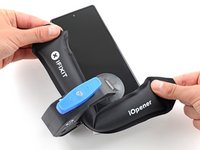
在这个步骤中使用的工具:Clampy - Anti-Clamp$24.95
-
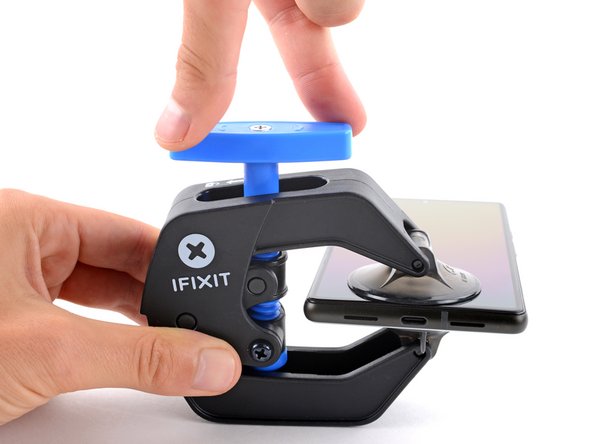
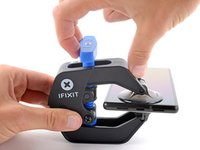
Pull the blue handle backwards to unlock the Anti-Clamp's arms.
-
Slide the arms over either the left or right edge of your phone.
-
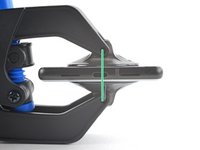
Position the suction cups near the bottom edge of the phone—one on the front, and one on the back.
-
Squeeze the cups together to apply suction.
-
-
-
Heat an iOpener and thread it through the arms of the Anti-Clamp.
-
Fold the iOpener so it lays on the bottom edge of the phone.
-
Wait one minute to give the adhesive a chance to release and present an opening gap.
-
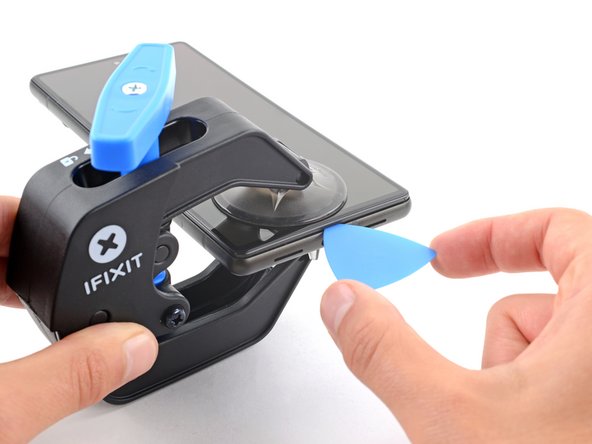
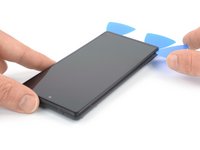
Insert an opening pick under the screen frame when the Anti-Clamp creates a large enough gap.
-
Skip the next two steps.
-
-
-
Apply a heated iOpener to the screen to loosen the adhesive underneath. Apply the iOpener for at least three minutes.
-
-
-
Once the screen is warm to the touch, apply a suction handle to the bottom edge of the screen.
-
Lift the screen, including its safety frame, with the suction handle to create a small gap between the screen and the phone assembly.
-
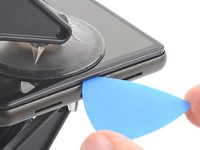
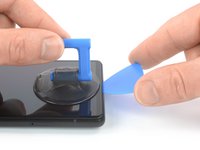
Insert an opening pick into the gap between the screen frame and the phone assembly.
-
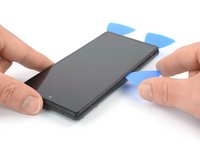
Slide the opening pick to the bottom right corner of the screen to slice its adhesive.
-
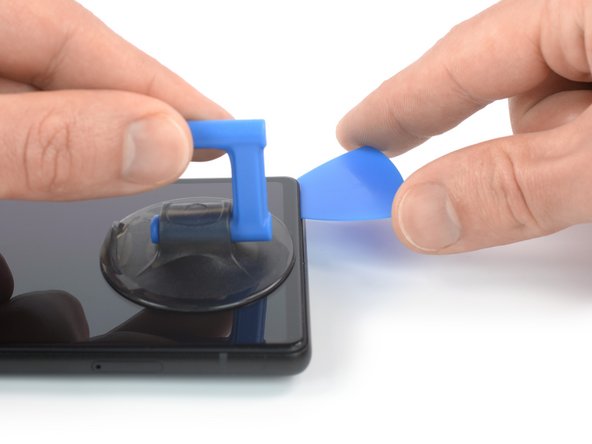
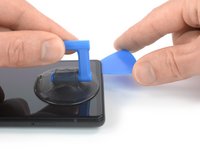
Leave the opening pick in place to prevent the adhesive from resealing.
-
-
-
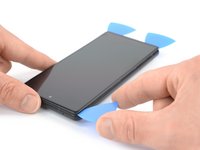
Insert a second opening pick at the bottom edge and slide it to the bottom left corner of the screen to slice the adhesive.
-
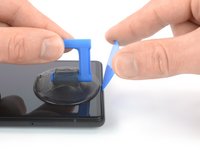
Leave the opening pick in place to prevent the adhesive from resealing.
-
-
-
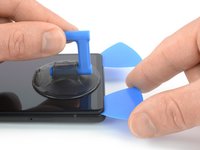
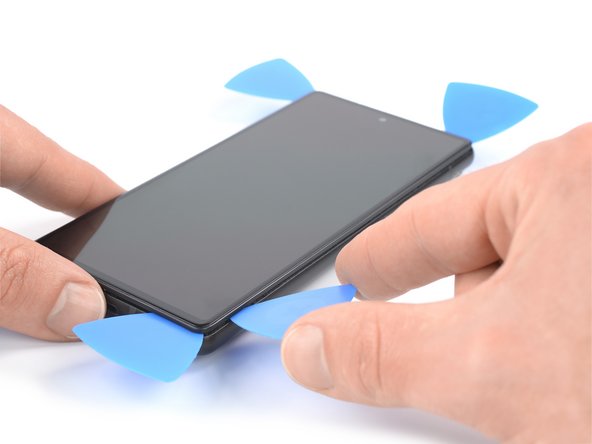
The screen of the Google Pixel 6 is not only held in place by adhesive but also small plastic clips. If your opening pick gets blocked during the screen removal procedure, it means you inserted your pick too deep underneath the screen. Only insert the tip of the opening pick (3-4 mm) when slicing the display adhesive.
-
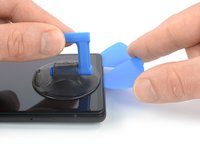
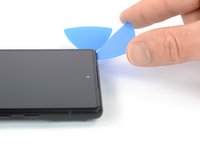
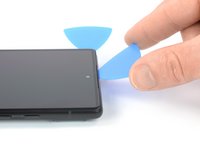
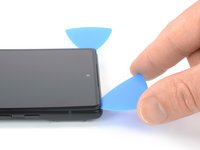
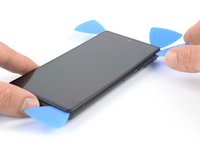
Insert a third opening pick underneath the bottom left corner of the screen.
-
Slide the opening pick along the left edge of the screen to slice the adhesive.
-
Leave the opening pick in the top left corner to prevent the adhesive from resealing.
-
-
-
-
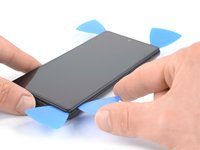
Carefully open the right side of the screen to the left side of the phone assembly like you would open a book.
-
-
在这个步骤中使用的工具:Tweezers$4.99
-
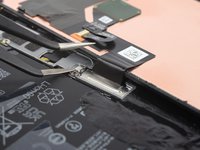
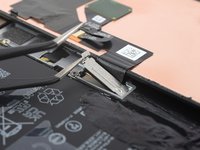
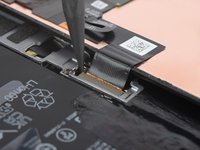
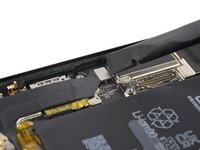
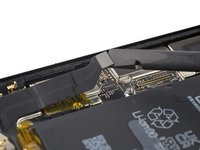
Use a pair of tweezers to carefully unhinge and remove the metal bracket sitting on top of the display cable connector.
-
-
-
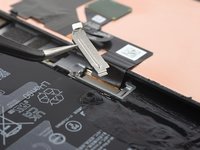
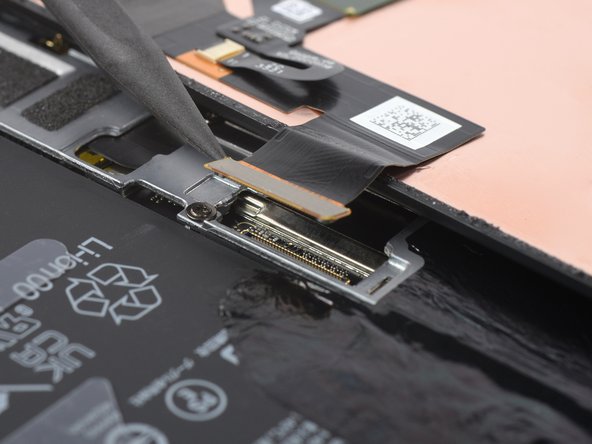
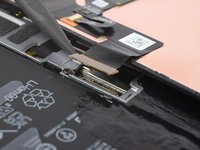
Use a spudger to disconnect the display flex cable by prying the connector straight up from its socket.
-
-
-
When handling your screen, grip it by its edges.
-
When placing the screen on your work area, make sure nothing is touching the bottom of the screen. Consider placing it on a soft, lint-free cloth.
-
-
-
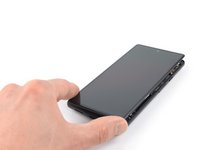
Remove the screen.
-
If you replaced the screen, check the front-facing camera hole on the screen and remove any remaining protective liners in it.
-
This is a good point to test your phone before sealing it up. Temporarily connect your screen, power on your phone, and make sure it works as expected. Before continuing with reassembly, power off your phone and disconnect the screen.
-
Follow this guide if you're using custom-cut adhesives for your device.
-
Follow this guide if you're using a pre-cut adhesive card.
-
If you're installing a new screen, follow this guide to calibrate the fingerprint sensor.
-
-
-
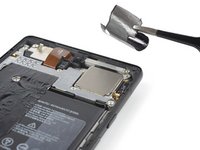
Apply a heated iOpener or a heat gun to the rear glass to loosen the adhesive underneath the graphite films on top of the battery. Apply the iOpener for at least two minutes.
-
-
在这个步骤中使用的工具:Tweezers$4.99
-
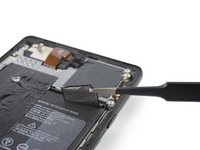
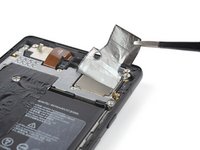
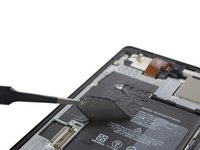
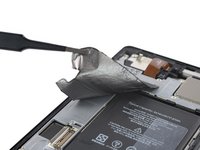
Use a pair of blunt nose tweezers or a clean fingernail to carefully peel the black graphite film off the top edge of the battery and the motherboard shield.
-
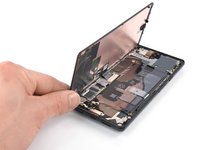
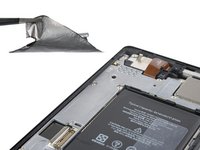
Remove the graphite film.
-
-
在这个步骤中使用的工具:Magnetic Project Mat$16.96
-
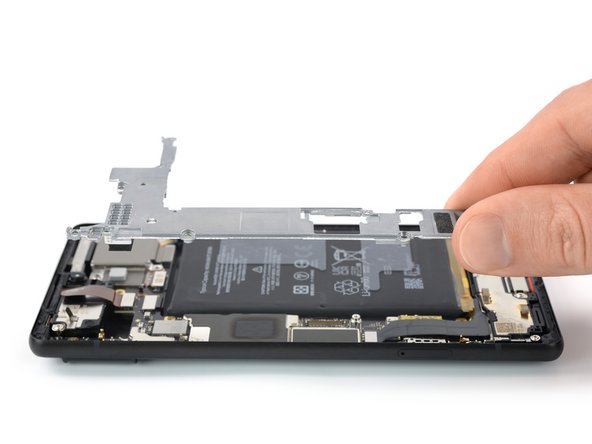
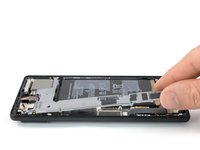
Use a Torx T3 screwdriver to remove the screws securing the motherboard cover:
-
Eight 4.8 mm-long screws
-
One 2.4 mm-long screw
-
-
-
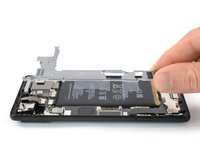
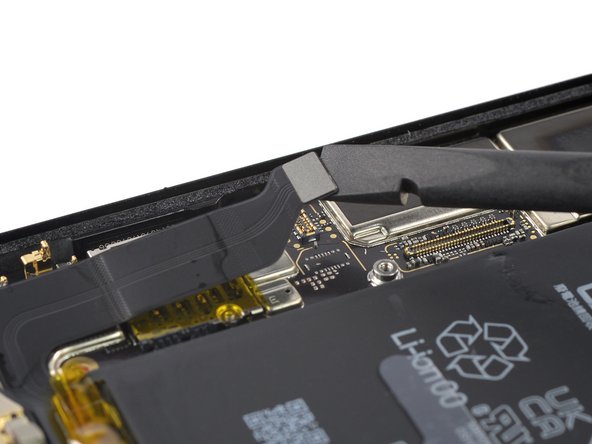
Use a spudger to disconnect the battery cable by prying the connector straight up from its socket.
-
-
-
Lift your phone assembly to a ~45° angle.
-
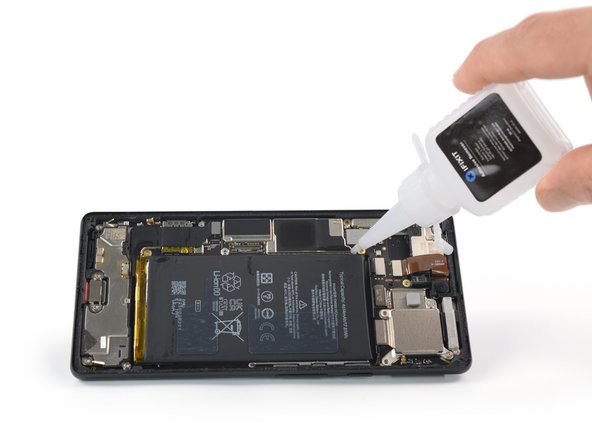
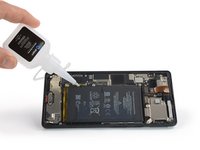
Apply a few drops of high concentration (over 90%) isopropyl alcohol into the gap between the motherboard and the top-left and bottom-left corner of the battery.
-
-
-
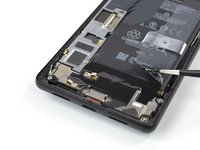
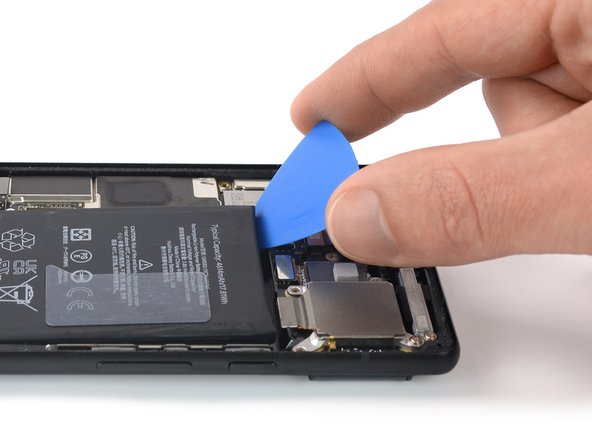
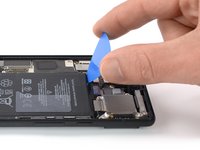
Insert an opening pick into the gap between the top edge of the battery and the motherboard.
-
Use your opening pick to pry up the battery by tilting your pick downwards and widening the gap between the battery and the motherboard to create enough space to insert a plastic card.
-
-
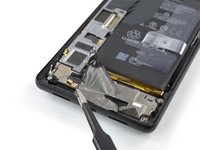
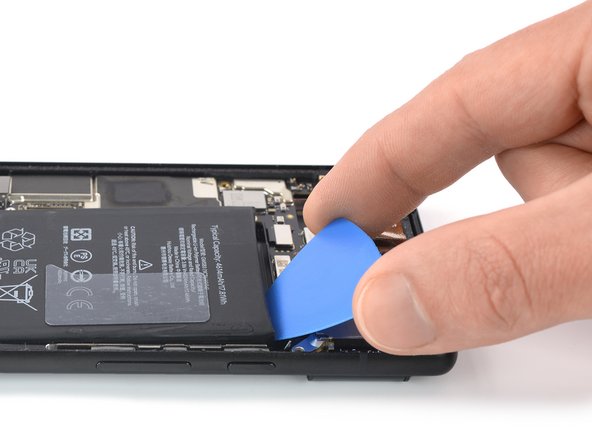
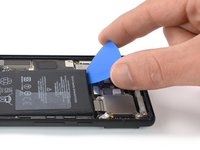
在这个步骤中使用的工具:Plastic Cards$2.99
-
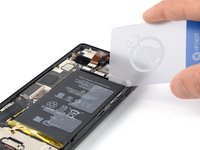
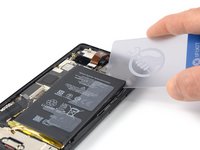
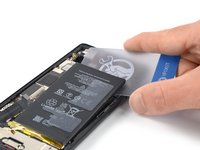
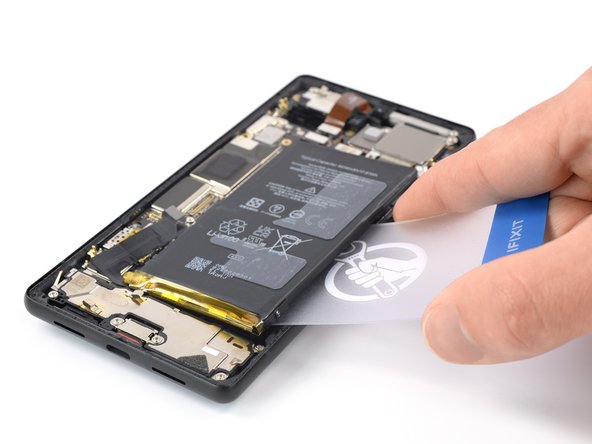
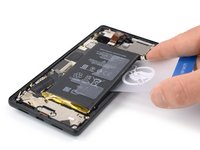
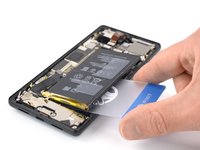
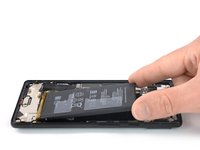
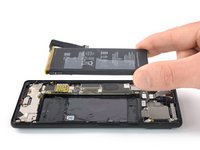
Insert a plastic card underneath the top right corner of the battery.
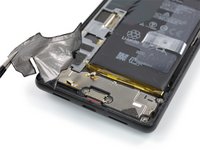
-
Slide the plastic card underneath the top edge of the battery to slice its adhesive and pry it up.
-


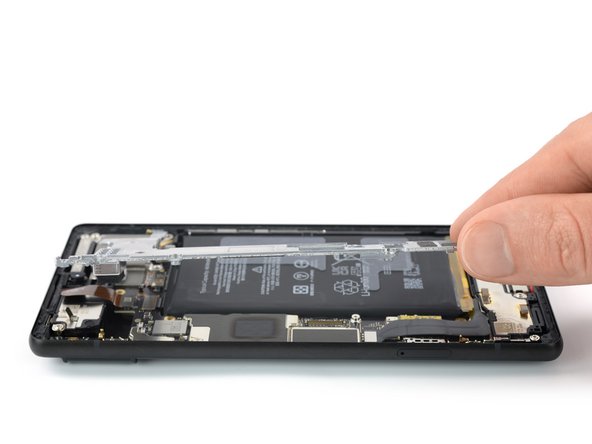


If possible, turn on your device and test your repair before installing new adhesive and resealing.
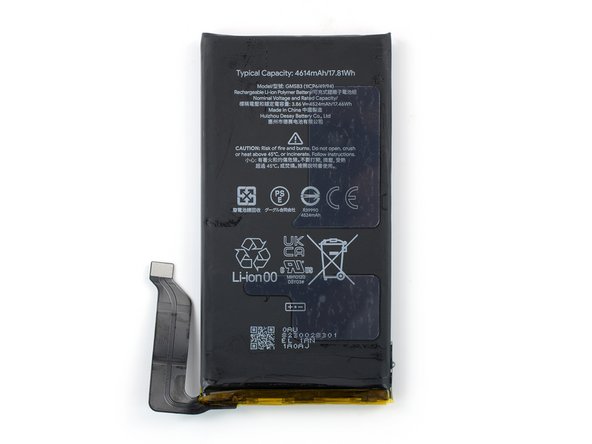
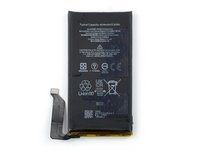
Compare your new replacement part to the original part—you may need to transfer remaining components or remove adhesive backings from the new part before installing.
To reassemble your device, follow these instructions in reverse order. During reassembly apply new adhesive where necessary after cleaning the relevant areas with isopropyl alcohol (>90%).
For optimal performance, calibrate your newly installed battery after completing this guide.
To run a diagnostics test with the built-in Pixel Diagnostic tool, click here.
Take your e-waste to an R2 or e-Stewards certified recycler.
Repair didn’t go as planned? Try some basic troubleshooting, or ask our Answers community for help.
103等其他人完成本指南。


20指南评论
Something this guide should add is when using the card to pop the battery adhesive, keep as much to the edge in the middle as you can. The qi charger is covered in that graphite like tape and that is easily damaged. You can see that a little bit in the pictures where it was damaged.
If you have the kit, pay attention to the adhesives. The battery already has adhesive attached, the clear plastic pieces are the battery spacers (look at old battery for positioning), and the graphite tapes match the old. Be careful that the plastics already on the battery (the little tab handle thing), the spacers, and the graphite tape don't overlap.
My original battery started to expand and even lifted up the screen! I had to replace the battery urgently.
I used the genuine Google replacement parts sold through iFixit. Everything worked as expected. I can only recommend using the Pixel Phone Series due to its good repairability and the availability of replacement parts and guides through iFixit. (Availability of Custom ROMs such as GrapheneOS and others is another great bonus :) )
All in all: Magnificent guide for a great device. Thank you guys!
Great guide - than you for your effort Dominik.
My battery had swollen so it was already popping off the screen for me so getting the screen off wasn't so hard :) For me the trickiest bit was getting the battery out - the adhesive was really hard to unstick. Had to do a three or four attempts with the alcohol - take your time and it will come out, don't force it.
Good luck!
My battery had also become swollen and the top right of the screen was lifting. Used the iFixit battery replacement kit and the anti-clamp device opener. For the battery removal, I used the isopropyl alcohol, but I also used the included suction cup as a stand and had the heated iOpener on the back of the phone. I think this helped loosen the battery as well.
This guide and tools made this job really easy and not frustrating at all. Screen was undamaged and worked perfectly after the battery was replaced (I did check it before it was all screwed down/resealed).
Thanks for the great guide and kit!
As many others my battery had started to push up on my screen and swell. I've always been a fan of iFixit, but never been able to afford any of their products, however, the Pixel 6 battery replacement kit is worth the purchase, it came with all the parts and tools needed to replace the battery, I didn't need to use the iOpener as the screen was already apart and IPA helped to remove the battery, I purchased the graphite tape separately as it didnt look like it came with it, but it did, I also didn't need to use the battery spacer, as the battery came with them applied, but I dint know how to use them. great tutorial and easy to follow,