简介
本指南说明了如何更换电池以恢复您 iPhone8 的性能. 如果您的电池已经鼓包, 请采取适当的预防措施.
本指南会指导您将显示屏的部件完全分离;这是为了防止显示屏电缆意外损坏。如果你觉得可以在不对显示器电缆造成过度拉力的情况下拆除电池的话,可以跳过拆卸显示屏的步骤。此外,虽然你可以在打开手机后立即取下固定电池的胶条,但本指南建议先把 Taptic Engine 取下来。这样做可以减少两种意外折断下部胶条的风险,这将避免以下两种下部胶条的意外折断风险的可能:1:胶条卡在Taptic Engine 上导致其折断,2:拉拽胶条的角度过大而导致其折断。
为了达到最佳电池性能,在完成本指南后请对其进行电池校准 第一步:对安装完新电池手机进行完全充电: 这意味着你将需要对其充电至 100%,并在电量显示充满之后继续充电至少 2 小时。第二步:取下充电线,使用你的手机,直到它由于电量耗尽而自动关机。第三步:再次对其充电,直到电量充满。
你所需要的
视频概述
-
在这个步骤中使用的工具:Clampy - Anti-Clamp$24.95
-
接下来的三个步骤演示了如何使用反向钳,一个旨在简化打开过程的工具。 如果你不使用 反向钳,请跳过这两个步骤以使用替代方法。
-
将蓝色手柄拉向铰链以解锁反向钳。
-
将手机塞进反向钳的两臂之间。
-
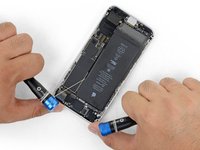
将吸盘放在屏幕上主页按钮的正上方——一个在前面,一个在后面。
-
向下推吸盘以将吸力施加到所需区域。
-
-
-
加热 iOpener并将其穿过反向钳。
-
折叠 iOpener,使其位于 iPhone 的底部边缘。
-
等待一分钟,让粘合剂有机会释放并出现开口间隙。
-
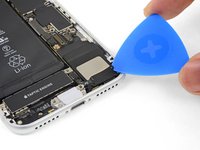
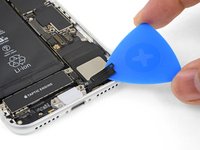
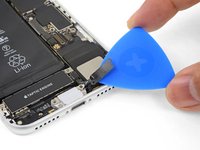
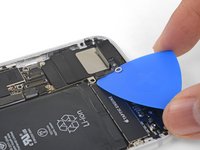
将撬片插入间隙中。
-
跳过接下来的三个步骤。
-
-
-
-
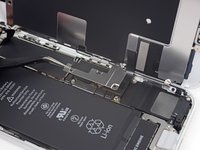
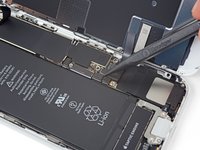
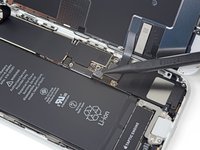
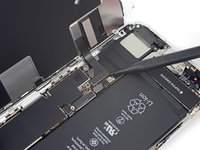
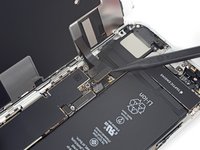
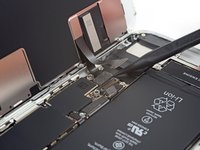
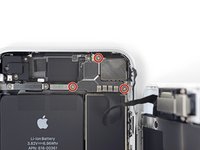
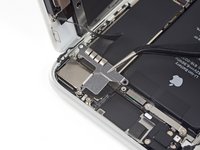
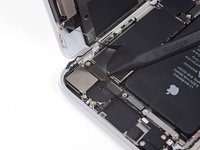
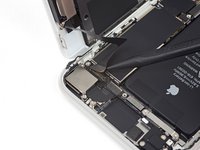
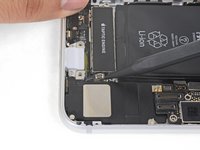
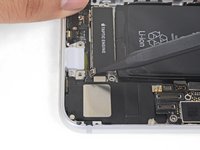
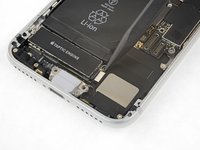
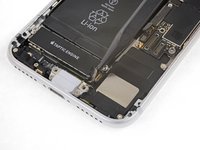
拧下用于固定Taptic Engine旁边支架的三颗螺丝钉:
-
一个 1.3毫米的Y000型螺丝钉。
-
一个 2.7毫米的十字型螺丝钉。
-
一个 2.9毫米的十字型螺丝钉。
-


363等其他人完成本指南。


66条评论
I still did it in 30 minutes….but I am glad I stop repairing phones around the Iphone 6s ! Now it takes serious effors just to replace the battery !
One note on this repair: When reinstalling the standoff that connects to the Taptic Engine, I found that the pointy tip of the spudger fits really well into the little hole at the top of the standoff, and helps with getting it into place and screwing it down if you don’t have a screwdriver bit for the standoff. Hope this is helpful!
Are steps 18 to 27 really required if you’re just replacing the battery?
Hi Daniel!
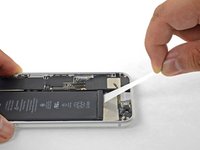
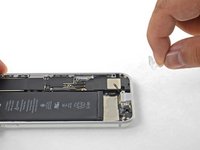
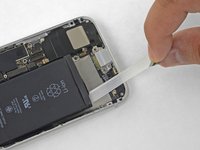
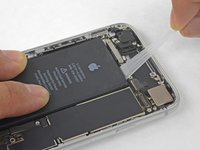
The pull-stretch adhesive holding the battery has a tendency to tear when they are pulled at a steep angle. When they tear, removing the battery becomes much more difficult. We strongly recommend removing the Taptic Engine in order to give the adhesive the best chance of coming out in one piece.
I tried doing it the ‘easy’ way without those steps. I wound up breaking the top adhesive tabs and it made it a lot harder to remove the battery and took a lot of extra time. If I had to do it again, I would do all the steps. Otherwise, things went very well. Very good instructions.