简介
If your iPhone 11 Pro screen is cracked, not responding to touch, or not showing a picture when your phone is powered on, use this guide to restore your iPhone to working order with a new screen, a.k.a. display assembly.
The combined earpiece speaker + sensor assembly affixed to the back of the display is paired to your individual iPhone from the factory, so you must transfer it from your old display to your new one during any display replacement. It contains the flood illuminator, which is part of the biometric Face ID security feature. If it is damaged or replaced, Face ID will cease to function, so take extra care not to damage any of these components during this procedure. If damaged, only Apple or an Apple-authorized technician can restore Face ID function.
Note: True Tone functionality is disabled after a screen replacement, even when using an original Apple screen. Additionally, your iPhone may temporarily show a warning about the “genuineness” of the display.
-
-
Power off your iPhone before beginning disassembly.
-
Remove the two 6.7 mm-long pentalobe screws at the bottom edge of the iPhone.
-
-
-
If your iPhone has a cracked screen, keep further breakage contained and prevent bodily harm during your repair by taping over the glass.
-
Lay overlapping strips of packing tape over the iPhone's display until the whole face is covered.
-
If the broken glass makes it difficult to get a suction cup to stick in the next few steps, try folding a strong piece of tape (such as duct tape) into a handle and lifting the display with that instead.
How to detect my Iphone what screen it is, OLED or LCD?
It’s OLED. You can find the specs here, https://support.apple.com/en-us/HT201296
When you find your phone, at the bottom of the description click on, See the tech specs…
mcr4u2 -
The included suction cups were stiff and worthless. They would not lift the screen. Also, I tried every type of tape on the screen to help the suction cups stick without success. Heavy duty suction cups were for my bathroom also failed. However, I had an old GoPro mount with some preapplied double sided 3M VSB tape and stuck that on the screen near the bottom. Magic! This method had the added bonus of being able to use a GoPro attachment as a handle to lift the screen, and propped up the screen like a kickstand in step 12.
Very cool! Thanks
Antonio -
My screen was pretty stuck… would not budge. Heated, super glued the suction cup, tried gorilla tape. Ended up doing the GoPro mount with 3M VSB tape method mentioned. Worked great. That 3M tape is the bomb.
If you have flat feeler gauges (for adjusting engine valve tappet clearance, ignition points … old school) the .003 thick goes right in. Work your way up until you can get the pick or supplied pry tool in.
where can I buy 3M VSB plis!!
-
-
-
Use a hairdryer or heat gun or prepare an iOpener and apply it to the lower edge of the iPhone for about a minute in order to soften up the adhesive underneath.
-
-
-
If the plastic depth gauge is attached at the center of the iSclack, remove it now—it's not needed for larger iPhones like the iPhone 11 Pro.
-
Position the suction cups near the bottom edge of the iPhone—one on the front, and one on the back.
-
Press both suction cups firmly into place.
-
-
-
Pull up on the suction cup with firm, constant pressure to create a slight gap between the front panel and rear case.
-
Insert an opening pick into the gap.
-
-
-
Slide the opening pick around the lower left corner and up the left edge of the iPhone, slicing through the adhesive holding the display in place.
-
-
-
-
Pull on the small nub on the suction cup to remove it from the front panel.
-
If you used an iSclack and it's still affixed to the iPhone, remove it now.
-
-
-
Open the iPhone by swinging the display up from the left side, like the back cover of a book.
-
Lean the display against something to keep it propped up while you're working on the phone.
-
-
-
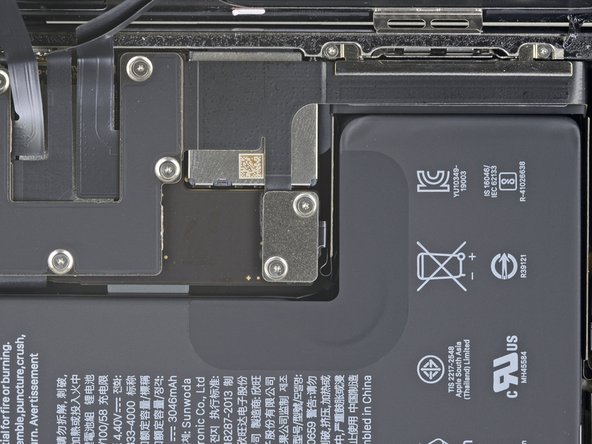
Remove two 1.3 mm long Y000 screws securing the battery cover bracket.
German translation says "3 screws” but there are only 2.
-
-
-
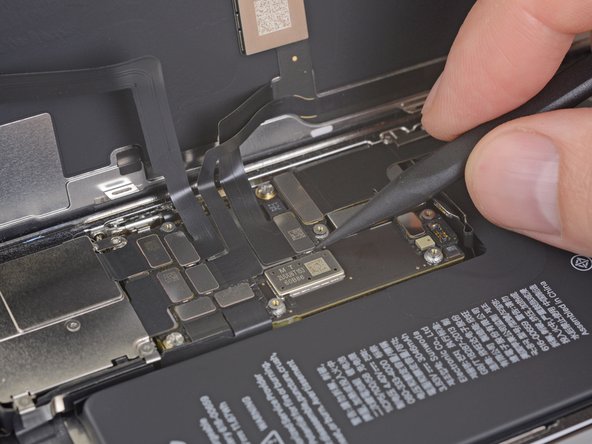
Use a spudger or a clean fingernail to pry the battery connector up from its socket on the logic board.
-
Bend the connector slightly away from the logic board to prevent it from accidentally making contact with the socket and providing power to the phone during your repair.
-
-
-
Use a Y000 driver to remove six 1.3 mm screws securing the logic board cover bracket.
-
-
-
Use a spudger or a fingernail to disconnect the OLED panel cable connector.
-
-
-
Use a spudger or a fingernail to disconnect the front sensor assembly cable connector.
-
Use a spudger or a fingernail to disconnect the digitizer cable connector.
-
-
-
Remove the display assembly.
-
-
-
Use a Y000 driver to remove the three screws securing the speaker/sensor assembly to the back of the display:
-
Two 1.3 mm screws
-
One 1.9 mm screw
Note that the top left screw has a smaller head than the other 3! You’ll learn like I did if they get mixed up & its really hard to get the other 1.3 mm screw to fit.
-
-
-
Use the point of a spudger to gently pry up the top edge of the speaker.
-
Flip the speaker assembly over—down and away from the top edge of the display.
-
-
-
Use a hairdryer or heat gun or prepare an iOpener and apply it to the top front of the display for 1-2 minutes, in order to soften the adhesive securing the sensors.
-
-
-
Use the point of a spudger to lift and separate the microphone from its notch in the front panel.
-
-
-
Use tweezers to wiggle the ambient light sensor and lift it from its notch in the display.
-
-
-
If you successfully removed the entire ambient light sensor, as shown in the first photo, continue to the next step below.
-
If the white diffuser strip detached and remains embedded in the display, as shown in the second photo, you will need to carefully lever it out along the top edge using a thin blade or pry tool. Re-applying heat first may make this task a bit easier.
-
-
-
Remove the earpiece speaker and front sensor assembly.
-
Proximity sensor
-
Flood illuminator
-
The module must be positioned so that these components are not obstructed by any adhesive.
-
Compare your new replacement part to the original part—you may need to transfer remaining components or remove adhesive backings from the new part before installing.
To reassemble your device, follow the above steps in reverse order.
Take your e-waste to an R2 or e-Stewards certified recycler.
Repair didn’t go as planned? Check out our iPhone 11 Pro Answers community for troubleshooting help.
44等其他人完成本指南。
5条评论
Scusate ma perche dovrei spendere 1-2 ore di tempo piu il costo del display a “soli” euro 500,00 (ma ti fanno il resto di € 0,05!, ndr) quando la APPLE “UFFICIALE” te lo ripara con 300euro pezzi , attrezzi e tempo di lavoro : TUTTO INCLUSO !!!!!
Comunque guida ben fatta!!!
UMM, Maybe you can tell customers that they will forever have a notification pop up saying “Unknown Part, not an original part installed” so that they can make an informed decision if they want to install or not.
Fixed it. Thank you.
jmcgaughey - 回复