简介
如果你的 iPhone 11 Pro 屏幕破裂,没有响应电子屏触摸,或者在开机时不显示图像,请使用本指南将iPhone 恢复到正常工作状态。需要使用新的屏幕,也称作显示屏总成。
固定在显示器背面的组合式听筒扬声器+传感器组件已在工厂与你的单个 iPhone 配对,因此在任何情况下你都必须按照以下说明将其从旧显示器转移到新显示器上显示替换。它包含泛光照明器,它是生物特征Face ID 安全功能的一部分。如果它已损坏或更换,则 Face ID 将停止工作,因此请格外小心,以免在此过程中损坏任何这些组件。如果损坏,则只有Apple可以恢复 Face ID 功能。
注意:更换屏幕后即使使用原装苹果屏幕,也会禁用True Tone功能。
你所需要的
-
-
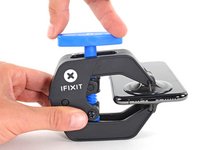
从尖端测量 3 毫米,并用永久性记号笔标记三角撬片。
Got to step 2 and realized the fix kit doesn't include an opening pick! Looks like a guitar pick, and I have those lying around. Is that expected? Looks like the pick is used in many steps below. There's a little blue crowbar that isn't mentioned in the instructions. Perhaps that replaces the opening pick?
Hi! I can't see which guide you were using when writing this comment. Can you reply here with which guide and fix kit you used?
I see you posted this in Meta. I hope it's resolved soon! In the meantime, a guitar pick may work well enough for your repair.
what fix kit?
My fix kit didn't include an opening pick either
My AliExpress refurbished screen came with a pick that has a coin-like circle that pops out, so no modification was necessary
It's not an Ifixit KIT if it doesn't include everything. You'll need to order the opening pic separately. Or head to Walmart like myself and look for guitar pics. Hopefully, this will work just as well.
No pick in mine as well. It’s really not clear that you have to order this separately when ordering an IPhone SE 202/2022 screen repair kit. Is this the case?
Frustrated, I ordered a compact package where everything was encapsulated. Useless suction tools could not separate the screen. If it is unable to decouple the screen, then why sucking suction tools you have provided.
For my kit the triangle pick was stuck inside the box with the screen not with the other tools maybe it's also there for you
Y’all are getting far, FAR too detailed with some of this stuff…. Measuring and marking the pick that you won’t actually use to open the device?!? lol that’s kinda funny. Just heat it up, grab a spudger, and the back just pops right off! The iFixit tech need to stick to the KISS method more often, you know KEEP IT SIMPLE STUPID!!! Like l, for reals, I’ve been doing this stuff for YEARS and using iFixit guides regularly and this is just ridiculous at this point!
Will the phone still work if the sensor assembly on the back of the screen is damaged?
-
-
-
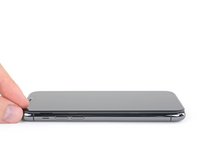
将重叠的透明包装胶带条黏在 iPhone 的后玻璃上,直到覆盖整个手机后部。
-
如果在接下来的几个步骤中无法让吸盘粘在手机上,请将强力胶带(折叠到把手中,然后用它提起后玻璃。
-
-
-
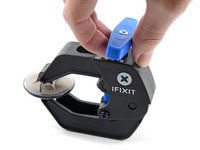
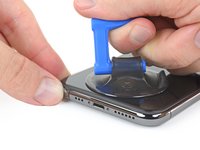
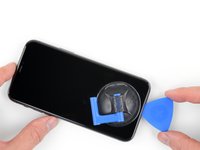
将蓝色手柄拉向铰链以解除开启模式。
-
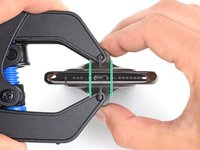
将反向钳手臂滑过 iPhone 的左边缘或右边缘。
-
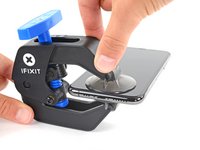
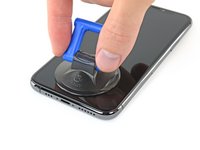
将吸盘放在屏幕上主页按钮的正上方——一个在前面,一个在后面。
-
向下推吸盘以将吸力施加到所需区域。
-
-
-
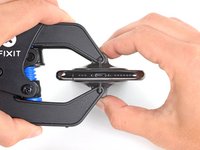
加热 iOpener 并将其穿过反向钳臂。
-
折叠 iOpener,使其位于 iPhone 底部边缘。
-
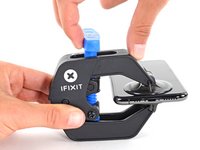
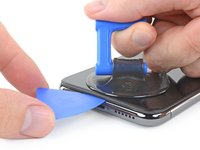
等待一分钟,让胶水软化并出现一个缝隙。
-
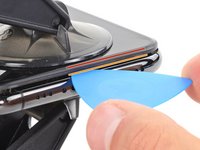
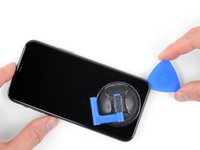
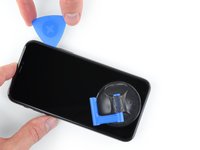
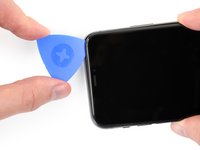
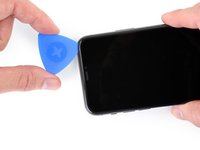
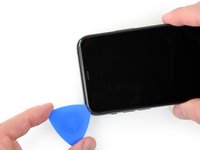
将三角撬片插入屏幕和塑料边框下方的间隙,而不是屏幕本身。
-
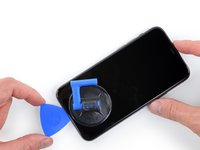
跳过接下来的三个步骤。
If the display is separating from the plastic, and the plastic is not rising in the middle, then you have forgotten step 1! The screws that hold the plastic to the bottom are still there! Stop fighting it, and go back to step 1! I made this mistake on my livestreamed repair on my youtube channel, somehow I managed to get it out with the screws attached, hopefully my display works! I gave up on the anti-clamp, used a hand suction on the bottom right corner with heat gun, used pry tool on the bottom right corner, and used another spudger along the middle which I guess bent the holes the screws go in so that it released the front. I also skipped over the slide action that is necessary. Also the adhesive on my phone was so intense it was a continual battle. Hopefully my display works!
-
-
-
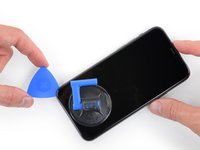
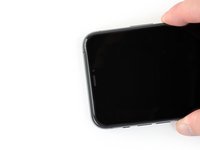
使用吹风机或准备一个iOpener,并将其放到手机的下缘约90秒,以软化下面的粘合剂。
I used a regulated heating gun, 180 degree celsius, 60 percent airstream, moving constantly around the edges for two minutes - works great for me.
einhanseat - 回复
-
-
-
在这个步骤中使用的工具:Magnetic Project Mat$19.95
-
卸下固定电池盖的两颗 1.3 毫米长的 Y000 螺钉。
-
-
-
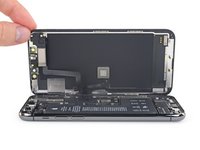
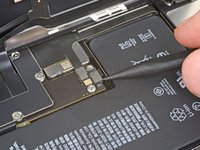
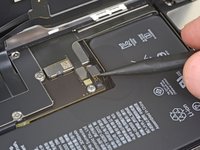
使用撬棒或指甲断开 OLED 面板排线接口。
My screen never activates upon reassembly, despite the phone vibrating to various inputs etc. I guess I damaged the cable? By pins, do you mean the pins of the cable damage, or the pins on the logic board damage? Need to know what to do.
-
-
-
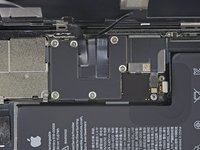
移除屏幕
-
-
-
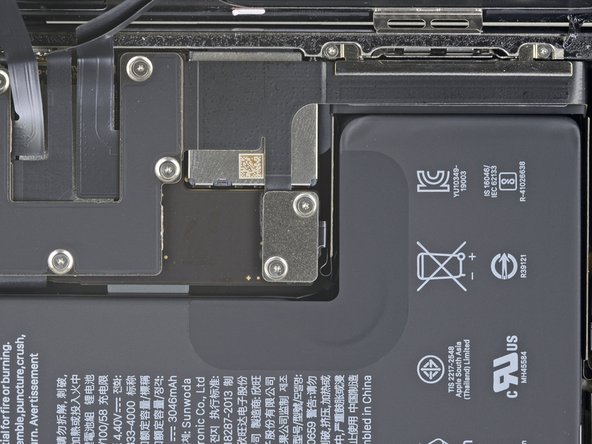
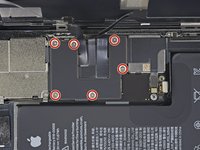
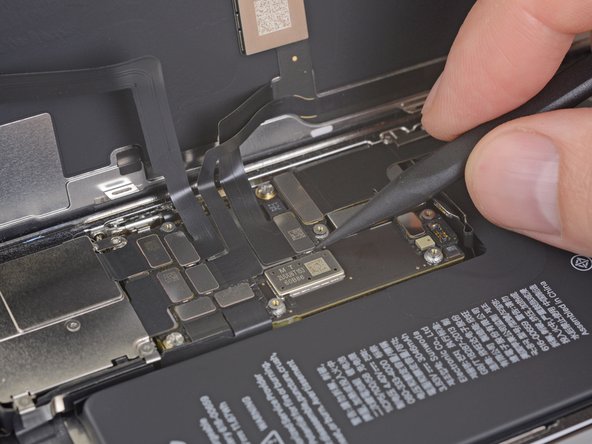
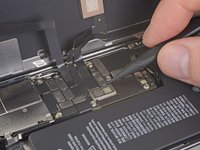
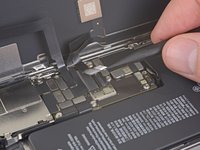
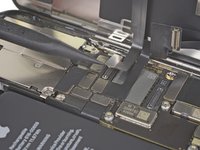
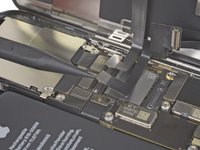
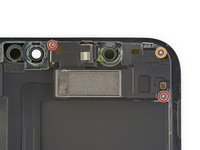
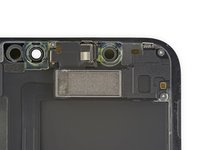
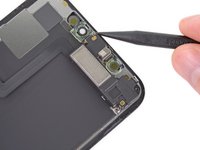
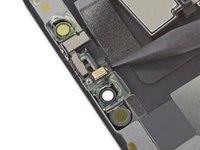
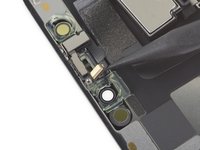
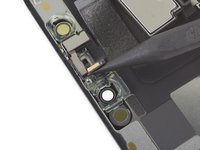
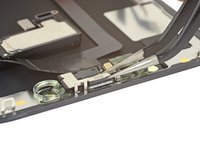
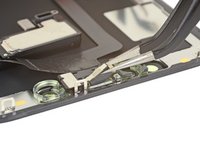
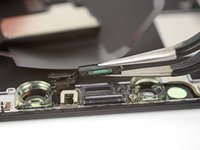
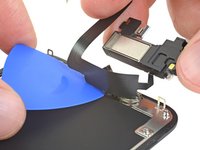
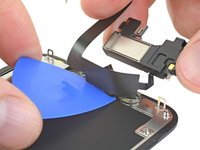
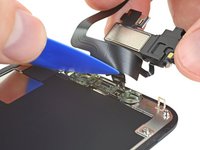
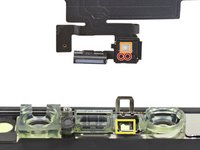
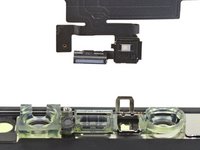
使用Y000 螺丝刀移除将扬声器/传感器组件固定到显示器背面的三颗螺丝:
-
两颗1.3 mm 螺丝
-
一颗1.9 mm 螺丝
Note that the top left screw has a smaller head than the other 3! You’ll learn like I did if they get mixed up & its really hard to get the other 1.3 mm screw to fit.
Thank you Andrew. That saved me!
-


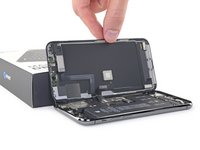


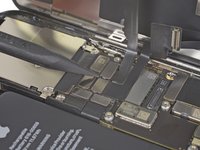


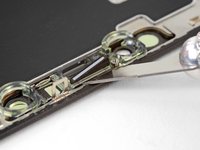


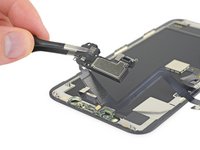
将新的替换零件与原始零件进行比较——在安装之前,你可能需要转移剩余的组件或从新零件上取下粘性衬板。
要重新组装你的设备,请按相反顺序执行上述步骤。
请将你的电子废料带到 R2 or e-Stewards 认证的回收商。
修理过程如遇问题,可以查看我们的社区iPhone 11 Pro Max 论坛以获取更多排除故障的帮助信息。
将新的替换零件与原始零件进行比较——在安装之前,你可能需要转移剩余的组件或从新零件上取下粘性衬板。
要重新组装你的设备,请按相反顺序执行上述步骤。
请将你的电子废料带到 R2 or e-Stewards 认证的回收商。
修理过程如遇问题,可以查看我们的社区iPhone 11 Pro Max 论坛以获取更多排除故障的帮助信息。
97等其他人完成本指南。


9条评论
Scusate ma perche dovrei spendere 1-2 ore di tempo piu il costo del display a “soli” euro 500,00 (ma ti fanno il resto di € 0,05!, ndr) quando la APPLE “UFFICIALE” te lo ripara con 300euro pezzi , attrezzi e tempo di lavoro : TUTTO INCLUSO !!!!!
Comunque guida ben fatta!!!
UMM, Maybe you can tell customers that they will forever have a notification pop up saying “Unknown Part, not an original part installed” so that they can make an informed decision if they want to install or not.
Fixed it. Thank you.
jmcgaughey - 回复
Display Daten für True Tone müssen mit einem Programmer aufs neue Display übertragen werden. Das sollte allgemein bekannt sein. Und dann entferne ich die Ohrhörer/Lautsprecher/Sensor Einheit komplett mit der Kunststoffhalterung vorsichtig vom Display und baue die so auf dem neuen Display wieder ein. Mir ist noch nie was kaputt gegangen. Die Fummelei mit dem Raushebeln tue ich mir nicht an. Viel zu riskant.
On the back of the iFixit iPhone 11 Pro replacement screen, there's a little sticker with a QR code attached to... whatever that connector piece is in the middle. I forgot to remove that before buttoning everything up, but everything seems to work fine. Does anyone know if that could be issue? Only thing I could see is if it's supposed to contact metal-to-metal for heat dissipation.
completed this repair and a month later the screen is black, but working. The glass is damaged so it’s possible that has something to do with it but I’ve also heard it’s an ios16 issue with charging. same thing happened when I replaced an iPhone 13 screen. Any ideas on what’s going on?
Thanks for this - it was helpful. My screen was shattered so even do the tape trick the suction cup only pulled up the cracked glass and no the bezel edge. If you have the same issue as me, its still doable, but an extra step as the screen comes off in one piece and its much harder to work the pick around the edge as you are seperating the glass from the bezel, and then have to remove the bezel seperately after. I had to pry it up carefully with a spudger to get a gap between the bezel and lower case to slide my pick in and seperate the bezel from the adhesive. Hopefully this helps someone who was in the same situation as me.
Owen Scott - 回复
I am having difficulty accessing the disassembly steps to remove all of the components from the rear case. This web site stops at step 1. I am not sure how to access the rest of the steps. Can you help. Domingo Rochin
Mingo59 - 回复