简介
您的iPad电池是否已经不能长时间使用了呢?跟随这个指南来帮助您更换iPad Air 2 Wi-Fi版本的电池。
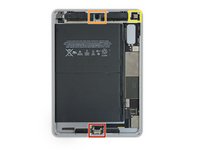
如果你的电池鼓包了, 采取适当的预防措施。
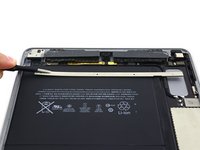
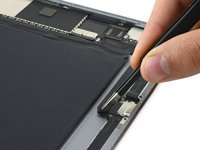
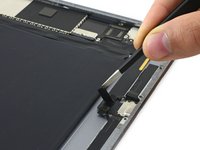
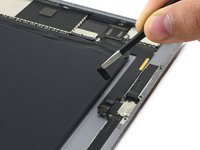
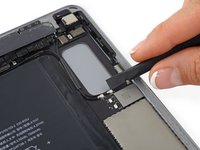
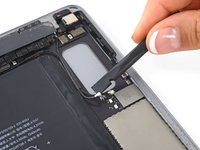
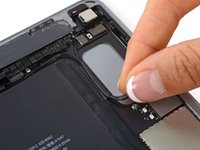
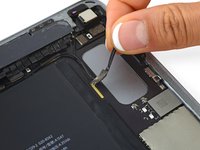
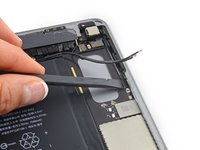
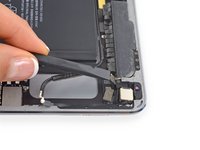
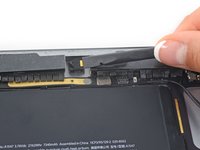
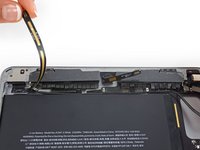
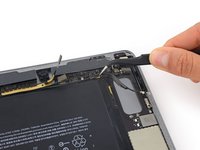
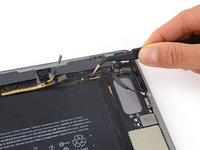
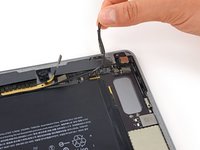
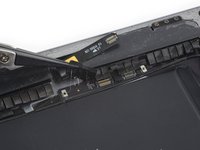
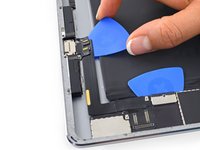
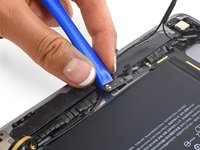
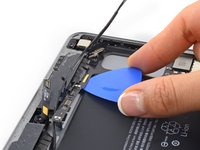
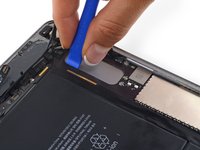
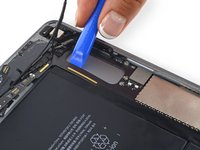
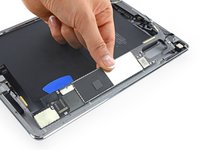
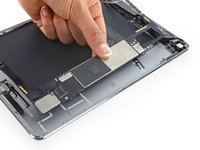
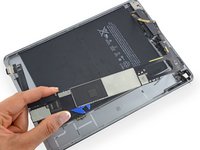
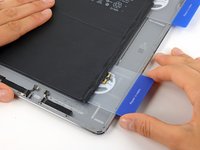
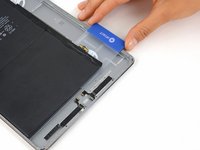
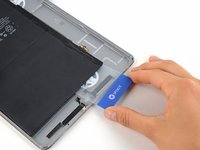
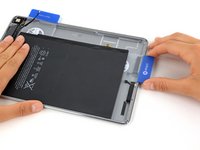
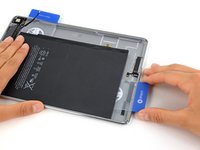
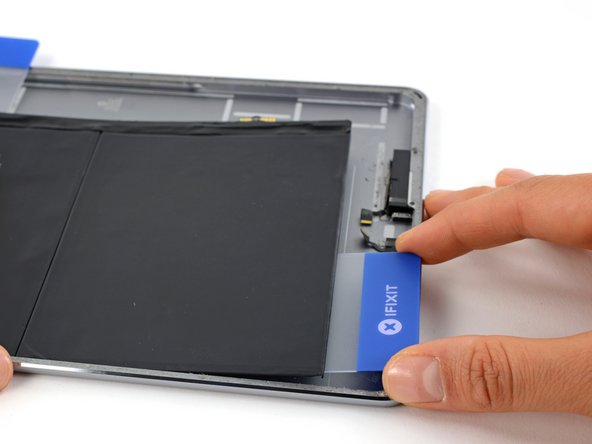
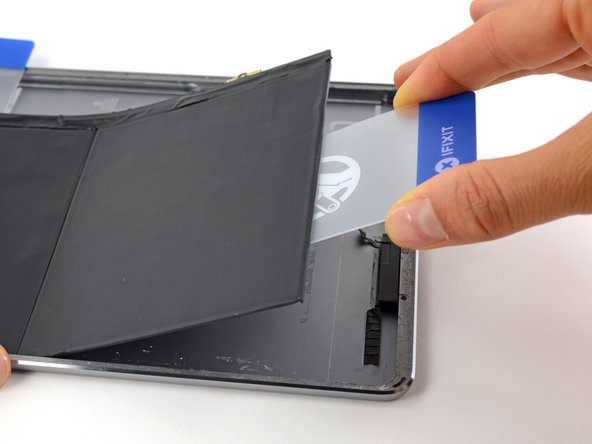
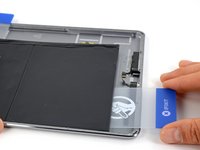
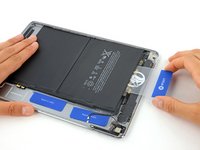
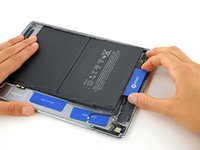
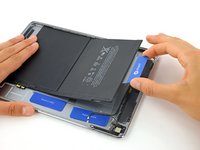
使用电池隔离器隔离电池时要非常小心。电池触点很脆弱,很容易造成不可逆转的损坏。 如果你选择在不隔离电池的情况下完成维修工作,除非在完全必要的情况下(例如拆除螺丝时),请避免使用金属工具,以免使电池短路和损坏敏感电路元件。
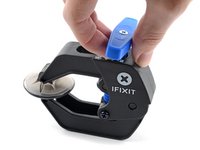
你所需要的
-
-
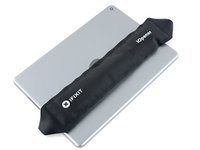
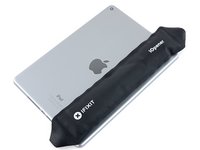
在锅或平底锅里装满足够的水来完全淹没iOpener。
-
把水加热到沸腾。关火。
-
将iOpener放入热水中2-3分钟。确保iOpener完全浸入水中。
-
用钳子从热水中提取加热的iOpener。
-
用毛巾彻底擦干iOpener。
-
你的iOpener已准备好使用!如果你需要重新加热iOpener,请将水加热到沸点,关火,并将iOpener放入水中2-3分钟。
-
-
-
如果您的显示屏玻璃已经碎裂,防止显示屏玻璃在您维修时进一步伤害您,请使用胶带来固定已经碎裂的屏幕。
-
给iPad 的正面整面贴上胶带。
-
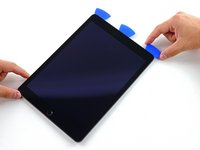
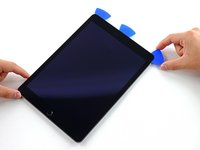
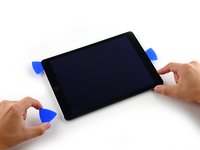
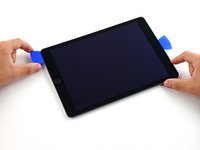
尽量根据下面的指南进行操作。但,一旦玻璃破碎,请停下拆解并使用金属撬刀撬出玻璃,避免更多的碎裂。
-
-
-
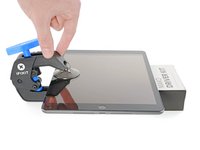
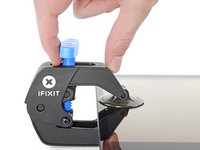
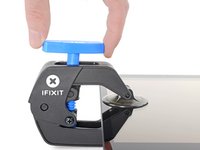
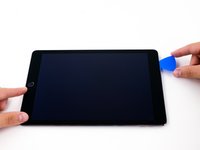
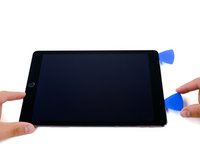
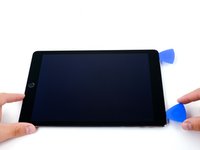
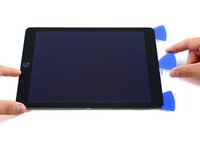
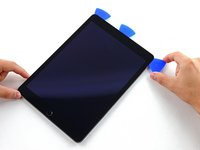
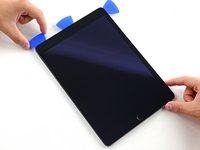
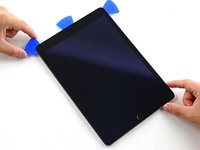
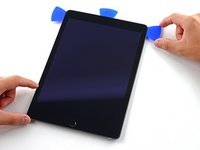
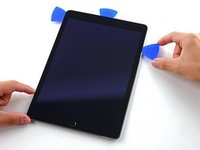
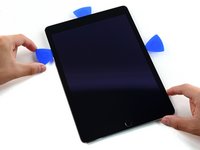
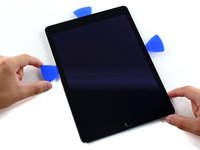
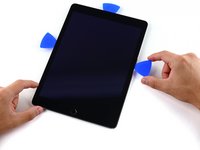
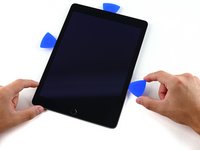
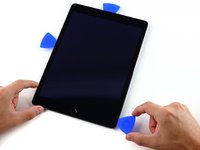
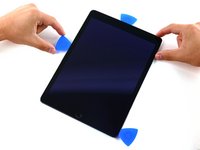
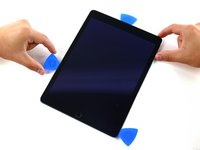
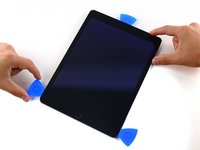
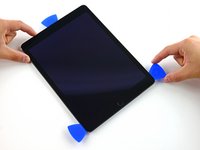
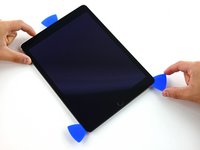
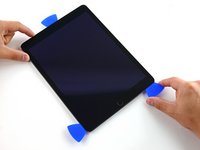
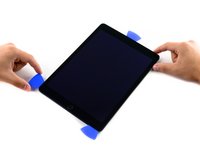
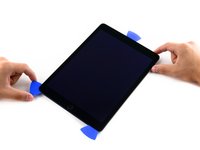
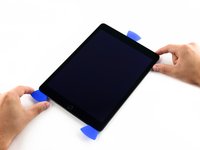
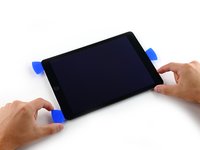
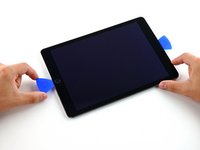
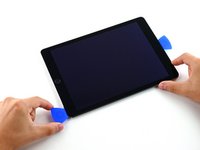
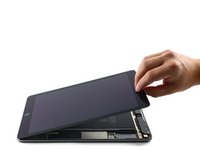
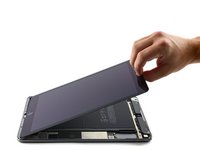
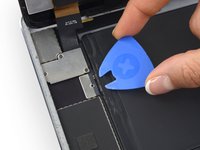
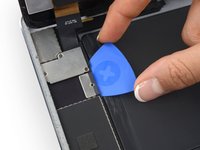
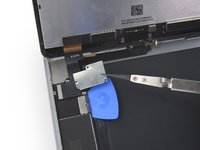
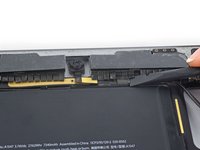
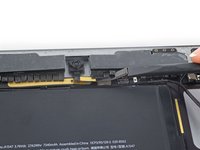
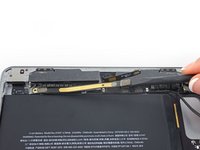
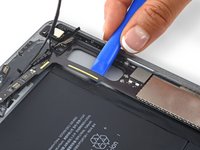
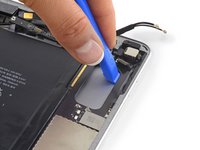
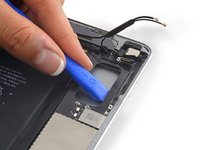
将 iPad 抬高到足以让 反向钳的铰链位于屏幕上方和下方的位置。
-
将蓝色手柄拉向铰链以解除开启模式。
-
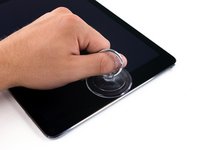
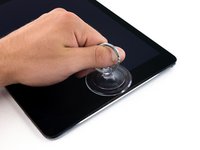
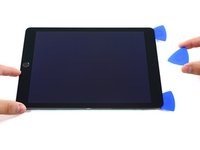
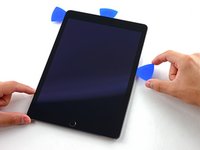
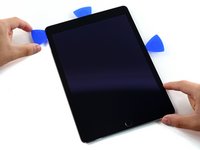
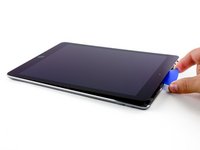
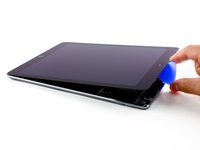
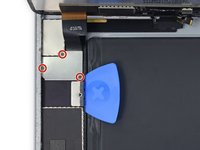
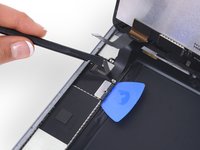
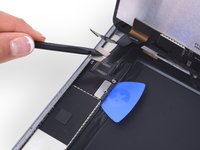
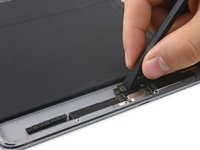
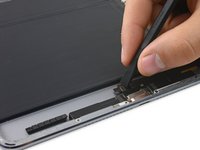
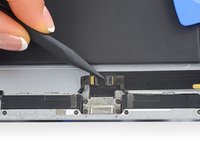
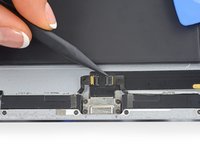
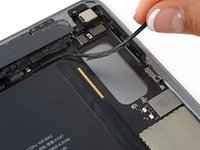
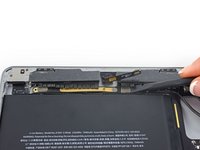
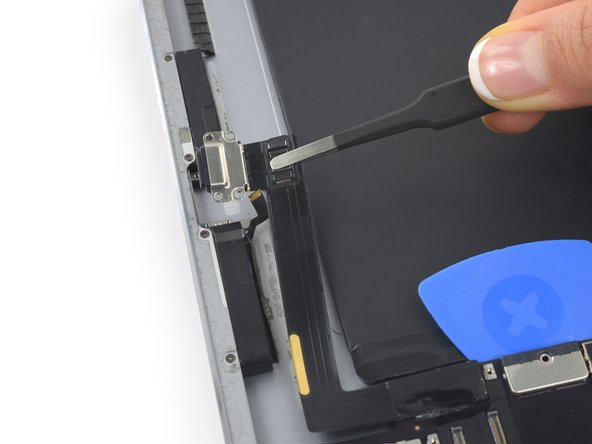
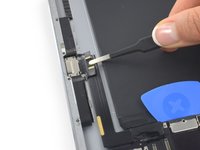
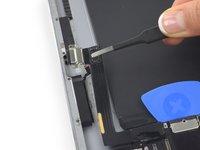
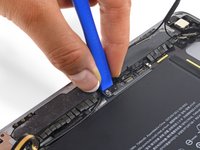
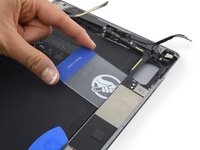
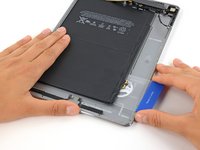
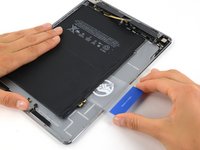
将吸盘放在屏幕上主页按钮的正上方——一个在前面,一个在后面。
-
向下推吸盘以将吸力施加到所需区域。
-
-


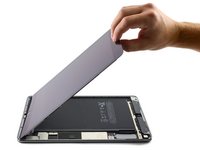


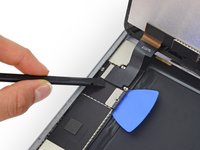
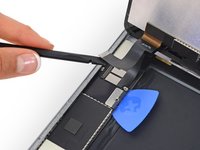


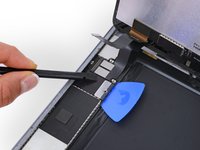


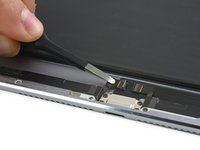
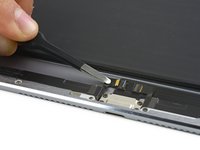


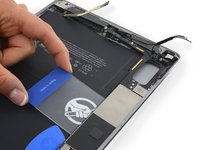

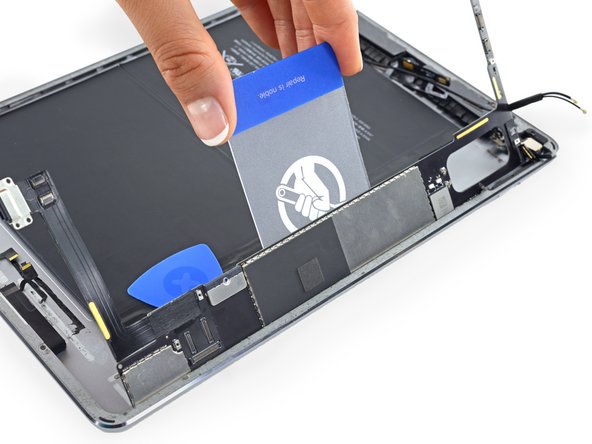
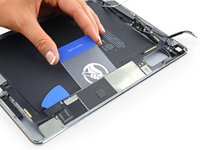
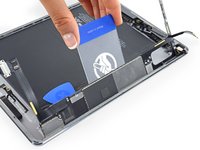


您可以按照指南相反的顺序来将您的设备重新安装回原样。
您可以按照指南相反的顺序来将您的设备重新安装回原样。
254等其他人完成本指南。


60条评论
Can the iPad air 2 battery be replaced without removing logic board or do all the internal components have to be dismantled before battery can be replaced?
The battery contacts are pinned underneath the logic board, so it's difficult to remove with the logic board in place. There's also very little room to work with the logic board installed, so there's an increased risk of damaging something with a wayward swipe of your card or pry tool. But yes, it's possible. You can reference this guide for tips on the procedure (it's for a different model but the same overall strategy will work).
I just finished this repair successfully. Don't force ANYTHING Find something, a steel plate, aluminum plate, a heat gun and heat the plates not the iPad. Then it does not over heat, it is even and does not get cool. That makes it really easy. I used a piece of 6" of channel beam and blew the heat in the channel, measuring the top with a laser thermometer (140F target) after step #37, it worked so much better. I lifted the battery w/o touching electronics, and logic board too. It was easy with separators from IFixIT and slabs from a milk carton.
I don't think anything was risky this way and should have used the beam for the 1-37 steps.
Thanks to all who contribute here.
I've just completed this fix (among 4-5 others previously). First comment here b/c this was an unusual repair. The biggest surprise about this fix (or anything to do with the internals of an iPad): the size of the screws! I'm surprised it isn't mentioned at the top, along with the PN000 driver: these things are literally the size of a grain of sand! So, taking them out is the easy part. Putting them back in is a trick. The secret: place them on the holes first, in whichever direction, then maneuver them btw fingernail and driver into correct position. You'll need something to anchor the screen in a vertical position to use both hands. Not mentioned in Jeff and AMT's comments: there is a loop in the battery contact. Not removing the logic board means you'll be breaking the loop on the old battery to remove it, and you'll need to snip the loop on the new battery to insert it. It all worked for me. It made the actual fix a fraction of the steps from the written one (just 4 screws removed), but it's risky.
I bought the $20 repair kit to go along with the lithium ion battery. The suction cup and the heating tube did not work even after multiple attempts to use the heating tube. I had to resort to a hair dryer and use a straight razor to pry the edge just enough to slip a pick in there. I did find incredible use for the magnetized screw drivers and spudgers.
I bought the iFixIt lithium ion battery replacement and once reassembling the iPad Air 2 (double checking each connection for fit and order), it still does not turn on. ugh…