
Steam Deck OLED Right Thumbstick Replacement

简介
转到步骤 1Use this guide to replace the right thumbstick in your Steam Deck OLED. The stick is part of a complete module and needs to be replaced as one unit.
Although the procedure is nearly identical, follow this guide to replace the left thumbstick.
Remember to follow general electrostatic discharge (ESD) safety procedures while repairing your device.


-
在这个步骤中使用的工具:FixMat$36.95
-
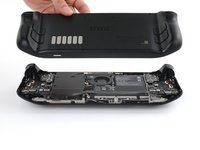
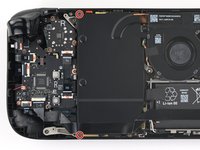
Use a T6 Torx driver to remove the eight 5.8 mm‑long screws securing the back cover.
-
-
-
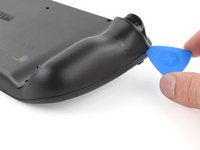
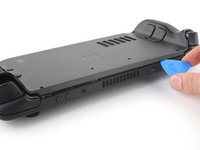
Insert an opening pick at an upward angle between the back cover and the front shell near one of the triggers.
-
Slide your pick along the edge of the handle to release the clips securing it to the front shell.
-
-
-
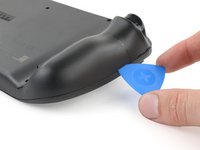
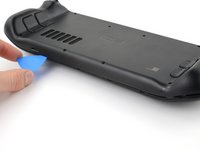
Reinsert your pick and slide it along the top and bottom edges until the back cover feels loose.
-
-
-
-
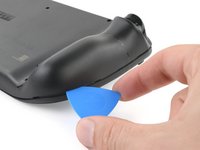
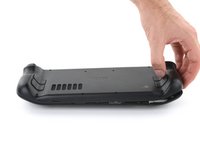
Grip the unclipped handle and pull it away from the front shell to release the remaining clips.
-
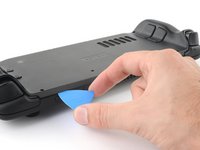
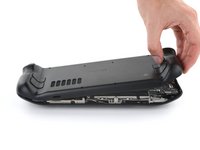
Remove the back cover.
-
-
-
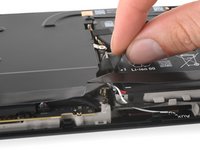
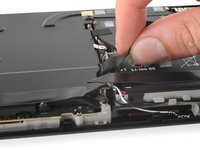
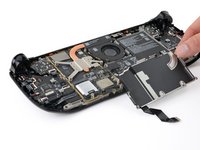
Grip the battery cable pull tab, located to the left of the battery.
-
Firmly pull the battery cable straight away from the motherboard shield (toward the battery) to disconnect it.
-
-
-
During disassembly, skip the next three steps.
-
Reinstall the two 3.8 mm‑long screws to secure the motherboard shield.
-
Reconnect the interconnect cable ZIF connector.
-
-
-
Use the flat end of a spudger to slide the battery connector into its socket on the motherboard.
-
-
-
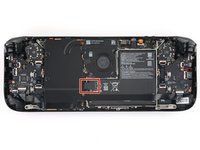
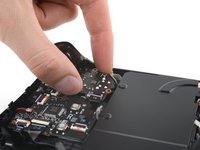
Use your T6 Torx driver to remove the two 3.8 mm‑long screws securing the motherboard shield.
-
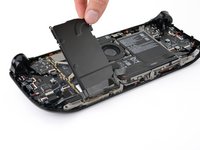
Lift the top edge of the motherboard shield up and flip it over the bottom edge of the frame, away from the motherboard.
-
-
在这个步骤中使用的工具:Tweezers$4.99
-
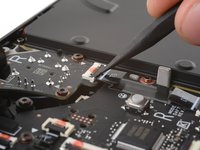
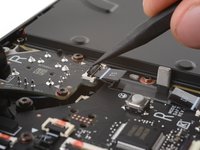
Use the point of a spudger to flip up the small locking flap on the right thumbstick ZIF connector.
-
Use tweezers or your fingers to grip the cable's pull tab and slide the connector straight out of its socket to disconnect it.
-
-
-
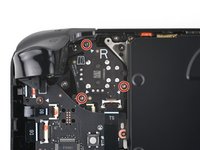
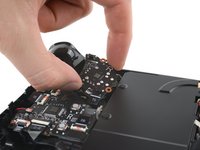
Use your T6 Torx driver to remove the three 5.9 mm‑long screws securing the right thumbstick.
-
-
-
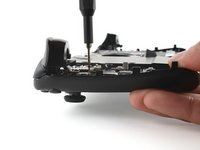
Grip the edges of the thumbstick board and rotate it clockwise to clear the trigger.
-
Remove the thumbstick.
-


To reassemble your device, follow these instructions in reverse order.
Take your e-waste to an R2 or e-Stewards certified recycler.
Repair didn’t go as planned? Try some basic troubleshooting, or ask our Steam Deck OLED answers community for help.
To reassemble your device, follow these instructions in reverse order.
Take your e-waste to an R2 or e-Stewards certified recycler.
Repair didn’t go as planned? Try some basic troubleshooting, or ask our Steam Deck OLED answers community for help.
4等其他人完成本指南。

团队

4条评论
Hi there, can the thumbstick modules from the LCD model be used in the OLED? I'm not seeing a listing on ifixit's website for OLED specific thumbstick modules.
I have the Gulikit joystick modules from the 1st gen SD and although the mounting locations are the same the flexible tape wiring harness is wider on the 2nd gen OLED SD. Another issue will/would be, is if you have a 2nd gen limited SD with the red accents it appears you most likely will have to desolder/solder a single wire for each unit in order to reuse those red shields with the newer sticks. Not a horrible task but one to beware of.
1. I'd wait till someone pops a drop in replacement like they did for the 1st gen.
2. Keep an eye out to see if they make it in the color you're replacing.
Hope this helps.
@molsen No they can't, totally different daughterboard (annoyingly). There seems to be a around 3 (maybe 4) different versions of the right and left thumb stick. The oled version the daughterboard also contains the switch for L1/R1, the LCD version doesn't have this switch on that board.
The models seem to start MHDA, MEDA, and MLCB (and maybe an MECB)
Are the Steamdeck OLED replacement joysticks featured with square or round inputs? Many aftermarket hall effect joysticks have square inputs which leads to diagonal input in some instances.
Also, are these hall effect joysticks?
J Sartrean - 回复