当前版本的文档还未经巡查,您可以查看最新的已查核版本。
你所需要的
-
这个步骤还没有翻译 帮忙翻译一下
-
Heat an iOpener and apply it to the left edge of the phone for two minutes.
-
As you wait, take note of the the following areas:
-
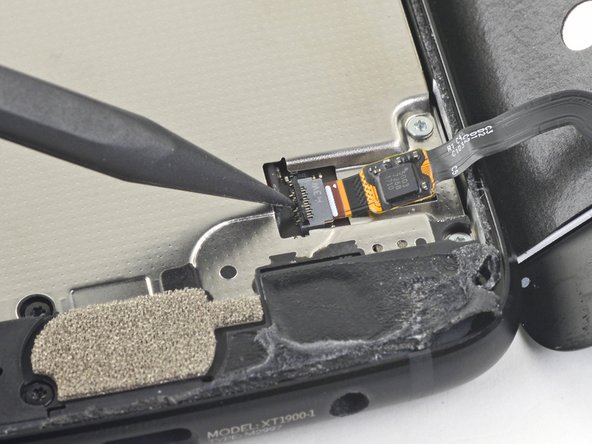
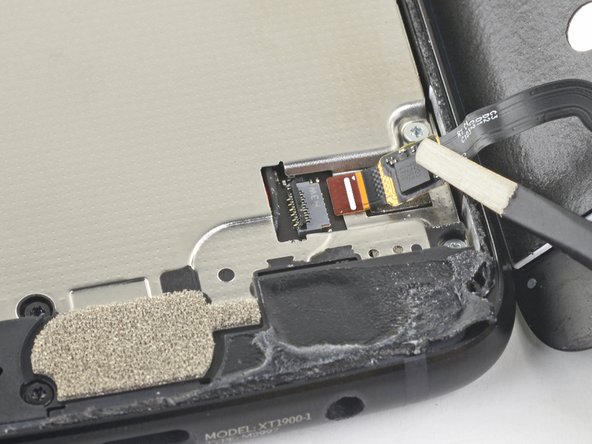
Display cable—be careful not to slice too deeply near the edge here, or you may damage the display cable.
-
Fingerprint sensor cable—be careful not to slice too deeply near the edge here, or you may damage the fingerprint sensor cable.
-
-
这个步骤还没有翻译 帮忙翻译一下
-
Apply a suction cup to the screen, as close to the heated edge as possible.
-
Pull on the suction cup with strong, steady force to create a gap in the seam.
-
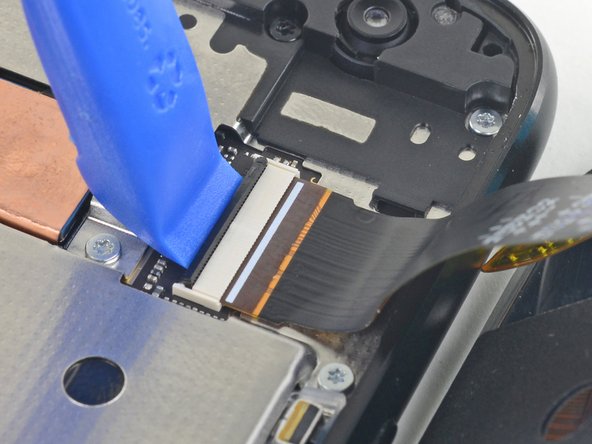
Insert the point of an opening pick into the gap.
On the left side it is a very thin strip of adhesive—but there are other places where there is alot more adhesive—If you look at the black part of the new adhesive-if you have the phone specific adhesive thing—you will get an idea what you might be trying to push through at any given spot on the phone. orient the new one over the old screen to line up holes etc-to understand where the adhesive is.
-
-
-
这个步骤还没有翻译 帮忙翻译一下
-
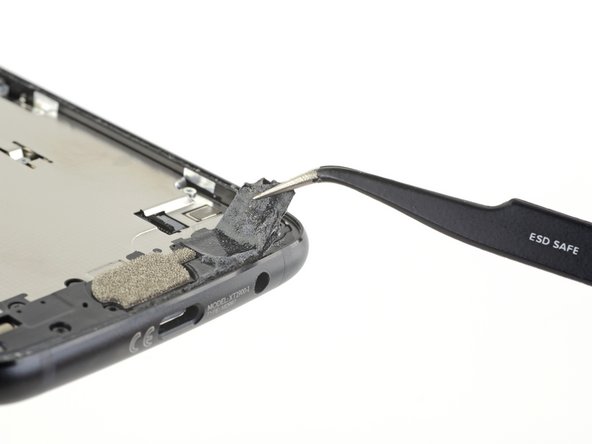
Remove the screen.
I found that the subsequent steps will be smoother if you spend a little time at this point cleaning out the old adhesive pieces. The picture above shows pulling off some of the old glue strips, but the bullet points don’t mention it. Removing the mid-frame and other steps is easier if the old adhesive has been cleaned out.
Good point Gordon! I’ve adjusted the wording on the second bullet to point people in the right direction.
I’d already used the free form adhesives to glue the screen back on before I realized the kit came with a ready-to-go adhesive sheet. It’d be nice if this were mentioned (or pictured) here.
The provided replacement screen does not have the black plastic film w/ 5 x 3 holes in it
photo to illustrate: top is replacement screen. Bottom is old screen, w/ black film w/ holes
Not sure how to proceed here.
-
-
这个步骤还没有翻译 帮忙翻译一下
-
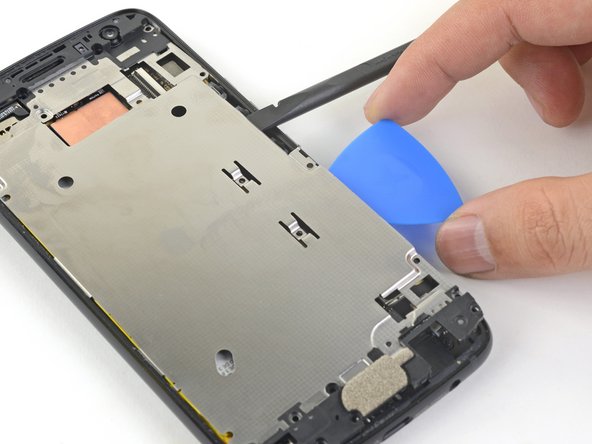
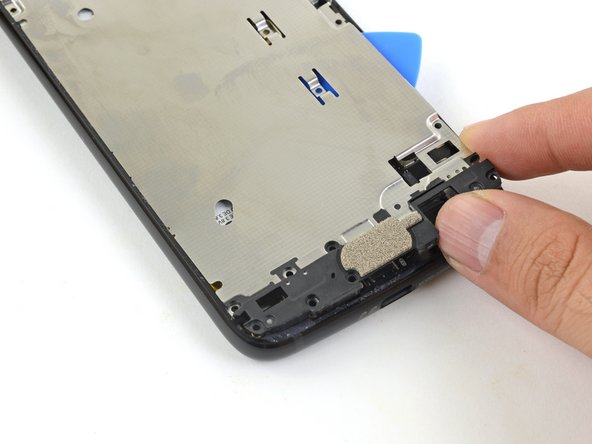
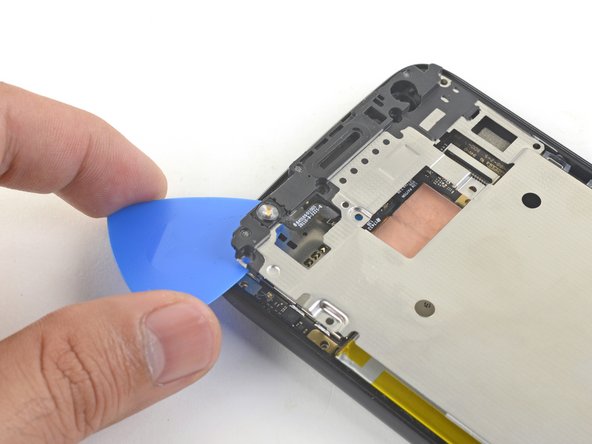
Remove the following twenty screws securing the midframe:
-
Eleven silver 2.7 mm-long T3 screws
-
Nine black 3.6 mm-long T4 screws
-
The midframe is still held in place by clips.
For some reason, my brand new T4 screwdriver didn’t fit the 9 designated T4 screws very well—it seemed a little large. So I carefully tried the T3 screwdriver and it worked perfectly! Not sure if the head has changed sizes on those longer screws in some assemblies….
Hi Kenneth! I’m glad the T3 worked! There have been many instances with Moto phones where the screw tolerances are quite variable—they normally shows up in the T3-T4 range.
-
-
这个步骤还没有翻译 帮忙翻译一下
-
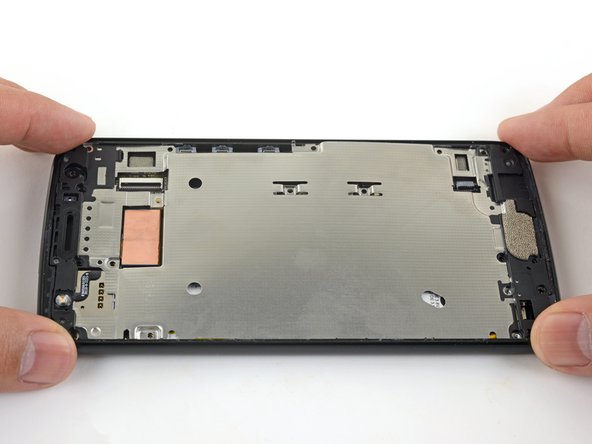
Remove the midframe.
-
Align the the midframe's top edge to the phone and press it into position.
-
Shift the bottom edge slightly to the left, to maneuver the left metal midframe clip underneath the phone edge.
-
Press the midframe's bottom edge into position.
-
-
这个步骤还没有翻译 帮忙翻译一下
After disconnecting the battery, there is 1x T3 (near the camera) and 2xT4 screws (near the headphone jack and usb port) that had to be removed, then the camera clips flipped up, then that board carefully removed (after ejecting the sim/memory cards) before being able to get to the two screws for the camera module.
For reassembly, the camera cables had to be carefully held back while the board was repositioned.
Hi Steve,
Thanks for the feedback! What you are describing sounds like the steps found in this guide. Can you see if anything is missing there? Thanks!
Hi Arthur, I am doing this repair right now, and yes, this guide should have steps 21-25 from the linked guide inserted after step 20. Getting to the Rear Camera requires removing the motherboard, and indeed you can see in the pictures in what is currently Step 21 of this guide that the motherboard is removed (note the missing large silver rectangle in the upper-left, which is the SIM card tray, for instance, or any electronics in the upper-right)
Although notably, the vibrating motor doesn’t have to be unplugged from the socket, just removed from the case along with the motherboard. I advise that, as the motor’s connection is very small and fragile.
-
这个步骤还没有翻译 帮忙翻译一下
-
Remove the battery.
-
Remove all traces of adhesive from the battery well.
-
Apply stretch release adhesive strips, double-sided tape, or pre-cut adhesive strips.
-
Press the battery firmly in place for thirty seconds.
-


17等其他人完成本指南。


4条评论
I want to change my motorola x4 mobile's battery. Where should I go to get the better service (means the original battery and the best service centre)?
My battery keeps overheating and drains quickly. I did everything to close background apps to no avail. Does that mean I need new battery?
Hi Traude,
It may be that your battery is damaged and is has a minor internal short. This can cause the battery to drain and overheat. Replacing the battery would be the first thing I’d try. However, it may also be a motherboard problem.
Complete novice. Getting old screen off was time consuming! I was too afraid of ruining something by overheating. Spent many hours trying to use iopener, afraid to risk bursting it in microwave. Read many comments in the iopener use guide; a guy said to get the screen temp up to 120-130F. Saw several youtube videos esp. Witrig one on replacing Moto x4 screen, they used heat gun 100C=212F so I got braver and put my phone on kitchen hot plate. Measured temperature by laying stem of candy thermometer on the surface. When hot plate got to 150-160F I finally got a pick under phone ‘s glass edge & got the screen off. Hot plate temp. not stable, guess phone was there a few minutes. May have damaged display but was replacing it anyway. Now new screen installed everything working properly! I’m not sure I was using the suction cup when I finally was able to push the pick under the edge.
Nahariyah Mosenkis - 回复