跳转到主内容
加入维修社区 - 创建账户

此翻译由机器生成,尚未经过人工审核。 会说这种语言吗? 查看评论

Motorola Droid Turbo 2 电池更换

你所需要的

    1. Motorola Droid Turbo 2 电池更换, SIM 卡托拆卸: 步骤 1 中的图像 1,3 Motorola Droid Turbo 2 电池更换, SIM 卡托拆卸: 步骤 1 中的图像 2,3 Motorola Droid Turbo 2 电池更换, SIM 卡托拆卸: 步骤 1 中的图像 3,3
      • 开始维修前,请先关闭手机。

      • 将 SIM 卡顶针、SIM 卡弹出工具或回形针插入 SIM 卡托的小孔中。

      • 按压以弹出卡托。

      • 将 SIM 卡托组件从手机中取出。

      询问修复机器人

      添加评论

    2. Motorola Droid Turbo 2 电池更换: 步骤 2 中的图像 1,1
      • 加热 iOpener,并将其放置在手机上边缘处一分钟。

      • 也可以使用吹风机、热风枪或加热板,但请注意不要让手机过热——显示屏和内置电池都很容易受热损坏。

      添加评论

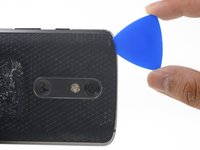
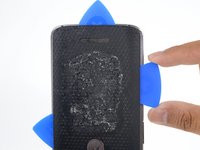
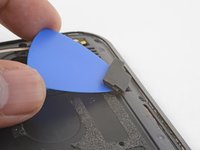
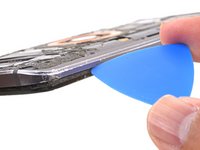
    3. Motorola Droid Turbo 2 电池更换: 步骤 3 中的图像 1,2 Motorola Droid Turbo 2 电池更换: 步骤 3 中的图像 2,2
      • 倾斜开启撬片并用力按压,使其滑入后盖下方。

      • 根据手机的使用年限,此操作可能会有难度。使用 iOpener 额外加热会有帮助。你可以 小心地用金属撬棒撬开 以留出缝隙,方便插入开启撬片。

      添加评论

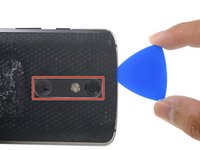
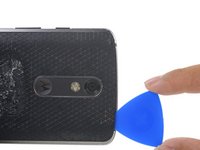
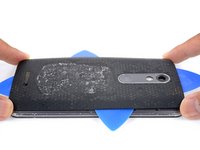
    4. Motorola Droid Turbo 2 电池更换: 步骤 4 中的图像 1,3 Motorola Droid Turbo 2 电池更换: 步骤 4 中的图像 2,3 Motorola Droid Turbo 2 电池更换: 步骤 4 中的图像 3,3
      • 沿着手机顶部边缘滑动开启撬片,以切断密封胶。

      • 使用开启撬片松开更深处的区域,但要避免切穿摄像头边框区域。

      添加评论

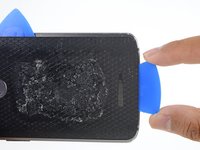
    5. Motorola Droid Turbo 2 电池更换: 步骤 5 中的图像 1,3 Motorola Droid Turbo 2 电池更换: 步骤 5 中的图像 2,3 Motorola Droid Turbo 2 电池更换: 步骤 5 中的图像 3,3
      • 对剩下的三侧重复进行 iOpener 加热和切割操作。

      • 请确保切割到更深的区域,因为后盖通过大面积的胶水固定。

      询问修复机器人
      添加评论

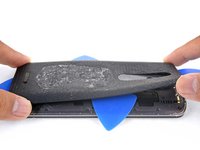
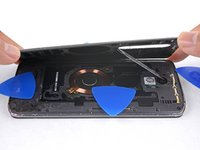
    6. Motorola Droid Turbo 2 电池更换: 步骤 6 中的图像 1,3 Motorola Droid Turbo 2 电池更换: 步骤 6 中的图像 2,3 Motorola Droid Turbo 2 电池更换: 步骤 6 中的图像 3,3
      • 切开胶粘剂后,慢慢将后盖从中框上揭下。

      • 取下后盖。

      • 重新组装时,请参照这份 后盖胶条指南 正确粘贴预切好的胶条。

      添加评论

    7. Motorola Droid Turbo 2 电池更换: 步骤 7 中的图像 1,3 Motorola Droid Turbo 2 电池更换: 步骤 7 中的图像 2,3 Motorola Droid Turbo 2 电池更换: 步骤 7 中的图像 3,3
      • 将开启撬片插入闪光灯连接器橡胶盖板下方并向前撬起,将其拆下。

      • 要重新安装盖板,对齐盖板并用手指将其向前推入到位。

      添加评论

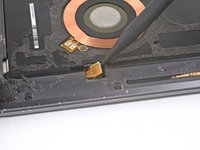
    8. Motorola Droid Turbo 2 电池更换: 步骤 8 中的图像 1,3 Motorola Droid Turbo 2 电池更换: 步骤 8 中的图像 2,3 Motorola Droid Turbo 2 电池更换: 步骤 8 中的图像 3,3
      • 用撬棒的尖端撬起并取下线圈连接器橡胶盖板。

      • 若要重新安装盖板,请对齐盖板,然后用手指将其向前推入到位。

      添加评论

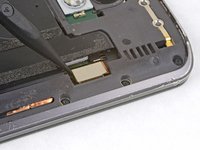
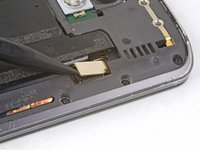
    9. Motorola Droid Turbo 2 电池更换: 步骤 9 中的图像 1,2 Motorola Droid Turbo 2 电池更换: 步骤 9 中的图像 2,2
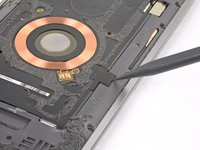
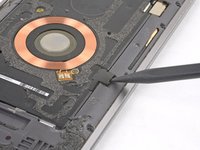
      • 用撬棒的尖端撬起并断开闪光灯连接器。

      • 要重新连接像这样的 按压式连接器,请小心对齐并按压一侧,直到听到咔哒声就位,然后在另一侧重复此操作。不要按压中间。如果连接器未对齐,针脚可能会弯曲,造成永久性损坏。

      询问修复机器人
      添加评论

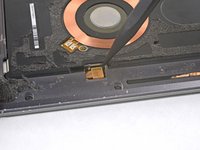
    10. Motorola Droid Turbo 2 电池更换: 步骤 10 中的图像 1,2 Motorola Droid Turbo 2 电池更换: 步骤 10 中的图像 2,2
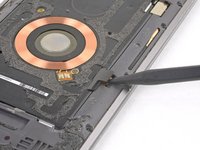
      • 使用撬棒的尖端撬起并断开无线充电线圈连接器。

      询问修复机器人
      添加评论

    11. Motorola Droid Turbo 2 电池更换: 步骤 11 中的图像 1,1
      • 拧下以下固定中框的 T3 螺丝:

      • 13 颗 3.1 mm 黑色螺丝

      • 4 颗 4.3 mm 银色螺丝

      • 由于螺丝和批头存在差异,使用 T4 螺丝刀可能会更容易。合适的批头应能完全放入螺丝头中,并感觉“稍微”有些松动。批头不应感觉像卡在螺丝头里一样。

      添加评论

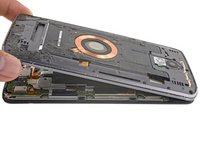
    12. Motorola Droid Turbo 2 电池更换, 松开中框: 步骤 12 中的图像 1,2 Motorola Droid Turbo 2 电池更换, 松开中框: 步骤 12 中的图像 2,2
      • 沿中框接缝处插入开启撬片,并轻轻转动,以将中框从手机上松开。

      询问修复机器人

      添加评论

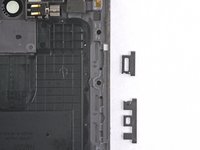
    13. Motorola Droid Turbo 2 电池更换, 拆下中框: 步骤 13 中的图像 1,2 Motorola Droid Turbo 2 电池更换, 拆下中框: 步骤 13 中的图像 2,2
      • 将中框从手机上拆下。

      • 你可以用胶带粘住侧边按键,防止它们在维修过程中掉落。

      • 如果按键从中框中掉出,请在重新安装中框前,按图示方向将它们装回。

      添加评论

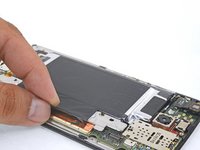
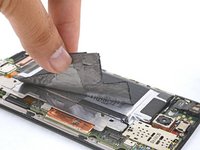
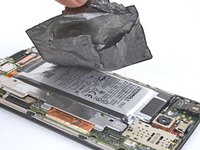
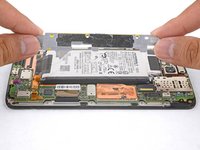
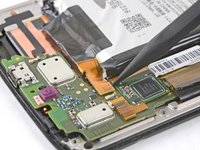
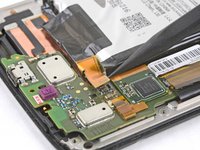
    1. Motorola Droid Turbo 2 电池更换, 电池: 步骤 14 中的图像 1,3 Motorola Droid Turbo 2 电池更换, 电池: 步骤 14 中的图像 2,3 Motorola Droid Turbo 2 电池更换, 电池: 步骤 14 中的图像 3,3
      • 用手指小心地从电池中取出黑色胶带。

      • 尽量不要撕破胶带,因为您将在新电池上使用它。

      添加评论

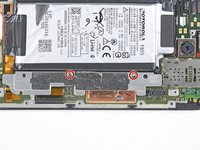
    2. Motorola Droid Turbo 2 电池更换: 步骤 15 中的图像 1,2 Motorola Droid Turbo 2 电池更换: 步骤 15 中的图像 2,2
      • 卸下两颗固定电池旁金属支架的4.2 mm T3螺丝。

      • 取下金属支架。

      添加评论

    3. Motorola Droid Turbo 2 电池更换: 步骤 16 中的图像 1,2 Motorola Droid Turbo 2 电池更换: 步骤 16 中的图像 2,2
      • 使用撬棒的尖端撬起并断开电池组连接器。

      添加评论

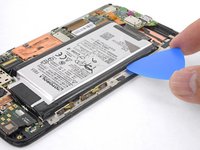
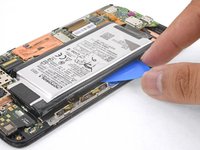
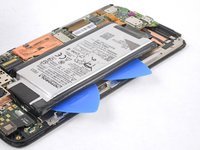
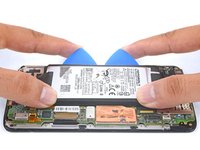
    4. Motorola Droid Turbo 2 电池更换: 步骤 17 中的图像 1,3 Motorola Droid Turbo 2 电池更换: 步骤 17 中的图像 2,3 Motorola Droid Turbo 2 电池更换: 步骤 17 中的图像 3,3
      • 从远离主板的一侧,将开启撬片倾斜插入电池长边下方。

      • 在第一个开启撬片旁边,沿着同一电池边缘插入第二个开启撬片。

      添加评论

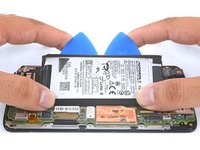
    5. Motorola Droid Turbo 2 电池更换: 步骤 18 中的图像 1,2 Motorola Droid Turbo 2 电池更换: 步骤 18 中的图像 2,2
      • 对撬片施加稳定、持续的撬动压力,以松开电池与中框的连接。

      • 随着电池从中框上松开,向内移动撬片并继续向上撬动。

      • 电池通过强力双面胶固定在中框上。为了辅助松开电池,可在电池下方涂抹少量高浓度(90% 或更高)异丙醇,以帮助溶解黏胶。

      • 不要让电池变形或刺穿电池,否则可能会泄漏危险化学物质或起火。

      添加评论

    6. Motorola Droid Turbo 2 电池更换, 拆卸电池: 步骤 19 中的图像 1,1
      在这个步骤中使用的工具:
      Tesa 61395 Tape
      $8.95
      • 拆卸电池。

      • 切勿重新安装已损坏或变形的电池。请更换电池。

      • 安装电池时,将其放置在正确位置,使导线从靠近底部的一侧朝向主板方向引出。

      • 为了方便对齐,在将电池粘好之前,请先将电池“暂时”连接到主板上。在继续后续重新组装步骤前,请先断开电池连接。

      • 清理掉所有可能妨碍电池与中框平齐放置的残余胶水。使用电池套件中附带的几条胶条或一些双面胶将电池固定在中框上。

      添加评论

结论

要重新组装设备,请按相反顺序执行这些说明。

请将你的电子废弃物交给R2 或 e-Stewards 认证回收机构

维修过程不如预期?请查看我们的 Motorola Moto Droid Turbo 2 Answers 社区以获取故障排除帮助。

取消:我没有完成这个指南。

78等其他人完成本指南。

由衷感谢以下译者:

en zh

100%

这些译者帮助我们修补全世界! 您也想加入吗?
开始翻译 ›

Arthur Shi

于01/03/18注册

345,180 声望

创作了915篇指南

团队

iFixit iFixit 的会员

Staff

123 名成员

创作了57,422篇指南

30指南评论

Despite being careful, I lost one screw that seemingly disappeared as I tried to place it back. Even a rare earth magnet didn't find it. It would be nice to have spare screws.

Bill Koonce - 回复 分享

From whom would get those?

Dan Lo Fat - 回复 分享

Your neighbors Turbo 2…it would've up to you whether or not to tell the neighbors that you got them, lol. Everyone seems to have a junk phone around, open it up and find the closest matching one….. I be yet to find anyone that sells spare phone

Jack Gaites - 回复 分享

Replaced the battery, but now the display is pixelated on the right side. Any ideas? Need help ASAP.

Cameron Barringer - 回复 分享

The only thing that got me hung up on this was the volume button reassembly. I can't seem to get the volume button to work properly again.

Richard Drawdy - 回复 分享

添加评论

浏览统计数据:

过去 24 小时: 2

过去 7 天: 15

过去 30 天: 55

总计 70,725