简介
Use this guide to replace a worn-out or dead battery on a Microsoft Surface Laptop 3 (15").
For your safety, discharge the battery below 25% before disassembling your laptop. This reduces the risk of a dangerous thermal event if the battery is accidentally damaged during the repair. If your battery is swollen, take appropriate precautions.
You'll need replacement adhesive for the battery in order to complete this repair. Strong double-sided tape like Tesa 61395 is recommended.
你所需要的
-
-
Flip the laptop over and place it on your work surface, feet facing up.
-
-
-
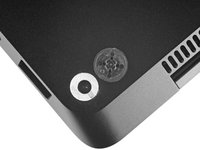
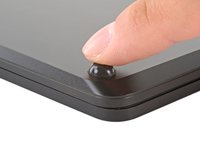
Each foot has a hidden indent that will simplify removal.
-
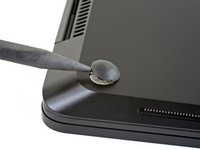
To make sure the spudger is in the indent, insert it at the nearest long edge, pushing parallel to the short edges of the laptop, as shown.
-
-
-
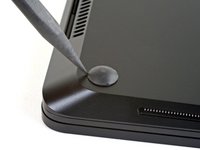
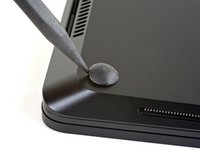
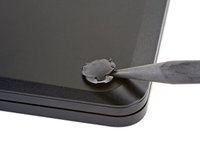
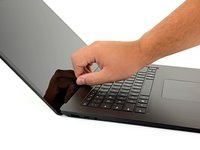
Insert the pointed end of a spudger underneath one of the two rear feet, at its rear edge.
-
Push the spudger underneath the foot and pry up to release it.
-
Repeat to remove the second rear foot.
-
-
-
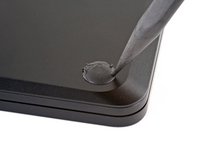
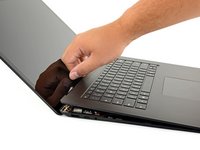
Insert the pointed end of a spudger underneath one of the two front feet, at its front edge.
-
Push the spudger underneath the foot and pry up to release it.
-
Repeat to remove the second front foot.
-
-
-
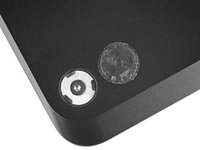
Note that the front and rear feet are different.
-
Note that the front feet are directional and only clip in one way.
-
-
-
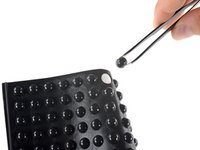
Peel a pad away from its backing, align it over a foot cavity, and press to secure.
-
-
在这个步骤中使用的工具:Magnetic Project Mat$19.95
-
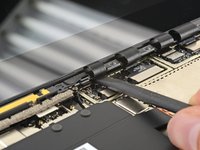
Use a T5 Torx driver to remove the four 3 mm screws in the foot cavities securing the upper case to the device.
-
-
-
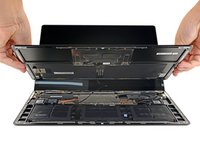
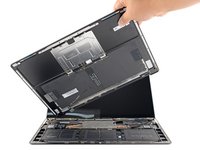
Grip the top edge of upper case above the keyboard and lift straight up to release it.
-
Lift the front edge of the upper case up and away from the laptop, taking care to not strain the keyboard and touchpad ribbon cable underneath.
-
-
-
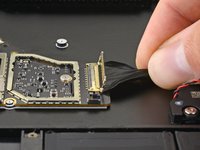
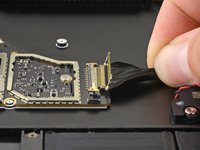
Insert the flat end of a spudger underneath one edge of the ribbon cable connector, and pry up to release it.
-
Remove the ribbon cable from the motherboard.
-
-
-
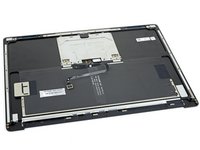
Remove the upper case.
-
Set the upper case onto a clean surface, keyboard-side down.
-
-
-
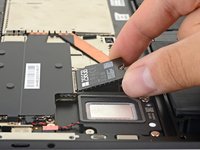
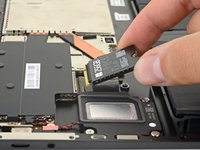
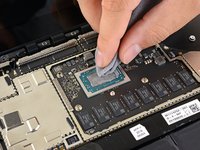
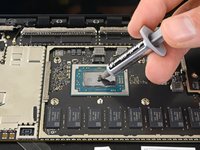
Grip the end of the SSD and pull it away from its board connector to remove it.
-
-
在这个步骤中使用的工具:Tweezers$4.99
-
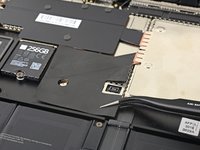
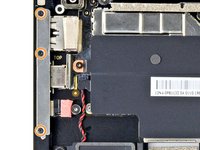
Use a pair of tweezers to remove the two pieces of black tape covering the bottom left and bottom right corners of the motherboard.
-
-
-
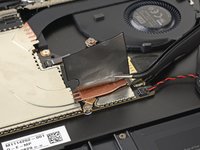
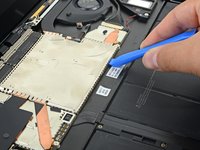
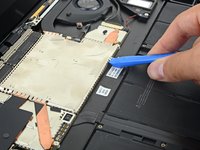
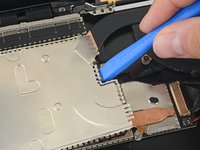
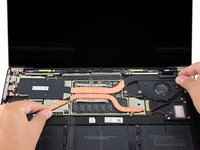
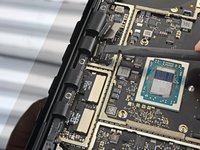
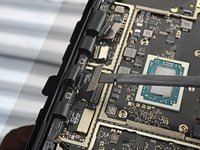
Use an opening tool to pry up the front edge of the metal shield covering the heatsink.
-
-
-
-
Use the pointed end of a spudger to flip up the locking flap on the fan cable's ZIF connector.
-
Use a pair of tweezers to pull the fan cable straight out of the connector.
-
-
-
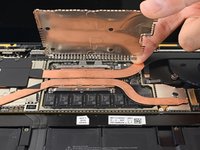
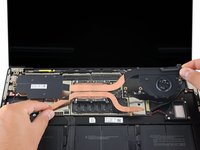
Use a T3 Torx driver to remove the ten screws securing the heatsink:
-
Two 2.5 mm screws
-
Three 2.0 mm screws
-
One 3.0 mm screw
-
Two 4.1 mm screws
-
Two 3.4 mm screws
-
-
-
Align the heatsink with the centering peg on the motherboard.
-
Tighten the four CPU tension screws in an "X" pattern.
-
-
-
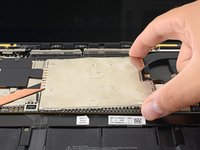
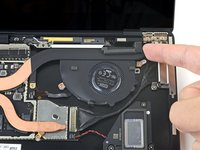
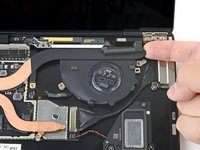
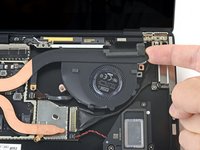
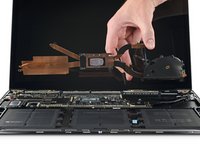
Use the tip of your finger to lift the far right edge of the heatsink up and off of the small alignment peg near the right side of the fan on the lower case.
-
Once the heatsink has cleared the peg, lightly pull the right edge towards the front of the device.
-
-
-
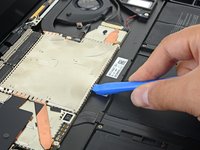
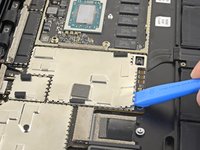
Use an opening tool to pry up an edge of the metal shield covering the right side of the motherboard.
-
Work your way around the perimeter of the shield, prying up intermittently, until you can remove it completely.
-
Remove the shield.
-
-
-
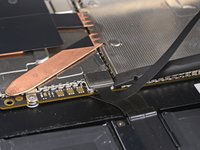
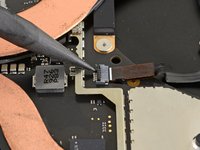
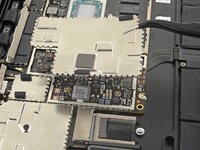
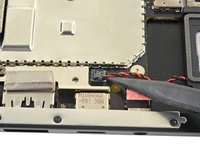
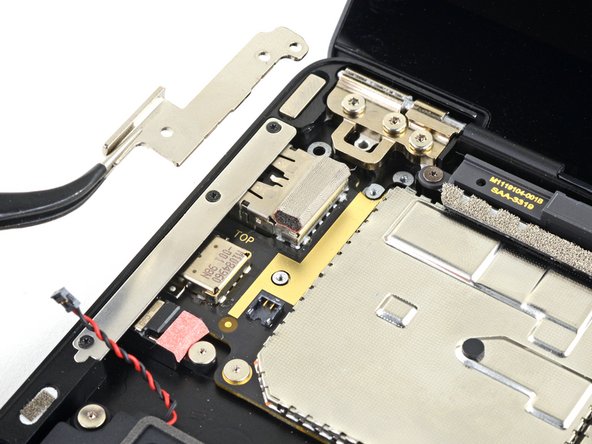
Use the pointed end of a spudger to lift and disconnect the right speaker wire from its connector on the motherboard.
-
-
-
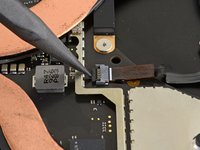
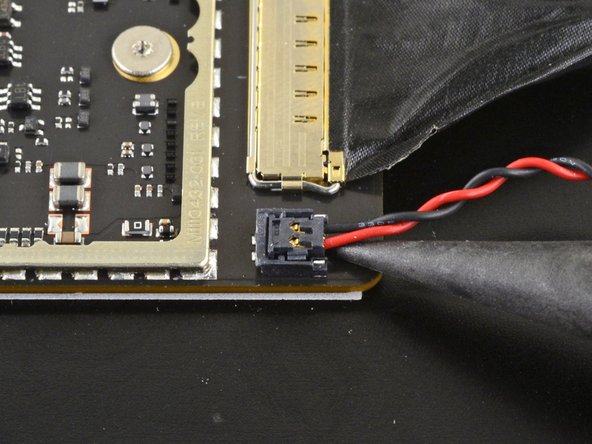
Use an opening tool to flip open the gold locking arm on the Surface Connect port's motherboard connector.
-
-
-
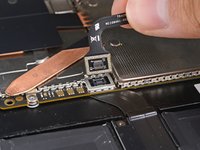
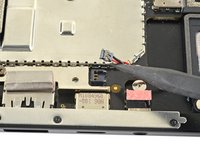
Use the pointed end of a spudger to lift and disconnect the left speaker wire from its connector on the motherboard.
-
-
-
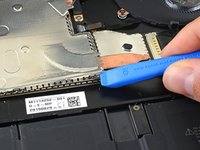
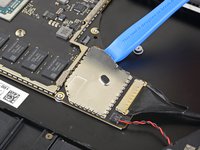
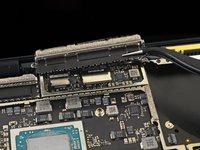
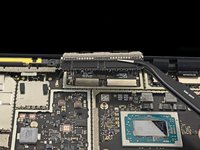
Use an opening tool to pry up the black shield covering the right bank of display connectors.
-
Repeat at different points around the shield until it becomes loose.
-
Remove the shield.
-
-
-
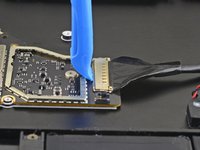
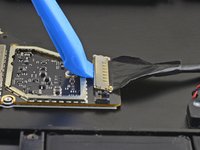
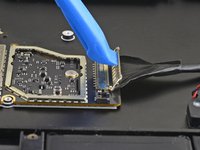
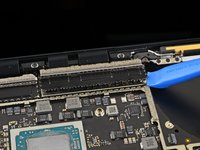
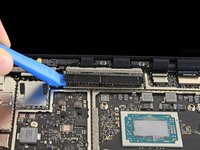
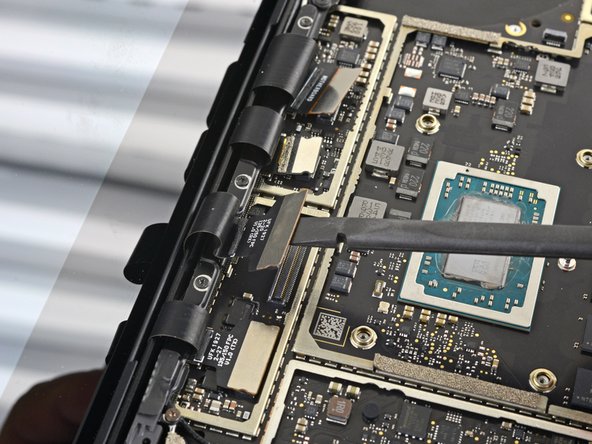
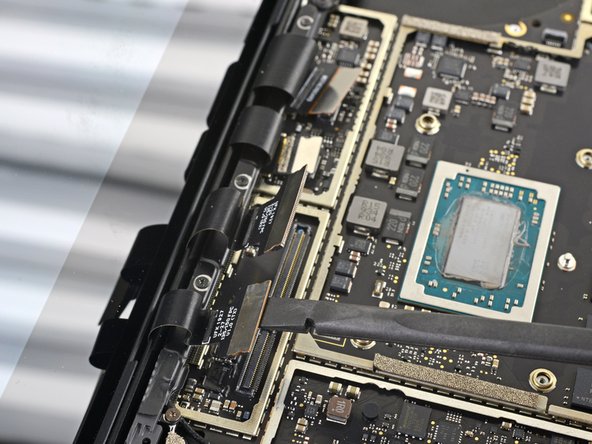
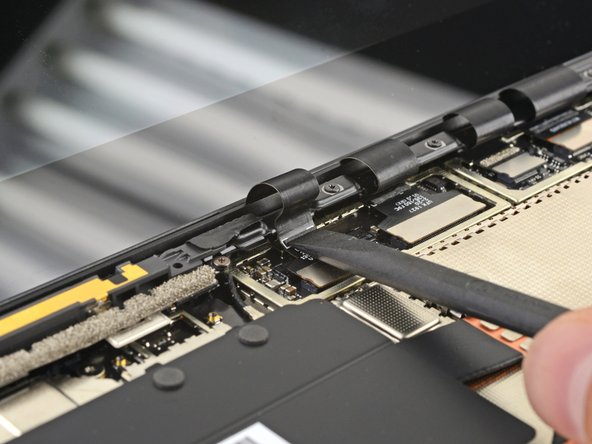
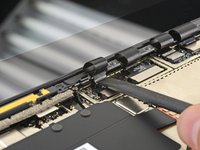
Use the flat end of a spudger to pry the first display cable up and out of its socket on the motherboard to disconnect it.
-
-
在这个步骤中使用的工具:Tweezers$4.99
-
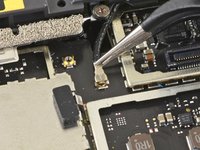
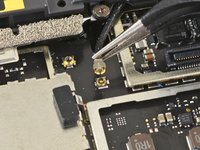
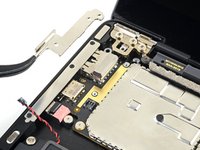
Use a pair of tweezers to grip the antenna cable close to its base.
-
Pull straight up to disconnect the cable.
-
-
-
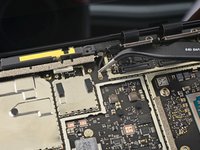
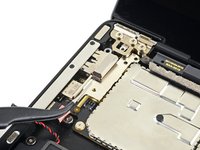
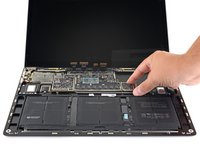
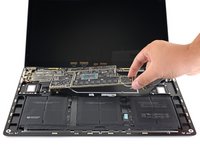
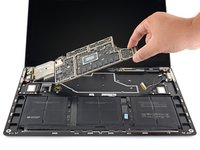
Use a T3 Torx driver to remove the two 3 mm screws securing the motherboard bracket.
-
-
-
Use a T3 Torx driver to remove the six 2 mm screws securing the motherboard.
-
Optionally, to simplify motherboard removal, use a T3 Torx driver to remove the three screws securing the port bracket, then remove the bracket.
-
-
-
Four display cables
-
Antenna cable
-
Left speaker cable
-
Surface Connect cable
-
Right speaker cable
-
-
-
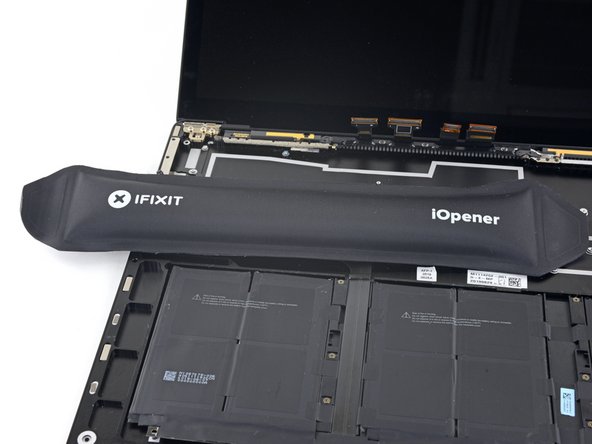
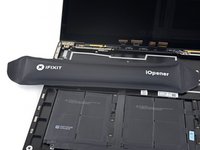
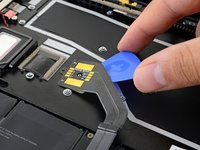
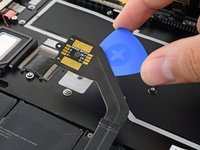
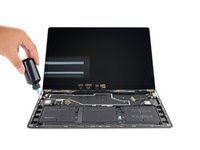
Heat an iOpener and lay it on top of the battery contact cable for about a minute, in order to soften the adhesive securing it to the case.
-
-
-
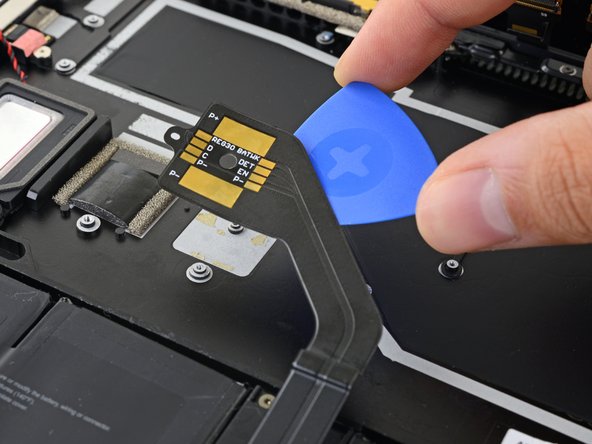
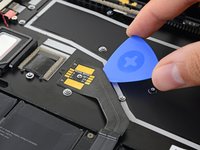
Slide an opening pick underneath the battery contact cable to separate it from the case.
-
-
-
Use a T3 Torx driver to remove the six 2.7 mm screws securing the battery to the case.
-
-
-
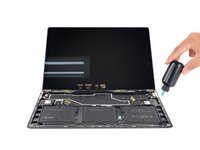
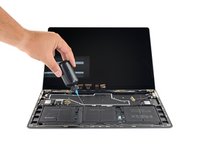
Apply adhesive remover or high-concentration (90% or higher) isopropyl alcohol to the top edges of all three battery cell groups.
-
Wait 2–3 minutes for the adhesive remover to penetrate and soften the adhesive before you proceed to the next step.
-
-
在这个步骤中使用的工具:Plastic Cards$2.99
-
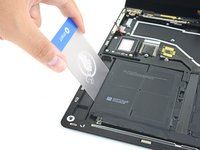
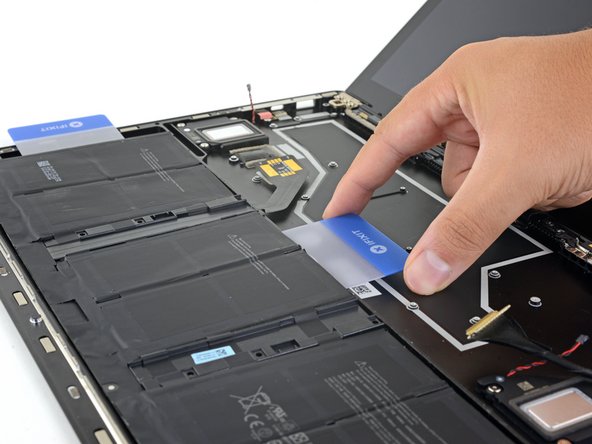
Slide a plastic card underneath the far left battery cell group to slice through the adhesive holding it to the case.
-
Wiggle the card from side to side as you insert it under the battery cells to fully separate all adhesive holding them in place.
-
Leave the plastic card temporarily underneath the cell to prevent it from re-adhering while you continue.
-
-
-
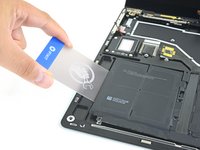
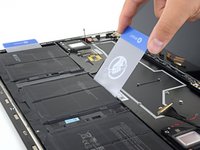
Slide the card out from under the middle cell group.
-
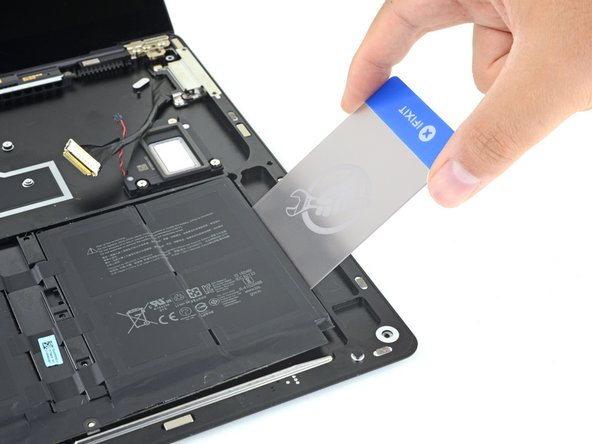
Slide the plastic card underneath the far right battery cell group to slice through the adhesive holding it to the case.
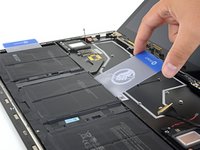
-
Wiggle the card from side to side as you insert it under the battery cells to fully separate all adhesive holding them in place.
-
Leave the plastic card temporarily underneath the right cell group to prevent it from re-adhering while you continue.
-
-
在这个步骤中使用的工具:Tesa 61395 Tape$12.99
-
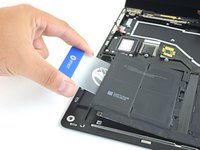
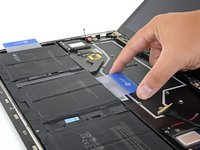
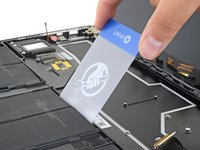
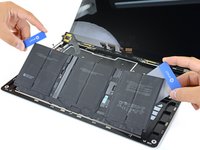
Use both plastic cards to lift the entire battery assembly up and away from the case.
-
Remove the battery.
-
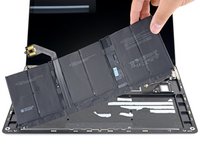
If your battery came with adhesive pre-installed on the bottom, flip it over and carefully peel away the liner to expose the adhesive. If your battery did not come with adhesive, apply a thin double-sided adhesive tape such as Tesa 61395 to keep your battery in place.
-
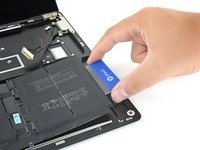
Carefully position the battery and set it into place. Press and hold each cell group firmly for 5–10 seconds to secure it to the lower case.
-


For optimal performance, calibrate your newly installed battery after completing this guide.
Compare your new replacement part to the original part—you may need to transfer remaining components or remove adhesive backings from the new part before installing.
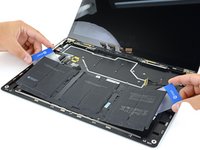
To reassemble your device, follow the above steps in reverse order.
Take your e-waste to an R2 or e-Stewards certified recycler.
Repair didn’t go as planned? Try some basic troubleshooting or search our Answers community for help.
For optimal performance, calibrate your newly installed battery after completing this guide.
Compare your new replacement part to the original part—you may need to transfer remaining components or remove adhesive backings from the new part before installing.
To reassemble your device, follow the above steps in reverse order.
Take your e-waste to an R2 or e-Stewards certified recycler.
Repair didn’t go as planned? Try some basic troubleshooting or search our Answers community for help.
4等其他人完成本指南。


6条评论
Wow, that was hard. but I did it and it worked. however. a couple of things. two of the mounting holes in the ifixit battery do not line up with the holes in the case - not a big deal, as the adhesive does most of the holding. And, two elongated dump-bell-shaped washers/bushings fell out somewhere when taking the motherboard out. I just found them lying in the case. I have no idea where they go (i can send an image of them).. like i said, it appears to work without them -- for now.
R
I'll check on those battery mounting holes! Those two washers are mentioned in step 40. They live under the motherboard.
Got through that. The author did a great job with the instructions, thank you!
The laptop powers up and operates just fine but is not charging. We have ordered another Surface 127W power supply but does anyone know of any issues with the Microsoft power supply not being happy with the replacement battery?
Vous avez obtenu une réponse par ailleurs ?
Wow, what a job... Should probably have a caption saying "do not try this at home"! Amazing that Microsoft made it so extraordinarily complicated just to change the battery - obviously a design choice to get people to buy new machines rather than replacing batteries! This sort of design should be prohibited by law. Be warned, removing the various shields is awful, and prising the battery cells out with isopropanol is messy. However, with the fantastic instructions here, and care and perseverance it is certainly possible. Only additional note I would add is to take precautions for static. Finally completed at 3 in the morning and the laptop is back to together, runs and charges. Thanks for the guidance iFixit :)