跳转到主内容
Meta Quest 2 Controller Thumbgrip Replacement

Meta Quest 2 Controller Thumbgrip Replacement

Arthur Shi

Arthur Shi

最后更新于 January 25, 2024

10 - 20 分钟
中等
特色指南

This guide shows how to remove and replace a worn out thumbgrip on your Meta Quest 2 controller.

The thumbgrip is a rubbery cover and not the actual joystick module. If you're experiencing controller drift, follow this guide instead to replace the joystick module.

This guide is written with the right controller. If you're repairing the left controller, you can still use this guide, as the procedure is identical.

你所需要的

工具

查看更多...

  1. Meta Quest 2 Controller Thumbgrip Replacement, Remove the battery cover: 步骤 1 中的图像 1,3 Meta Quest 2 Controller Thumbgrip Replacement, Remove the battery cover: 步骤 1 中的图像 2,3 Meta Quest 2 Controller Thumbgrip Replacement, Remove the battery cover: 步骤 1 中的图像 3,3
    • Use your fingers to slide the battery cover down towards the strap end of the controller.

    • Remove the battery cover.

    • If you're taking the controller apart for repairs, remove the batteries in the controller.

  2. Meta Quest 2 Controller Thumbgrip Replacement, Loosen the faceplate adhesive: 步骤 2 中的图像 1,1
    • Heat an iOpener and apply it to the bottom edge of the controller faceplate for a minute.

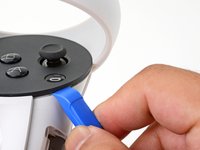
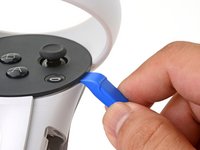
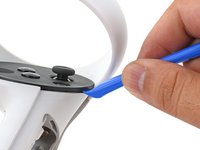
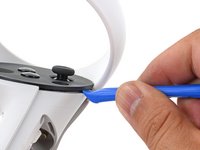
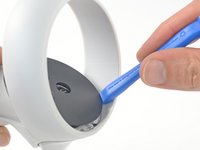
  3. Meta Quest 2 Controller Thumbgrip Replacement, Loosen the controller faceplate: 步骤 3 中的图像 1,3 Meta Quest 2 Controller Thumbgrip Replacement, Loosen the controller faceplate: 步骤 3 中的图像 2,3 Meta Quest 2 Controller Thumbgrip Replacement, Loosen the controller faceplate: 步骤 3 中的图像 3,3
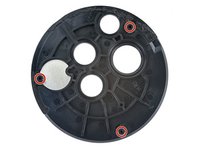
    • The controller faceplate is secured with adhesive and three friction pegs.

    • Press the edge of an opening tool into the seam between the controller faceplate and shell, near the Oculus button.

    • If you can’t get the opening tool into the seam, heat the area with an iOpener for a minute and try again.

    • Slide the opening tool to the base of the ring shell to loosen the adhesive.

  4. Meta Quest 2 Controller Thumbgrip Replacement: 步骤 4 中的图像 1,2 Meta Quest 2 Controller Thumbgrip Replacement: 步骤 4 中的图像 2,2
    • Use an opening tool to pry up on the seam to loosen the first friction peg.

  5. Meta Quest 2 Controller Thumbgrip Replacement: 步骤 5 中的图像 1,2 Meta Quest 2 Controller Thumbgrip Replacement: 步骤 5 中的图像 2,2
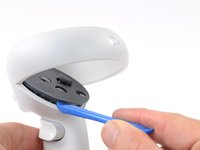
    • Continue prying around the entire faceplate to separate the remaining friction pegs and adhesive.

    • If you're having trouble, apply a heated iOpener to the faceplate for a minute and try again.

  6. Meta Quest 2 Controller Thumbgrip Replacement, Remove the faceplate: 步骤 6 中的图像 1,3 Meta Quest 2 Controller Thumbgrip Replacement, Remove the faceplate: 步骤 6 中的图像 2,3 Meta Quest 2 Controller Thumbgrip Replacement, Remove the faceplate: 步骤 6 中的图像 3,3
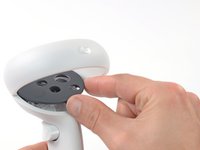
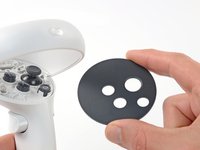
    • Remove the controller faceplate.

    • The three friction pegs should hold the faceplate securely, so you don’t need to replace the adhesive during reassembly. Be sure to firmly press the faceplate onto the controller so that all friction pegs fully engage.

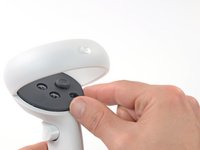
  7. Meta Quest 2 Controller Thumbgrip Replacement, Remove the thumbgrip: 步骤 7 中的图像 1,2 Meta Quest 2 Controller Thumbgrip Replacement, Remove the thumbgrip: 步骤 7 中的图像 2,2
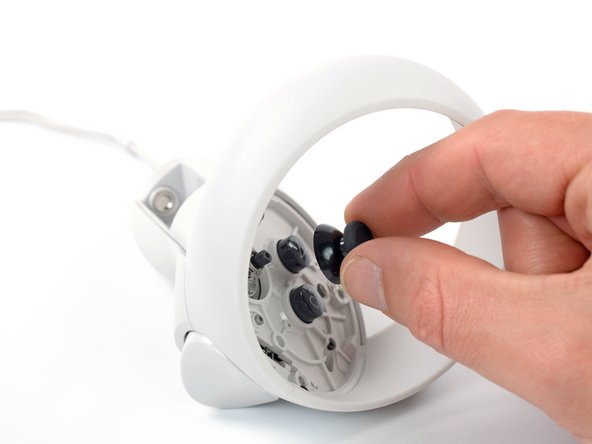
    • Use your fingers to pull the thumbgrip straight off of the thumbstick and remove it.

结论

To reassemble your device, follow these instructions in reverse order.

Repair didn’t go as planned? Try some basic troubleshooting, or ask our Answers community for help.

Arthur Shi

于01/03/18注册

284,050 声望

创作了588篇指南

团队

iFixit iFixit 的会员

Staff

121 名成员

创作了19,716篇指南

0指南评论

添加评论

浏览统计数据:

过去 24 小时: 3

过去 7 天: 38

过去 30 天: 120

总计 1,079