
iPod Touch 5th Generation Display Assembly Replacement
简介
转到步骤 1Cracked your screen? Use this guide to replace the display assembly from your iPod Touch.


-
-
If your display glass is cracked, keep further breakage contained and prevent bodily harm during your repair by taping the glass.
-
Lay overlapping strips of clear packing tape over the iPod's display until the whole face is covered.
-
-
-
Use a hair dryer or prepare an iOpener and apply it to the lower edge of the iPod for about a minute in order to soften up the adhesive underneath.
-
The bottom of the screen (near the home button) is held in place with strong adhesive.
-
As you start prying the screen off in the next stages, you may need to apply more heat to keep the glue warm and flexible.
-
-
-
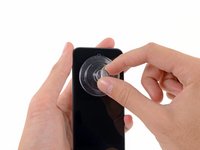
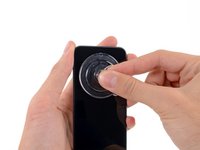
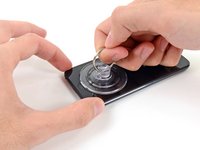
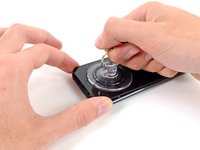
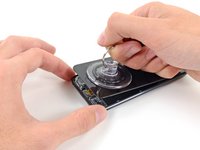
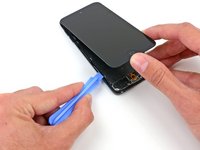
Hold the iPod firmly against a table or bench.
-
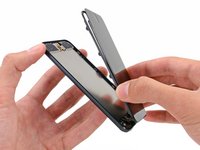
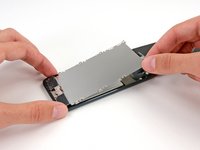
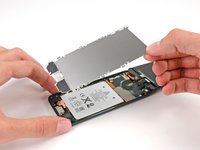
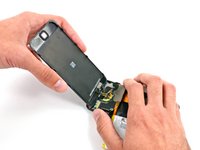
Lift the suction cup up and back toward the top of the iPod. Be patient, and pull with firm, constant force until the adhesive breaks and the display comes up from the rear case.
-
It may be necessary to use a heat gun to soften the adhesive (especially in cooler climates). If you can pry the screen apart, and the adhesive is still sticking and pulling apart like cheese topping on a pizza, you can slide a thin razor blade in and gently cut the adhesive.
-
-
-
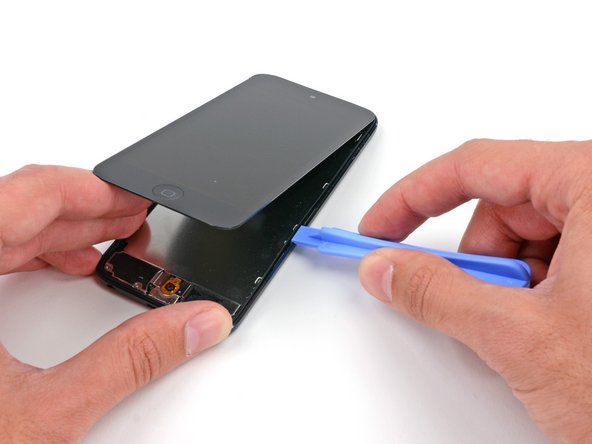
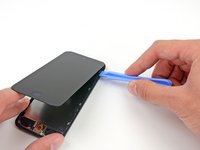
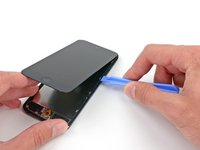
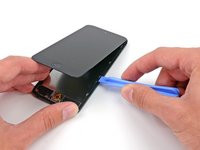
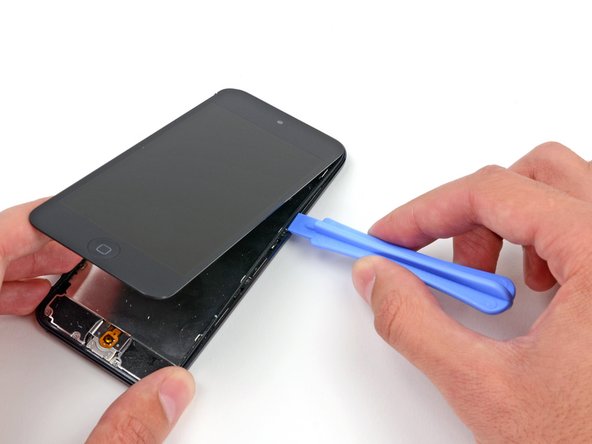
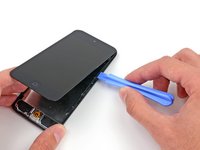
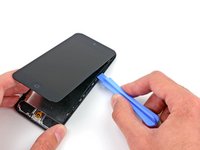
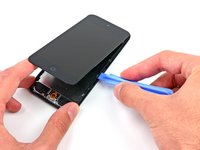
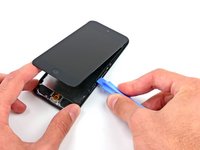
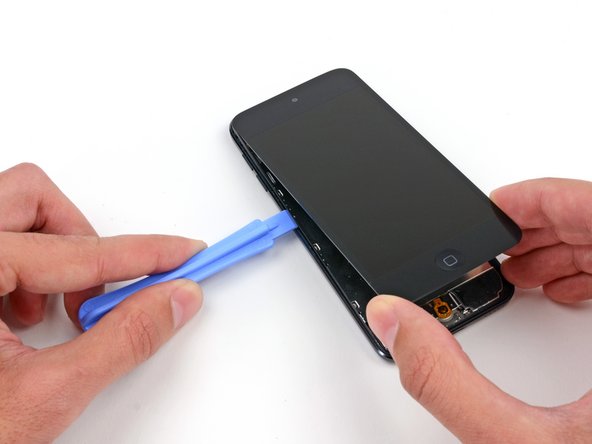
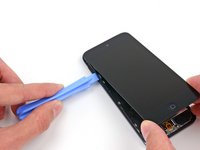
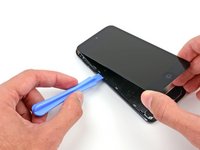
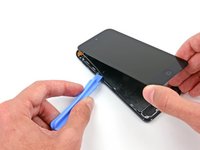
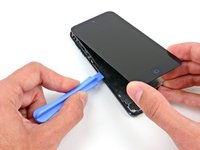
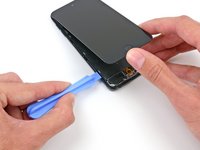
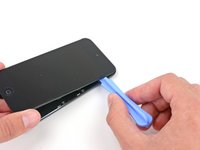
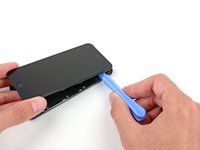
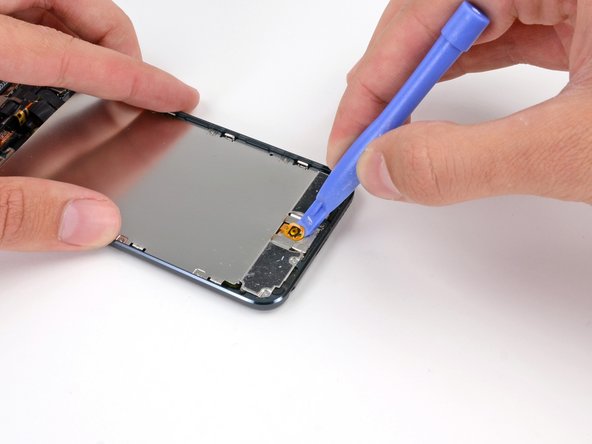
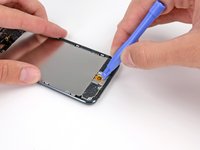
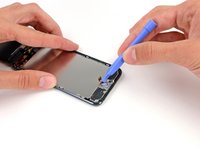
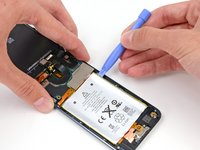
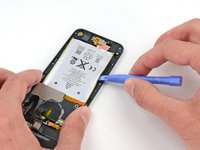
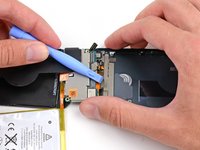
Insert the plastic opening tool between the frame and the rear case behind the first clip.
-
Rock the tool sideways, to spread the gap behind the clip and separate it from the rear case.
-
This may not free the clip initially, but repeating the procedure for each clip will begin to loosen the piece.
-
-
-
-
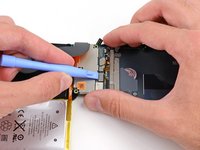
If your iPod has a black home button assembly rather than the orange one shown here, you can skip this step. The button is not attached to the LCD plate and does not need to be removed to complete the repair.
-
Use a plastic opening tool to pry the home button switch up from the LCD plate.
-
It may be necessary to use a heat gun or hair dryer to soften the adhesive on the back of the home button. Always use a low heat setting.
-
-
-
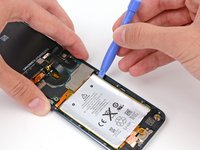
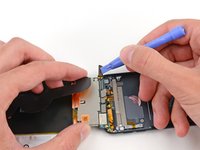
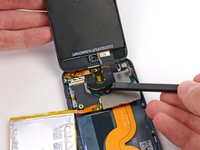
Remove three 1.6 mm #000 Phillips screws securing the logic board to the rear case.
-
-
-
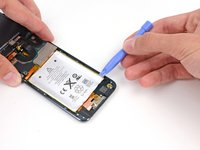
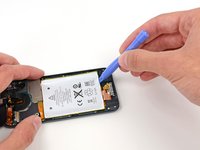
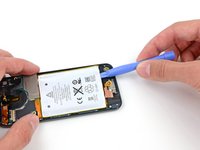
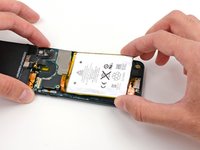
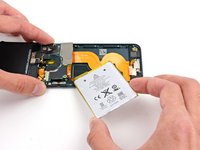
There are two strips of adhesive keeping the battery in place.
-
Turn the iPod over and heat the BACK of the aluminium iPod case. Do not heat the battery.
-
The aluminium case does not have to be hot; you should always be able to touch heated parts with your fingers at all times without it being uncomfortable.
-
-
-
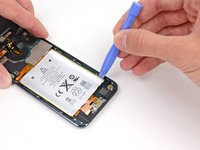
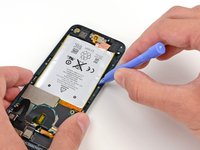
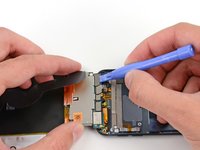
Use the flat end of a spudger to flip the front-facing camera out of its socket in the display assembly.
-
-
-
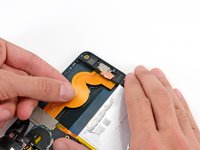
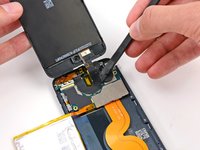
Use the tip of a spudger to peel back a small piece of tape covering a screw on the left side of the headphone jack.
-
-
-
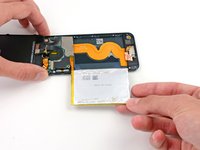
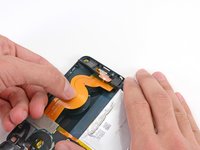
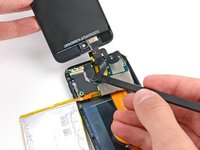
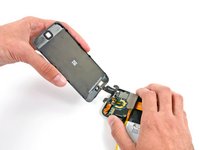
Flip the entire assembly over, exposing the back of the logic board.
-
Use a plastic opening tool to disconnect the digitizer cable from the logic board.
-


To reassemble your device, follow these instructions in reverse order.
To reassemble your device, follow these instructions in reverse order.
200等其他人完成本指南。

32条评论
There is a major problem with the information provided here.
I followed the advice of the staff and purchased on eBay a replacement glass with tools for our cracked glass problem. I then began to follow the guide shown here.
The first major problem is that the suction cup will not pull off the glass. I tried the suction on various surfaces, and it's very strong. So no doubt, the problem is the fact that the glass is cracked. But that's the whole reason we're trying to take it apart. Secondly, if this guide doesn't apply to cracked glass, that should be clearly stated and possible another guide should be provided.
As it is now, removing the "glass" from the foamy "gasket" underneath was nearly impossible, and the local tech now tells me that in this condition, it's essentially worthless.
I don't know about Ipods, but I have worked on Samsung phones in their repair facility and to lift our digitizers from the lcd assembly you have to heat them up a little bit with a heat gun first. The heat loosens the adhesive tape that holds the digitizer down. Once that glue on the tape becomes pliable you should be able to lift it up. Hope this helps.
pau -
One more thing - ignore your local tech. Anything can be fixed unless its been sitting in water. They just want their service fee.
If you've got the confidence to try this repair (which it sounds like you do) and google and youtube too - you can do this.
pau -
I tried multiple times to remove the screen after heating it thoroughly with a hair drier. True, not a heat gun, but the display was well heated. The screen wouldn't budge with a suction cup a bit smaller than the one pictured above. My eureka moment was when I remembered the suction-cup on a car cellphone holder. The edges of the cup just exceed the size of the display, but I was able to turn the ring that "tightened" the suction. I pulled firmly on the base of the cellphone holder, and after a minute or so the display started pulling away. The key was being able to apply an even, slow pull.
Lance -
would Covering entire display with the packaging tape change anything?
Or you did & still thumbs down?
Prosit
PURCHASE -