注:你正在为你刚才查阅的指南编辑前提条件。你所做的任何更改将影响包括此步骤的18本指南。
正翻译步骤 1
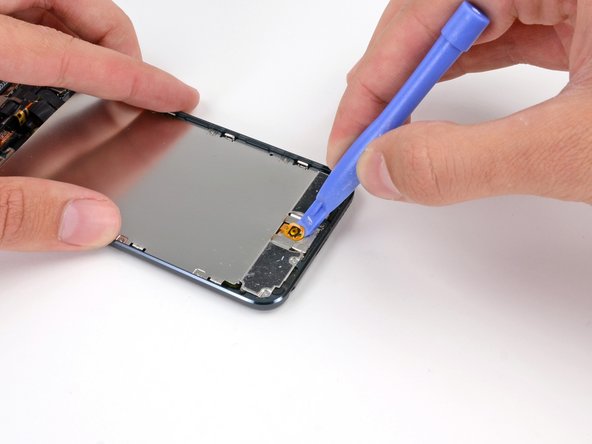
步骤 1


-
If your iPod has a black home button assembly rather than the orange one shown here, you can skip this step. The button is not attached to the LCD plate and does not need to be removed to complete the repair.
-
Use a plastic opening tool to pry the home button switch up from the LCD plate.
-
It may be necessary to use a heat gun or hair dryer to soften the adhesive on the back of the home button. Always use a low heat setting.
| [* icon_note] Gently fold the display over away from the rest of the iPod, taking care not to disconnect or break any of the ribbon cables. Set the two halves flat on a table or bench. | |
| + | [* black] ***If your iPod has a black home button assembly rather than the orange one shown here, you can skip this step.*** The button is not attached to the LCD plate and does not need to be removed to complete the repair. |
| [* black] Use a plastic opening tool to pry the home button switch up from the LCD plate. | |
| [* black] It may be necessary to use a heat gun or hair dryer to soften the adhesive on the back of the home button. Always use a low heat setting. | |
| [* icon_caution] Do not attempt to remove the home button switch, as it is connected to components below the LCD plate. |
您的所有投稿皆享有基于开源创作共享许可协议(CC BY-NC-SA)的著作权利。