While your iPad looks uniform from the outside, there are delicate components under portions of the screen. To avoid damage, follow instructions exactly as written and note the following areas as you open your iPad:
Camera module, ambient light sensors, proximity senor, and front microphone
The next three steps demonstrate the Anti-Clamp, a tool we designed to make the opening procedure easier. If you aren't using the Anti-Clamp, skip down three steps for an alternate method.
Turn the handle clockwise 360 degrees or until the cups start to stretch.
Make sure the suction cups remain aligned with each other. If they begin to slip out of alignment, loosen the suction cups slightly and realign the arms.
If your screen is badly cracked, covering it with a layer of clear packing tape may allow the suction cup to adhere. Alternatively, very strong tape may be used instead of the suction cup. If all else fails, you can superglue the suction cup to the broken screen.
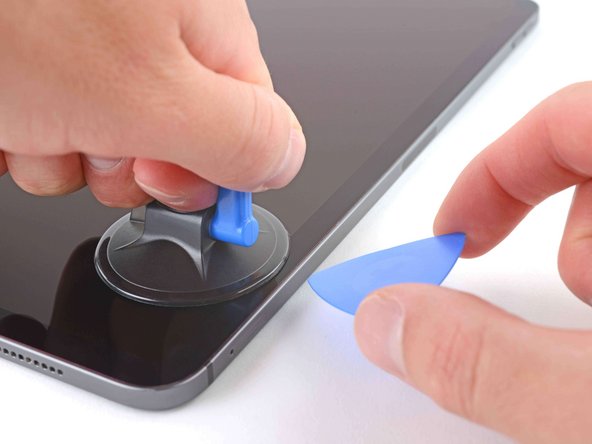
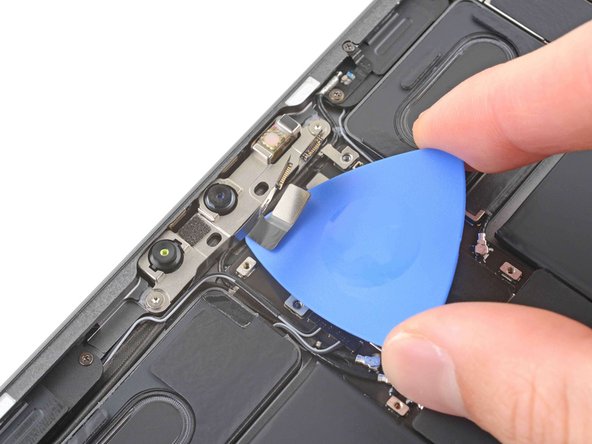
Apply a suction handle to the right edge of the screen, about 5 cm from the bottom edge.
Pull up on the suction handle with firm, constant pressure to create a gap large enough to insert an opening pick.
Only create a gap small enough to insert an opening pick. Overbending the screen will damage it.
Insert the tip of an opening pick into the gap.
Don't insert the opening pick more than 5 mm or you'll damage the LCD.
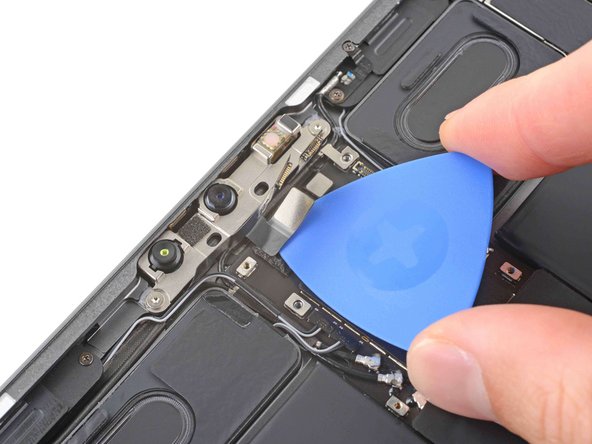
The top edge of the iPad contains the camera module, two ambient light sensors, the proximity sensor, and front microphone. These components are fragile and easily damaged if an opening pick is inserted too far. Only separate the adhesive in the marked locations to avoid damage.
The two ambient light sensors can be hard to see and can be located using a flashlight or by placing the iPad under a bright light.
Don't insert an opening pick more than 2 mm near the top left and right edges or you'll damage the ambient light sensors.
Don't insert an opening pick more than 1 mm near the middle of the top edge or you'll damage the camera module, proximity sensor, and front microphone.
The left edge of the iPad contains several display cables. These cables are extremely fragile and easily damaged if an opening pick is inserted too far or at the wrong angle. Follow the instructions exactly as written to avoid damage.
The display cables are located within small indents of the frame and require an opening pick to be inserted at a 45° angle.
There are flat sections of the frame which require an opening pick to be inserted horizontally.
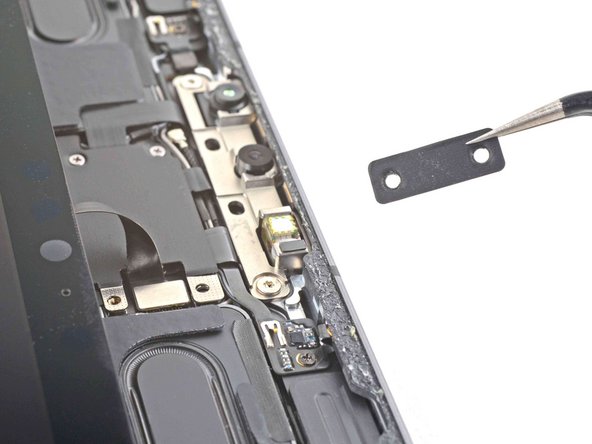
Throughout this repair, keep track of each screw and make sure it goes back exactly where it came from.
Use a Phillips screwdriver to remove the two screws securing the ambient light sensor cable bracket to the logic board:
One 1.3 mm screw
One 2.0 mm screw
During reassembly, this is a good point to power on your iPad and test all functions before sealing it up. Be sure to power your iPad back down before you continue working.
Use the flat end of a spudger to disconnect the ambient light sensor cable by lifting straight up on the press connector.
To re-attach press connectors like this one, carefully align and press down on one side until it clicks into place, then repeat on the other side. Do not press down on the middle. If the connector is misaligned, the pins can bend, causing permanent damage.
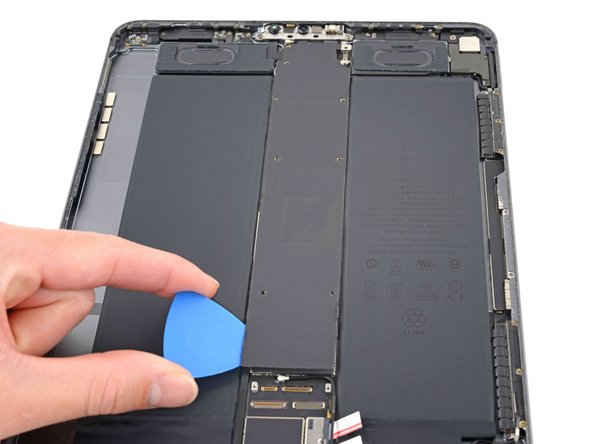
Grip the right edge of the screen and lift it away.
During reassembly, before installing a display, remove any remaining adhesive from the frame, and clean the glued areas with high-strength (>90%) isopropyl alcohol and a lint-free cloth. This helps prep the iPad for fresh adhesive and ensures that it will bond properly.
If you plan to reinstall your existing screen, remove any remaining adhesive from the back and clean the adhered areas with isopropyl alcohol.
Follow this guide to install pre-cut adhesive strips on your iPad before sealing it up.
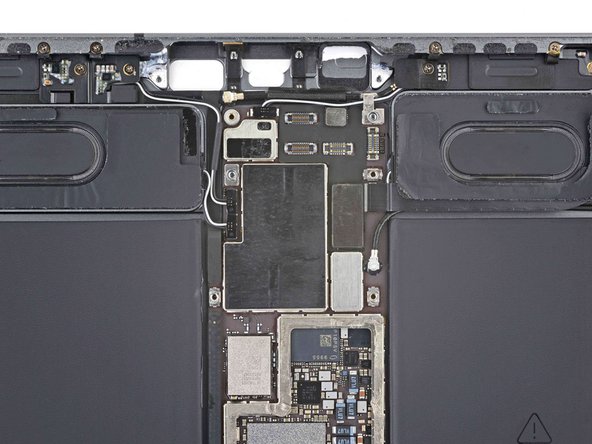
Grip the logic board shield at the top and lift it up.
Stop lifting if the shield is stuck or begins to bend—a bent shield will reduce thermal transfer from the logic board. Use an opening pick to separate any remaining adhesive.
You're about to disconnect many connectors from the top and bottom of the logic board. During reassembly, use these photos as a reference to ensure all cables are connected in the correct locations.
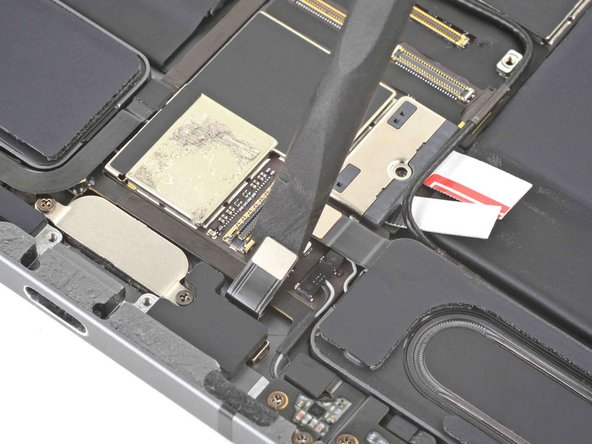
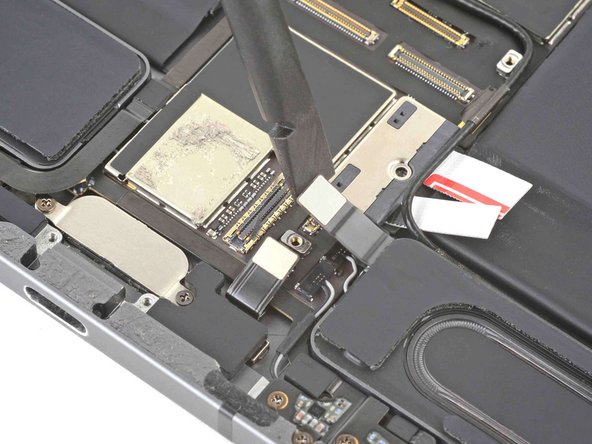
To disconnect antenna cables like this, use tweezers to grip the connector near the cable and lift it up.
Use the pointed end of a spudger to disconnect the top Wi-Fi antenna cable.
To reinstall, hold the connectors in place and gently press them straight down. The connectors “snap” into their sockets much like the metal snaps on a jacket.
The adhesive that secures the logic board to the frame is very strong. To remove the board, follow the next steps to weaken the adhesive using high-strength (>90%) isopropyl alcohol.
Prop the left side of the iPad up against an object so the isopropyl alcohol can flow under the logic board.
Apply a few drops of isopropyl alcohol along the left edge of the logic board.
Be careful if you're using a syringe with a needle or other sharp instrument to dispense isopropyl alcohol—a punctured or bent battery may leak dangerous chemicals or cause a fire.
Let the alcohol soak for one minute to soften the adhesive under the logic board.
Remove the old adhesive from the rear case and bottom of the logic board using tweezers and high concentration isopropyl alcohol with a lint-free cloth where needed.
During reassembly, apply strips of Tesa tape to the bottom of the logic board.
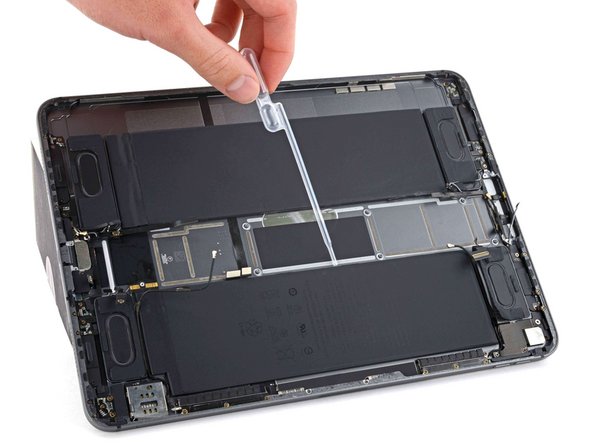
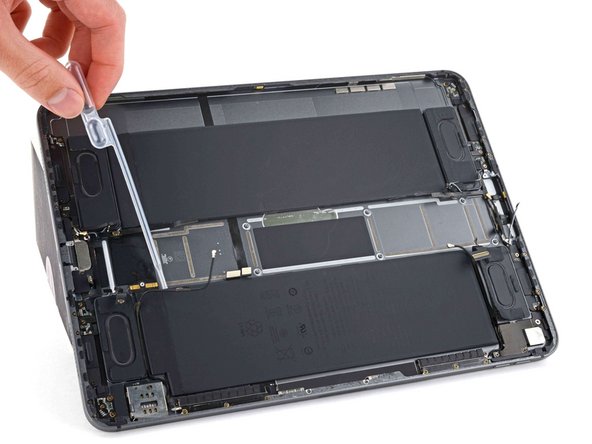
If you removed all of the stretch-release adhesive, good job! You can skip the next four steps. If not, then follow the next four steps to apply isopropyl alcohol.
Prop the left side of the iPad up against an object so the isopropyl alcohol can flow under the right battery cell.
Apply high-strength (>90%) isopropyl alcohol along the inside edge of the right battery cell.
Be careful if you're using a syringe with a needle or other sharp instrument to dispense isopropyl alcohol—a punctured or bent battery may leak dangerous chemicals or cause a fire.
Let the alcohol soak for two minutes to soften the adhesive under the battery cell.
Extremely upset with this guide! It didn’t have me disconnect the battery first. When taking off the first display cable, the logic board sparked and shorted out, frying the whole thing! Not even my iPad which makes it so much worse.