跳转到主内容
Nikon CoolPix S600 LCD Replacement

Nikon CoolPix S600 LCD Replacement

andreas anggasastra

andreas anggasastra3 其他贡献者

最后更新于 January 28, 2014

30分钟
困难
需要更好的图片

你所需要的

工具

查看更多...

  1. Nikon CoolPix S600 LCD Replacement, Front and Rear Casing: 步骤 1 中的图像 1,1
    • With the lens facing forward, remove the one 4.2 mm screw on the bottom right hand corner of the camera.

  2. Nikon CoolPix S600 LCD Replacement: 步骤 2 中的图像 1,1
    • Remove the chrome side cover from the body of the camera.

  3. Nikon CoolPix S600 LCD Replacement: 步骤 3 中的图像 1,1
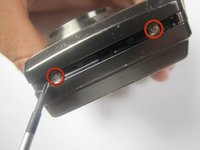
    • Remove the four 3.2 mm screws on the bottom of the camera.

  4. Nikon CoolPix S600 LCD Replacement: 步骤 4 中的图像 1,2 Nikon CoolPix S600 LCD Replacement: 步骤 4 中的图像 2,2
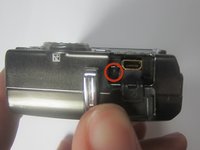
    • Remove the two 3.2 mm screws from the right side of the camera (with lens is facing forward)

    • Remove the one 3.2 mm screw from the left side of the camera (with lens facing foward)

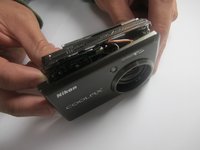
  5. Nikon CoolPix S600 LCD Replacement: 步骤 5 中的图像 1,2 Nikon CoolPix S600 LCD Replacement: 步骤 5 中的图像 2,2
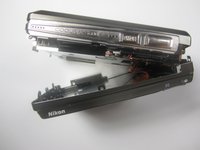
    • Gently separate the back cover from the body of the camera.

    • The back casing will still be connected to the circuit board by a ribbon

  6. Nikon CoolPix S600 LCD Replacement: 步骤 6 中的图像 1,1
    在这个步骤中使用的工具:
    Tweezers
    $4.99
    • Use the tweezers to disconnect the ribbon from the circuit board.

  7. Nikon CoolPix S600 LCD Replacement: 步骤 7 中的图像 1,1
    • Remove the one 2.6 mm screw from the left side of the camera (with the lens facing forward)

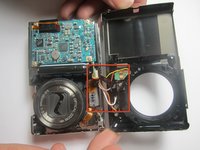
  8. Nikon CoolPix S600 LCD Replacement: 步骤 8 中的图像 1,2 Nikon CoolPix S600 LCD Replacement: 步骤 8 中的图像 2,2
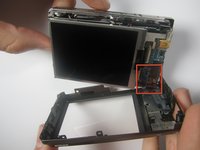
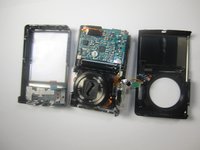
    • Gently separate the front cover from the body of the camera.

    • The front casing will still be connected to the circuit board by a few wires

  9. Nikon CoolPix S600 LCD Replacement: 步骤 9 中的图像 1,1
    • Remove the two 3.2 mm screws that hold the flash to the front cover.

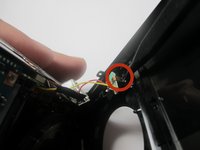
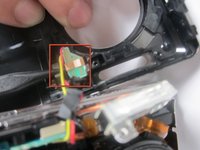
  10. Nikon CoolPix S600 LCD Replacement: 步骤 10 中的图像 1,3 Nikon CoolPix S600 LCD Replacement: 步骤 10 中的图像 2,3 Nikon CoolPix S600 LCD Replacement: 步骤 10 中的图像 3,3
    • Use the Spudger to remove the copper colored light bulb clip.

    • Remove the front cover entierly from the camera body.

  11. Nikon CoolPix S600 LCD Replacement, LCD: 步骤 11 中的图像 1,1
    • Gently remove LCD ribbon from the mother board

    • The screen will still be connected to the mother board by two very small wires (black & red)

  12. Nikon CoolPix S600 LCD Replacement: 步骤 12 中的图像 1,1
    • Desolder both wires from the mother board.

    • Refer to iFixit's solder/desoldering guide for the correct procedure to desolder the connection.

  13. Nikon CoolPix S600 LCD Replacement: 步骤 13 中的图像 1,1
    • Separate the LCD screen from the rest of the mother board

结论

To reassemble your device, follow these instructions in reverse order.

团队

Cuesta, Team 1-6, Zipperian Fall 2011 Cuesta, Team 1-6, Zipperian Fall 2011 的会员

CUESTA-ZIPPERIAN-F11S1G6

2 名成员

创作了6篇指南

0指南评论

添加评论

浏览统计数据:

过去 24 小时: 1

过去 7 天: 2

过去 30 天: 8

总计 1,391