简介
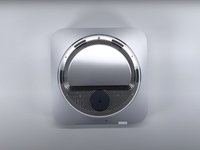
转到步骤 1M2 Mac Mini上的Teardown(2023年初)。本指南的目的是提供对设备内部的详细了解此拆卸并非作为维修指南。
==免责声明==
视频错误地将几个不同的螺钉识别为T5 Torx,特别是CPU风扇、PSU和扬声器。之前的M1在苹果的官方维修指南中将这些螺钉识别为T6螺钉。虽然M2 mini被认为是M1的更新设计,但总体设计在很大程度上没有变化。


视频概述
-
-
此拆卸适用于Mac mini的基本M2型号。本指南使用以下规格:
-
系统芯片M2 8核CPU,具有4个性能核心和4个效率核心
-
8G或更高内存
-
两个霹雳4端口,支持60 Hz的6K分辨率。
-
256 GB SSD存储空间。
-
-
在这个步骤中使用的工具:TR6 Torx Security Screwdriver$5.99
-
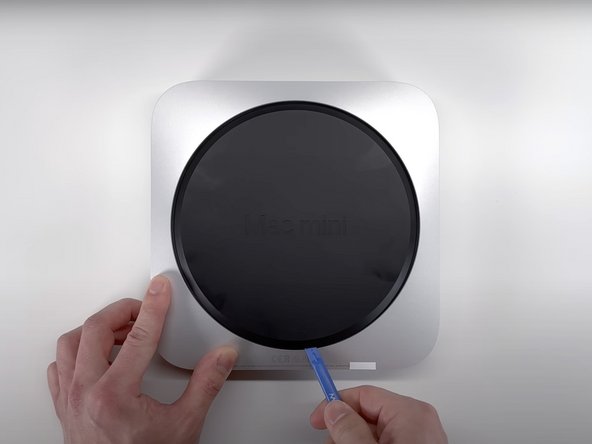
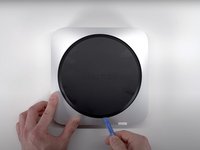
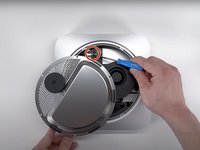
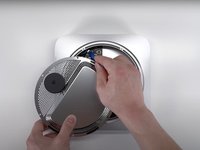
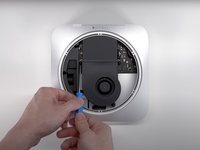
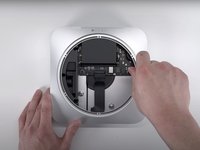
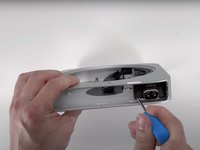
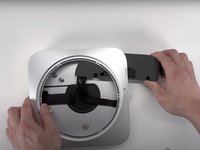
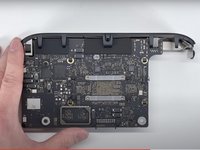
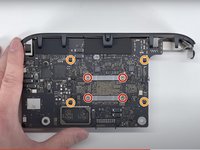
拆下盖子后,我们可以看到天线板。这是用六个Torx T6安全螺钉固定的,可以用适当的螺丝刀将其拆下。
-
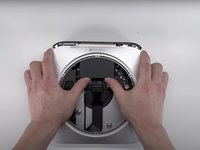
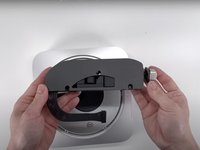
小心地将板移到一边,我们刚好有足够的空间露出用接地夹和另一个T6螺钉固定的天线同轴电缆。
-
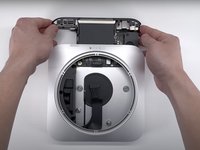
拆下螺钉后,可以使用撬棍将天线板移开。或者,您可以使用“打开工具”进行此操作。
"a Spudger can be used to dislodge using an Opening Tool." Does this mean either can be used or is it a typo?
They there, the wording was incorrect, but you can use either for this step.
-
-
-
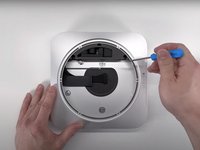
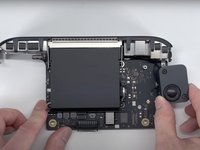
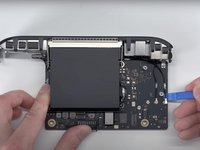
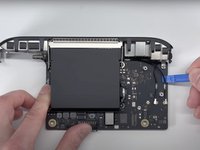
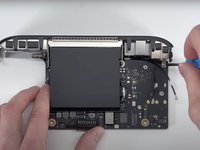
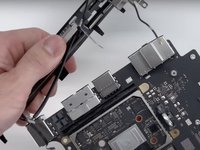
在这个步骤中使用的工具:TR10 Torx Security Screwdriver$5.99
-
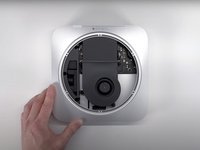
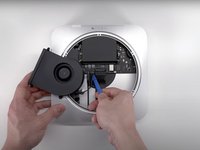
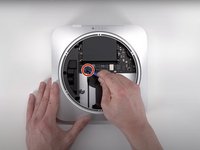
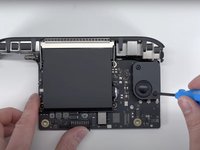
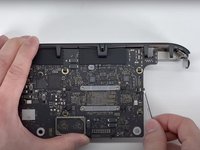
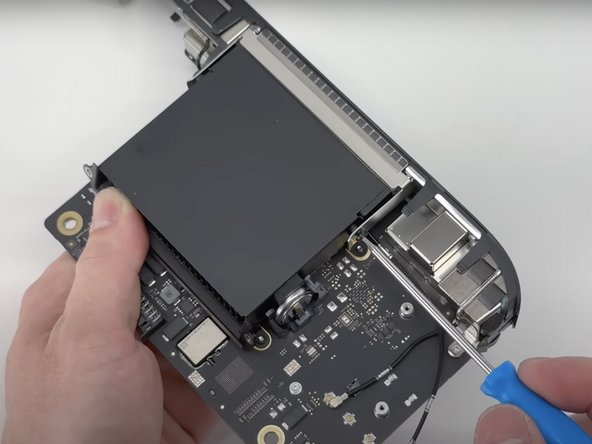
主板只能由两个Torx T10螺钉固定。
-
一旦拧下螺丝,我们就可以毫不费力地将主板滑出外壳。
-
-
-
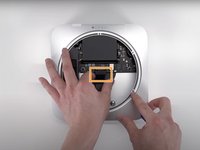
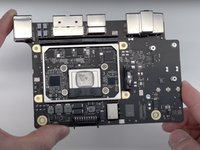
在典型的苹果时尚中,我们看到少量的热敏膏覆盖在CPU上。清除糊状物后,便可看到苹果的标志性标志。
Does anyone know why the thermal paste is not covering the entire metal shield of the CPU but only a smaller square-size area?
Hey there,
To answer your question, most companies that sell prebuilt systems will do this for two reasons. Cost cutting and consistency between units. Applying the right amount of thermal paste requires precision and care, which can increase manufacturing costs. Using less thermal paste can save money on materials and labor. In addition, mass-producing PCs involves a high degree of automation. Achieving consistent and precise thermal paste application across all units can be challenging. Applying too little paste may be seen as a way to ensure uniformity between Mac computers.
-
-
-
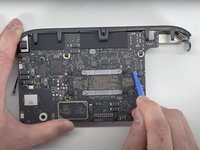
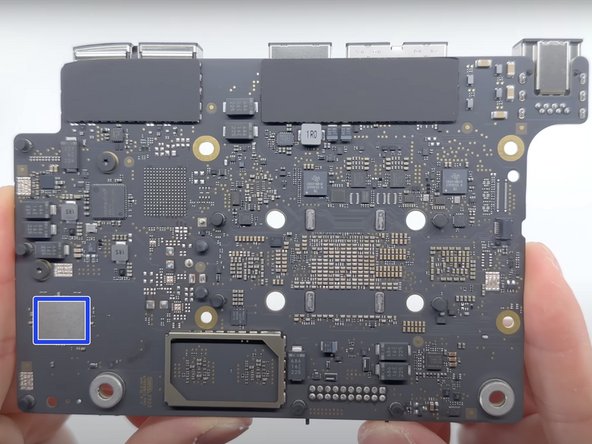
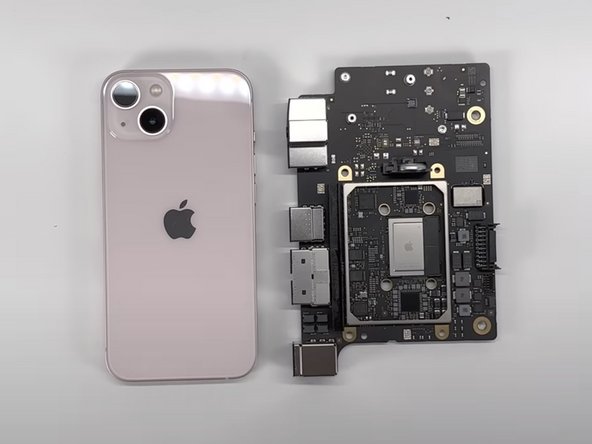
主板本身的整体占地面积只比iPhone 13略宽一点。
-
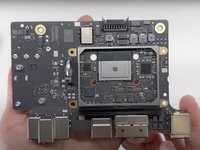
64位M2 8核SoC(片上系统)。
-
8 GB(2 x 4 GB)LPDDR5 SDRAM内存
-
PRAM电池外壳
-
256 GB NAND闪存
-
PMIC以太网控制器
-
Wi-Fi/蓝牙模块
1. Should Apple M2 processor support LPDDR5? Why is it two LPDDR4 chips?
2. The chip marked is yellow color should PMIC for Apple M2 processor. Is the Ethernet NIC from Broadcom? There is Broadcom BCM577xx on the mainboard
Hello, I made some corrections to the chip identification. Yes, the processor is two 4 GB LPDDR5 chips. I also made a correction to the ethernet controller, although I am not aware if it is Broadcom or not.
-
-
-
Mac mini M2可修复性得分:6分(满分10分)
-
没有任何坚硬的粘合剂可以挟持M2 Mac mini或其组件。
-
使用一些常见的工具,拆卸是直截了当的。
-
拆卸与M1 mini没有明显区别,这使许多维修变得熟悉。
-
苹果糟糕的热粘贴工作可能会在以后成为一个问题。
-
所有I/O端口都直接焊接到主板上。如果其中一个坏了,那么整个主板都需要更换。
-
由于与处理器的集成,升级存储或内存等组件几乎是不可能的。
-
CPU和存储器都焊接在主板上,用户无法升级。
6/10? That's the same score that the Mac Mini 2014 and 2018 got, which you could upgrade either the disk (for the former) or the RAM (for the latter). There is NOTHING upgradable in this Mac, and no point opening it other than possibly to clear dust. It should score 1/10.
Howdy there,
My thought process for the score is that while it does not feature the same upgradeability for the major components, the disassembly is still very similar to the late 2018 Mac mini. It is also worth pointing out that the design also reduces the amount of tools needed to disassemble the device.
6/10 is accurate for disassemble-ability. There's nothing repairable here (aside from a power supply swap), so repairability is 1-2 at most.
KrisB -
Repairability doesn't equal "upgradeability", so yep, 6 is a pretty much fair score. Super simple layout and easy maintenance, actually, for such a capable machine. Go for a decent amount of RAM and storage at the time of buying, and you're futureproof for years to come. Maybe investing in Apple Care is also worth it, especially if you're planning to make money with this computer, do some everyday productive work, it totally is. Then you won't have to worry that much about soldered storage and stuff. Do backups and you'll be fine, that's a one great habit, anyway P) And then sometime in the future you'll always be able to sell it and upgrade, simply because that's a MAC;) And I seriously doubt Kioxia NAND (the top brand chip that sits there, yep) will go just totally dying on you in 3-4 years, unless you seriously and purposely abuse it, so there'll be an aftermarket for those, no worries/ Soldered stuff really isn't all that 'horrible' if it's done right, and that Apple can do.
Sorry, but repairability implies there's something that could be repaired.
Short of replacing the power supply (or mainboard), there's nothing repairable here -- even if you did have the soldering skills to swap a connector or component, good luck finding the parts.
Giving this anything more than a 1 or 2 out of 10 is ridiculous. Apple had might as well have superglued the bottom panel on.
KrisB -
-


11指南评论
I'd give it a 3/10 repairability score, since every major component (CPU/RAM/SSD) is soldered and unreplaceable/not upgradeable. At least it's easy to open.
Howdy, my thought process for the score is that while it does not feature upgradeability for the major components, the disassembly is very similar to the late 2018 Mac mini and also reduces the number of tools needed for disassembly.
Seeing the similarities in the housing design of both the M2 model and the 2018 model, is it feasible that I should be able to switch the housing between the two without any trouble?
I strongly agree with Federico Barutto. This score feels rooted in the wrong place. A 9/10 repairability score when the CPU, RAM, and SSD can't be swapped? How is this a 9/10, when 63% of all desktops in the world (Windows desktops) have all of those things hotswappable? Since all Windows desktops are more repairable than this 9/10 system, does that mean that 63% of all desktops in the world have a reparability score of 10/10? Easily upgradeable CPU, RAM, and storage only merits a single point increase?
This should be a 5 or below on reparability. A rare miss from an otherwise excellent iFixit.
Score is 6/10
I strongly feel someone doesn’t get the difference between “repair” and “upgrade“
tarpot -
Hey all, I've decided to put the score up to a vote on iFixit's Meta site. Ultimately, I do want to do what is best for the community, and I do want to improve how I score future devices. https://meta.ifixit.com/Answers/View/197...
The PRAM battery is a Lithium Ion battery, but that's the only onboard battery on this device.
The PRAM battery looks like a normal coin cell, CR2032 or CR2025, these are Lithium-Manganese-dixoide cells, non-rechargeable with a voltage of 3.0V, NOT to be confused with so-called "Lithium-Ion" cells that are rechargeable with a voltage of 3.6/3.7V.
And you should call these cells, because they're single cells and not a battery of cells ;)
However rechargeable coin cells with lithium-ion chemistry nowadays exist, most true wireless earphones use these and they're also available in classic formats like said 2032 but I doubt that Apple uses such a rechargeable 2032 (or what size it is) cell.