简介
本指南由iFixit员工编写且未经谷歌认证。
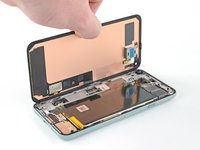
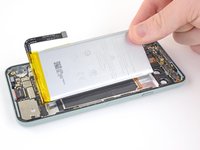
请按照本指南取出并更换 Google Pixel 5 的电池。
为了您的安全,在拆卸您的手机之前,请将电池放电到25%以下。如果电池在维修过程中意外损坏,这样可以降低危险的高温事故发生的风险。若旧电池已经鼓胀,请参考如何处理鼓包膨胀的电池以采取适当的预防措施。
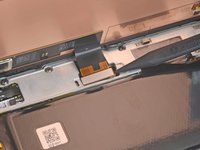
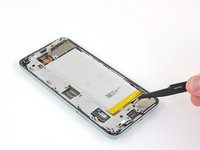
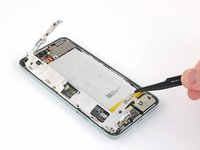
后置摄像头在照片中被移除了,但这并不是取出电池时必要的步骤。
你所需要的
-
-
-
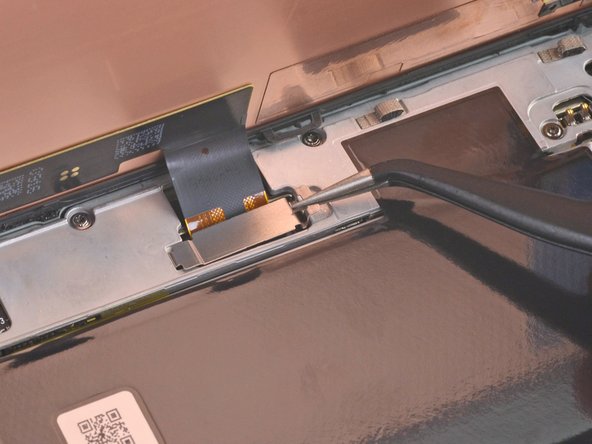
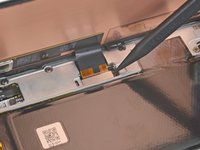
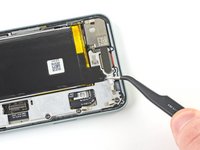
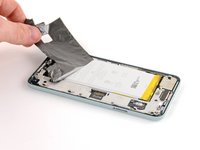
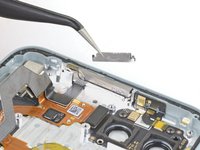
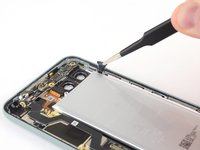
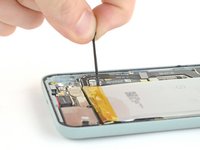
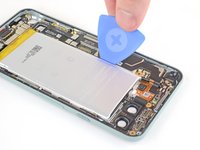
用钝头镊子夹住位于电池右上方边缘的黑色胶条拉片。用镊子抬起拉片,直到您能用手指捏住它。
-
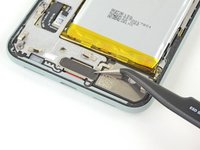
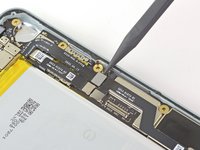
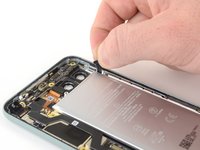
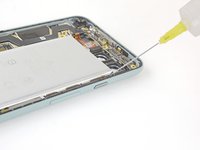
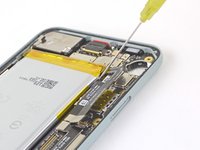
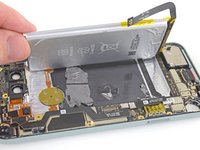
沿小角度,缓慢地匀速拉动拉片,防止胶条在中途断开。
-
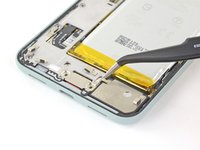
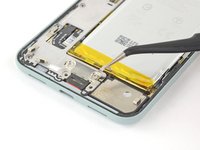
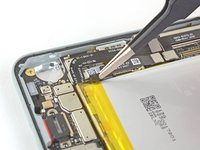
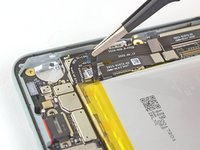
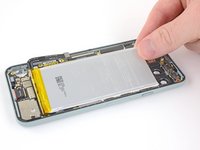
如果拉片在中途断了,用镊子捏住剩余的胶条,继续拉动。
-


99等其他人完成本指南。


53指南评论
While this is an excellent guide, like the others here, I find the ending statement of "To reassemble your device, follow the above steps in reverse order." very much a throw you in the deep end type of scenario. Figuring out how to place the adhesives that come with the kit was very much a trial and error thing. They are not quite intuitive and I was unable to find any answers anywhere. In my first attempt, the two strips for the battery, are a mess. You never get a visual of how or where they are since you remove them by pulling tabs in Step 21.
Here's the deal with them. Two protective layers, a clear oversized layer on one side, and blue cut to the exact shape on the other. Both sides are sticky. Once you figure out the placement, apply the adhesives by peeling the clear protective layer first. Line it up and firmly press. When ready to adhere to the other side, the blue layer is removed by 2 tabs that are part of the layer. Pull 1 tab and carefully peel it away and it should come away in 1 or 2 pieces.
Very frustrating that a year and a half later the tutorial has not been fixed to include the information you've given, or any more information at all.
It's clear that this tutorial is not complete when multiple replies have had issues with vibration, screens, and other functions, along with pieces that got left out upon reassembly. I had better hopes for ifixit since they offer a complete kit and boast they have tutorials. I thought the experience would be higher quality.
To put it back together I recommend watching Google Pixel 5 Battery Replacement from 5:46 onwards. This video as an accompaniment in general to this guide I found super helpful as it's an actual video of this repair.
Seeing someone actually perform this exact repair in realtime is very helpful as well as some techniques not mentioned in this guide.
I performed a screen and battery replacement with the help of this video so I really recommend watching it.
Clear instructions and photos. I would agree the 'do in reverse order' instruction is too vague. Thanks to Jesse for the clarifying information on the adhesives and to Marcel for the video link - both of these additional instructions helped immensely. New phone battery installed and phone is in working order!
This comment thread is as important as the guide itself - your explanation and the video linked below complete the guide. And this shouldn't be necessary - I wouldn't have bought the part if I had looked through the guide and realized that it is incomplete. Lesson learned for the next time!