跳转到主内容
Fitbit Charge 2 Battery Replacement

Fitbit Charge 2 Battery Replacement

Adriana Zwink

Adriana Zwink 另一个贡献者

最后更新于 August 16, 2024

30分钟 - 1小时
中等
特色指南

Use this guide to replace a worn-out or dead battery in your Fitbit Charge 2.

If your battery is swollen, take appropriate precautions. For your safety, discharge your battery below 25% before disassembling your Fitbit Charge 2. This reduces the risk of a dangerous thermal event if the battery is accidentally damaged during the repair.

You’ll need replacement adhesive to reattach components when reassembling the device.

你所需要的

配件

工具

查看更多...

  1. Fitbit Charge 2 Battery Replacement, Remove the watch band: 步骤 1 中的图像 1,1
    • Before starting, take your Fitbit Charge 2 off the charger and power it down.

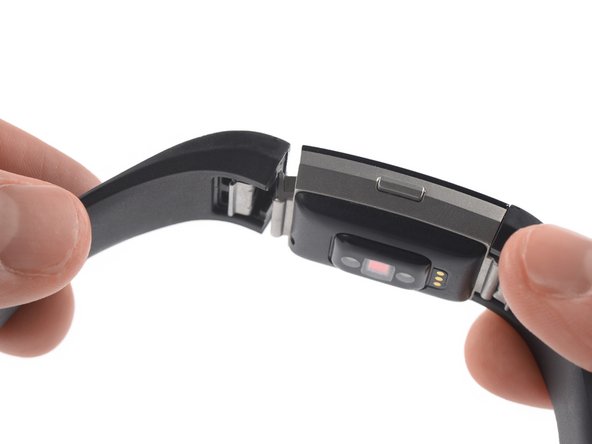
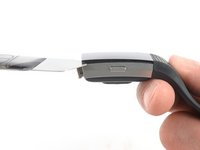
    • Remove the watch band on both sides.

  2. Fitbit Charge 2 Battery Replacement, Heat the touch screen: 步骤 2 中的图像 1,1
    • Heat an iOpener and apply it to the touch screen for two minutes.

    • The screen is not glued down, but the heat helps to loosen the touch screen assemly.

  3. Fitbit Charge 2 Battery Replacement, Slide along the left edge: 步骤 3 中的图像 1,3 Fitbit Charge 2 Battery Replacement, Slide along the left edge: 步骤 3 中的图像 2,3 Fitbit Charge 2 Battery Replacement, Slide along the left edge: 步骤 3 中的图像 3,3
    在这个步骤中使用的工具:
    iSesamo Opening Tool
    $9.99
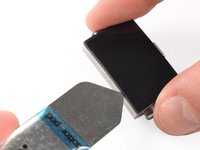
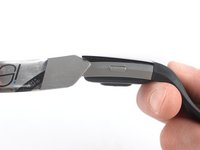
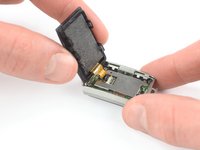
    • Insert an iSesamo into the gap between the touch screen and the watch assembly on the top left corner.

    • Slide the iSesamo along the left edge to the bottom left corner.

  4. Fitbit Charge 2 Battery Replacement, Slide along the bottom edge: 步骤 4 中的图像 1,2 Fitbit Charge 2 Battery Replacement, Slide along the bottom edge: 步骤 4 中的图像 2,2
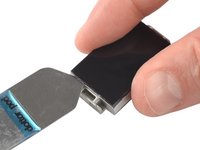
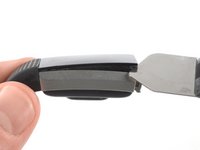
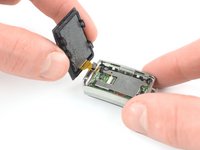
    • Slide the iSesamo around the bottom left corner.

    • Slide it along the edge to the bottom right corner.

  5. Fitbit Charge 2 Battery Replacement: 步骤 5 中的图像 1,3 Fitbit Charge 2 Battery Replacement: 步骤 5 中的图像 2,3 Fitbit Charge 2 Battery Replacement: 步骤 5 中的图像 3,3
    • Slide the iSesamo around the bottom right corner.

    • Keep sliding it along the right edge to the top right corner.

  6. Fitbit Charge 2 Battery Replacement: 步骤 6 中的图像 1,2 Fitbit Charge 2 Battery Replacement: 步骤 6 中的图像 2,2
    • Slide the iSesamo around the top right corner.

    • Slide it along the top edge to the top left corner.

  7. Fitbit Charge 2 Battery Replacement: 步骤 7 中的图像 1,2 Fitbit Charge 2 Battery Replacement: 步骤 7 中的图像 2,2
    • Place the iSesamo under the top left corner.

    • Feel free to reattach the watch band for this and the next step for a better grip.

    • Pry up the touch screen assembly by twisting the iSesamo sideways to create a gap and unhinge the plastic clips which are holding the screen in place.

  8. Fitbit Charge 2 Battery Replacement: 步骤 8 中的图像 1,2 Fitbit Charge 2 Battery Replacement: 步骤 8 中的图像 2,2
    • Place the iSesamo under the top right corner.

    • Pry up the touch screen assembly by twisting the iSesamo sideways to create a gap.

  9. Fitbit Charge 2 Battery Replacement: 步骤 9 中的图像 1,2 Fitbit Charge 2 Battery Replacement: 步骤 9 中的图像 2,2
    • Insert a spudger into the gap on the top edge of your Fitbit Charge 2.

    • Use the spudger to pry up the touch screen assembly.

    • Do not remove the touch screen assembly all the way yet—it's still connected to the motherboard.

  10. Fitbit Charge 2 Battery Replacement: 步骤 10 中的图像 1,1
    • Carefully fold the touch screen assembly in the direction of the bottom edge.

  11. Fitbit Charge 2 Battery Replacement, Remove the protecting sticker: 步骤 11 中的图像 1,2 Fitbit Charge 2 Battery Replacement, Remove the protecting sticker: 步骤 11 中的图像 2,2
    在这个步骤中使用的工具:
    Tweezers
    $4.99
    • Use a pair of blunt nosed tweezers to remove the black sticker which covering the touch screen connector.

  12. Fitbit Charge 2 Battery Replacement, Open the ZIF connector: 步骤 12 中的图像 1,2 Fitbit Charge 2 Battery Replacement, Open the ZIF connector: 步骤 12 中的图像 2,2
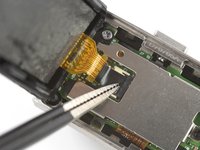
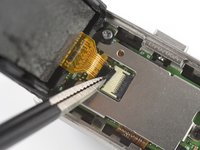
    • Use the pointed end of a spudger to open the ZIF connector by pushing up the black flap.

    This step was a little confusing for me as I thought the "gray flap" was the part directly under the black sticker that we were told to lift in the previous step. Making this more confusing is the order of the photographs. To me things follow an orderly procession from left to right; by that standard, the "gray flap" was already "pushed up" in the first photo and you can't push it up anyway. It is also BLACK not gray! Anyway, I know it is my fault for not scrutinizing the photos better before I undertook the task of changing my battery. I broke the gray part of the connector and it just crumbled away. I have a small electronic microscope and it looks like I got the ribbon under the tabs correctly, but the display screen will not come on. I can feel the device vibrate when I put it on the charger and the app on my phone looks like it is working properly. I have prior experience with these type of connectors but my old eyes can't focus as well as they used to. Any suggestions for what I can do now? chazasmith@gmail.com

    Chuck Smith - 回复

    Dear Chuck Smith,

    you're completely right. The photos in this step were in wrong order. I changed the order and the color to black for easier understanding. I'm very sorry the flap of your connector broke off.

    The only suggestion I can give is to push the ribbon cable as far into the connector as possible and test if you're able to turn on the display (do this before resealing). If you're able to bring the cable in the right position and the display turns on, you can try to tape it to the connector with kapton tape or a similar strong tape (like it was before with the black tape). Try to tape the cable tight to the connector. Otherwise there might be some play for it to move and loose connection.

    Dominik Schnabelrauch -

  13. Fitbit Charge 2 Battery Replacement, Remove the touch screen assembly: 步骤 13 中的图像 1,3 Fitbit Charge 2 Battery Replacement, Remove the touch screen assembly: 步骤 13 中的图像 2,3 Fitbit Charge 2 Battery Replacement, Remove the touch screen assembly: 步骤 13 中的图像 3,3
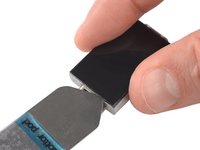
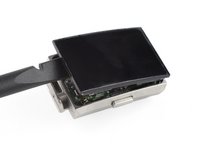
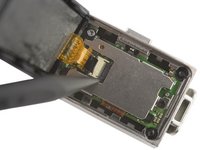
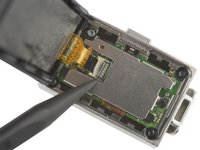
    • Pull the touch screen flex cable straight out its socket.

    • Remove the touch screen assembly.

    New touch screen will not turn on

    Lisa McGee - 回复

  14. Fitbit Charge 2 Battery Replacement, Unfasten the screws: 步骤 14 中的图像 1,1
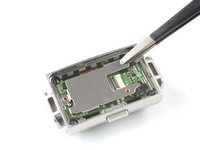
    • Remove the two Phillips screws securing the motherboard cover:

    • One 2.5 mm screw

    • One 2.8 mm screw

  15. Fitbit Charge 2 Battery Replacement, Remove the motherboard shield: 步骤 15 中的图像 1,2 Fitbit Charge 2 Battery Replacement, Remove the motherboard shield: 步骤 15 中的图像 2,2
    在这个步骤中使用的工具:
    Tweezers
    $4.99
    • Use a pair of blunt nose tweezers to remove the motherboard shield.

  16. Fitbit Charge 2 Battery Replacement, Disconnect the heart rate monitor sensor: 步骤 16 中的图像 1,2 Fitbit Charge 2 Battery Replacement, Disconnect the heart rate monitor sensor: 步骤 16 中的图像 2,2
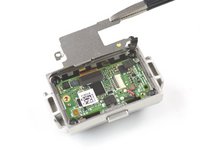
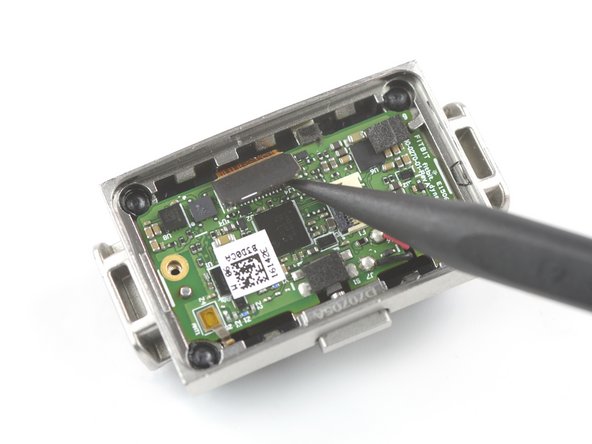
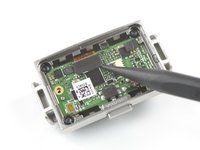
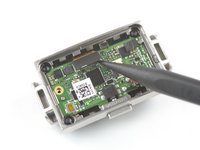
    • Use the pointed end of a spudger to pry up and disconnect the heart rate monitor sensor flex cable.

  17. Fitbit Charge 2 Battery Replacement, Remove the motherboard: 步骤 17 中的图像 1,3 Fitbit Charge 2 Battery Replacement, Remove the motherboard: 步骤 17 中的图像 2,3 Fitbit Charge 2 Battery Replacement, Remove the motherboard: 步骤 17 中的图像 3,3
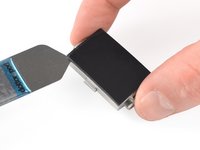
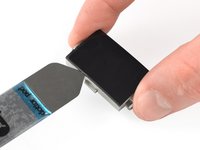
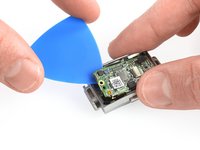
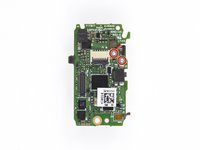
    • Use an opening pick to pry up and remove the motherboard which is holding the battery.

  18. Fitbit Charge 2 Battery Replacement, Separate the battery from the motherboard: 步骤 18 中的图像 1,3 Fitbit Charge 2 Battery Replacement, Separate the battery from the motherboard: 步骤 18 中的图像 2,3 Fitbit Charge 2 Battery Replacement, Separate the battery from the motherboard: 步骤 18 中的图像 3,3
    • The battery is mildly glued to the motherboard.

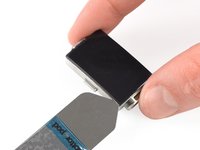
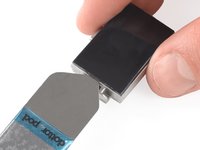
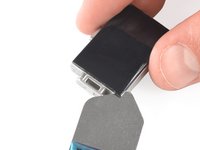
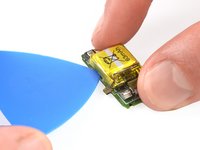
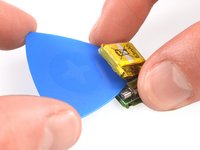
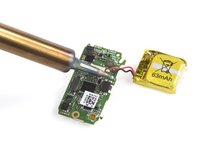
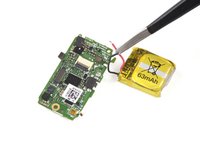
    • Slide an opening pick underneath the battery to cut the adhesive.

    • Don't try to remove the battery all the way yet! It's still connected to the motherboard.

  19. Fitbit Charge 2 Battery Replacement: 步骤 19 中的图像 1,1
    • The next steps require desoldering the two battery cables from the motherboard.

    • Use this picture as reference for resoldering during re-assembly or make your own photo if the cable order differs in your model.

  20. Fitbit Charge 2 Battery Replacement: 步骤 20 中的图像 1,3 Fitbit Charge 2 Battery Replacement: 步骤 20 中的图像 2,3 Fitbit Charge 2 Battery Replacement: 步骤 20 中的图像 3,3
    • Use a soldering iron to desolder the first battery cable from the motherboard.

  21. Fitbit Charge 2 Battery Replacement: 步骤 21 中的图像 1,2 Fitbit Charge 2 Battery Replacement: 步骤 21 中的图像 2,2
    • Use a soldering iron to desolder the second battery cable from the motherboard.

  22. Fitbit Charge 2 Battery Replacement: 步骤 22 中的图像 1,1
    • Remove the battery.

    • Do not reinstall a damaged or deformed battery, as doing so is a potential safety hazard. Replace it with a new battery.

    • Make sure the battery cables are long enough to solder them onto the motherboard before installing new adhesive to the battery.

结论

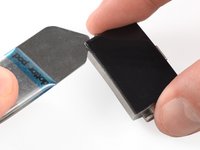
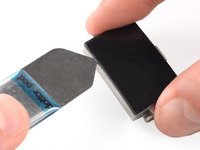
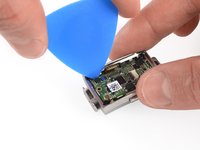
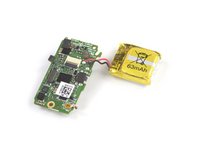
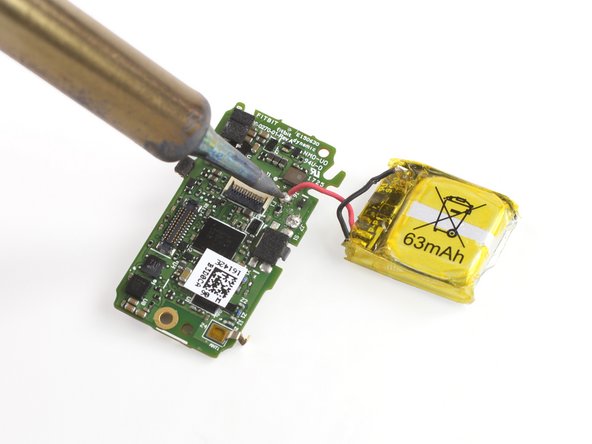
Secure the new battery with pre-cut adhesive or double-sided adhesive tape. In order to position it correctly, apply the new adhesive into the device at the places where the old adhesive was located, not directly onto the battery. Press the new battery firmly into place.

To reassemble your device, follow these instructions in reverse order.

For optimal performance, calibrate your newly installed battery: Charge it to 100% and keep charging it for at least 2 more hours. Then use your device until it shuts off due to low battery. Finally, charge it uninterrupted to 100%.

Take your e-waste to an R2 or e-Stewards certified recycler.

Repair didn’t go as planned? Try some basic troubleshooting, or ask our Answers community for help.

9等其他人完成本指南。

Adriana Zwink

于12/18/19注册

56,807 声望

创作了167篇指南

团队

iFixit iFixit 的会员

Staff

120 名成员

创作了19,664篇指南

4指南评论

Donde se compran los repuestos?

Leonardo - 回复

Muy buenas las instrucciones! Donde puedo comprar los repuestos y herramientas? Gracias!!!

Leonardo - 回复

Nice, thank you!

Mike Beard - 回复

添加评论

浏览统计数据:

过去 24 小时: 18

过去 7 天: 93

过去 30 天: 506

总计 26,825