
Canon PowerShot SD1200 IS Flash Assembly Replacement
简介
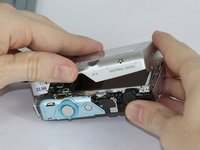
转到步骤 1Use this guide to access or replace the flash assembly on your Canon Powershot SD1200 IS camera.
你所需要的


-
-
在这个步骤中使用的工具:Tweezers$4.99
-
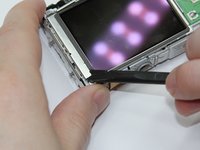
Use the spudger to lift the retaining flap on the Zero Insertion Force (ZIF) tab securing the thick ribbon cable.
-
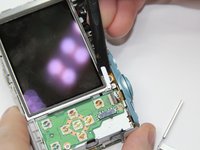
Slide out the ribbon cable using fingers or tweezers.
-
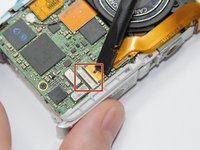
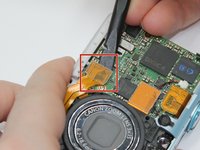
Using tweezers, disconnect the small ribbon cable below the flash assembly from the No Fuss Connector by simply pulling the ribbon cable straight out.
-
-
-
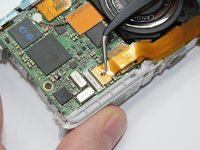
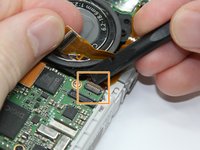
Use the spudger to pry up each side of the lens assembly Flat-Topped Connector at the bottom of the motherboard.
-
Holding back the lens assembly ribbon cable, use the spudger to lift the Zero Insertion Force (ZIF) connector tab . Slide out the ribbon cable.
-
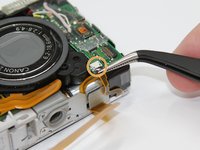
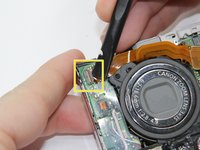
Use the spudger to lift the Zero Insertion Force (ZIF) connector tab located on the flash unit. Remove the ribbon cable.
-


To reassemble your device, follow these instructions in reverse order.
To reassemble your device, follow these instructions in reverse order.
团队

USF Tampa, Team 17-5, Blackwell Fall 2016 USF Tampa, Team 17-5, Blackwell Fall 2016 的会员
USFT-BLACKWELL-F16S17G5
3 名成员
创作了7篇指南