简介
使用本指南更换 Microsoft Surface Laptop 3 (15") 上磨损或没电的电池。
为了你的安全,在拆卸笔记本电脑之前,请将电池放电至 25% 以下。 如果电池在维修过程中意外损坏,这可以降低发生危险热事件的风险。
如果你的电池膨胀,采取适当的预防措施。
你需要更换电池粘合剂才能完成此维修。建议使用强力双面胶带,如 Tesa 61395。
你所需要的
-
-
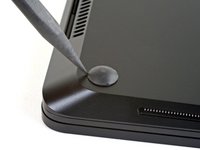
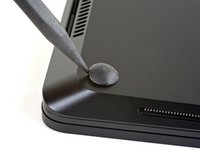
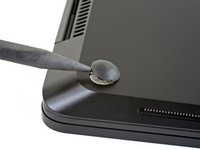
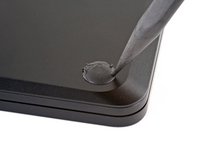
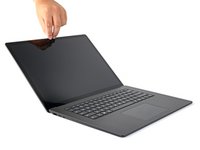
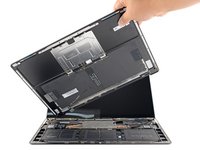
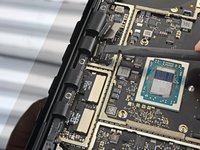
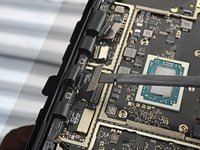
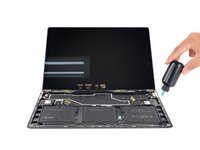
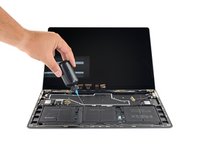
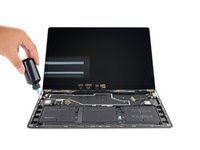
取下上壳。
-
将上壳放在干净的表面上,键盘面朝下。
Excellent instructions. Just replaced my upper case. Also thanks for the tip for replacement rubber feet.
What do I do if I accidentally disconnected the ribbon on the keyboard side. I can’t figure out how to reconnect it
Wow - that was easy! Thanks!
John McKee - 回复
-
-
-
-
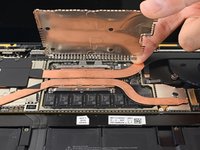
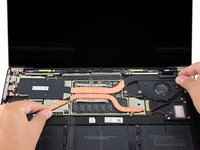
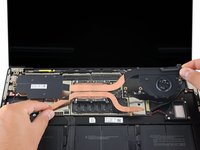
使用 T3 Torx 螺丝刀卸下固定散热槽的十颗螺丝:
-
两颗 2.5 毫米螺丝
-
三颗 2.0 毫米螺丝
-
一颗 3.0 毫米螺丝
-
两颗 4.1 毫米螺丝
-
两颗 3.4 毫米螺丝
-
-
-
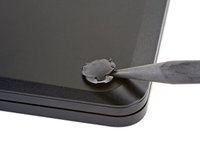
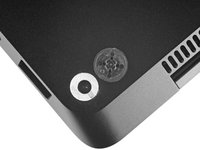
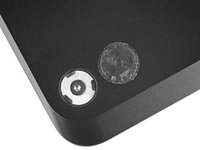
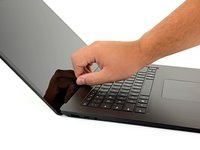
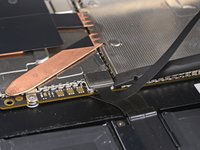
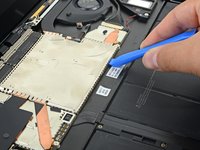
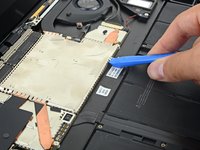
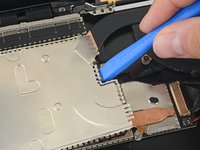
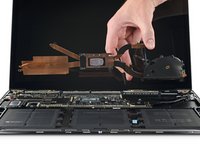
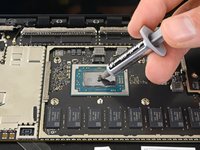
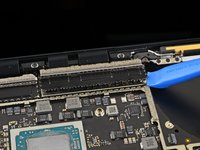
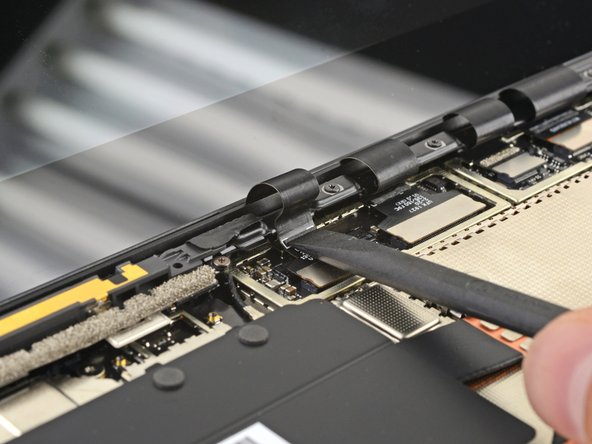
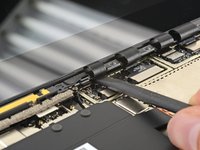
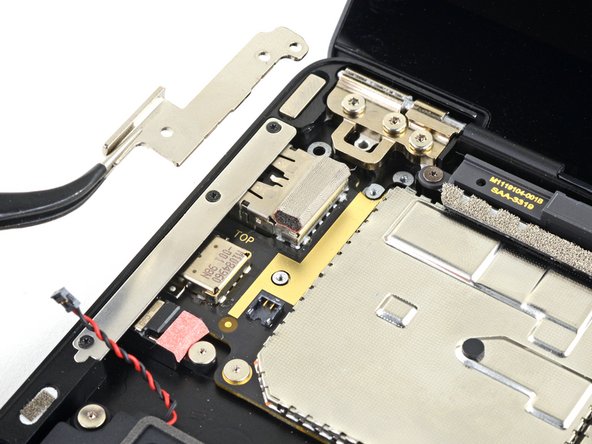
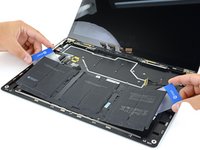
使用打开工具撬起覆盖右排显示器接口的黑色屏蔽板。
-
在屏蔽板周围的不同点重复撬动,直到它变松。
-
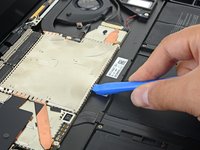
取下屏蔽板。
Le reinstale el windows 10 a la Microsoft surface laptop 3 y ya no reconoce el teclado ni el mouse interno
I initially was plying the silver bits on this step. Make sure you're plying the black bits! The foam covered bar also came off separately (first)
-
-
-
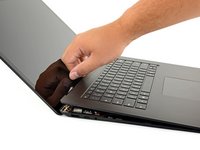
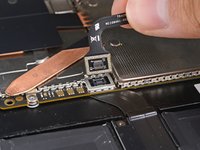
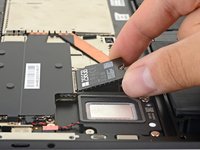
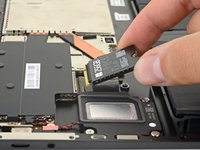
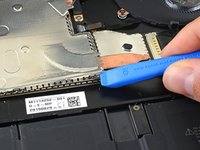
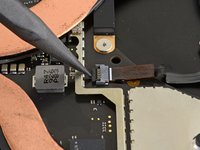
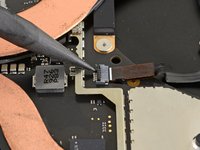
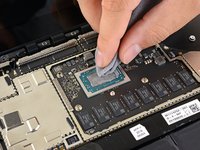
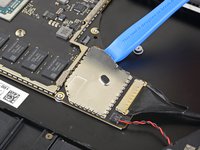
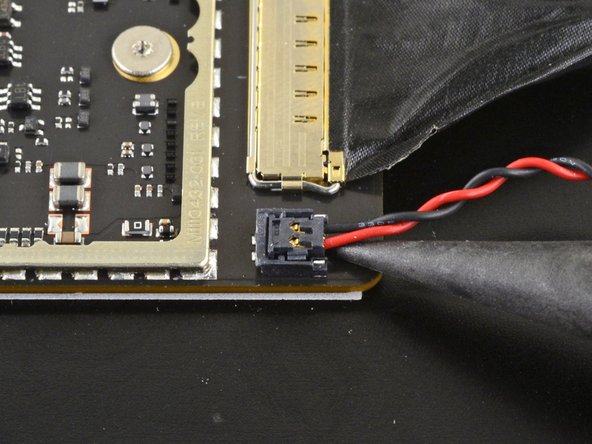
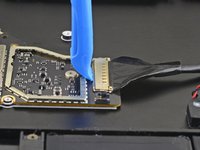
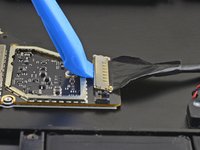
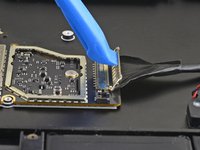
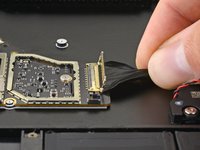
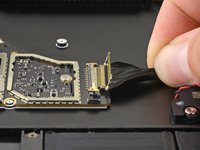
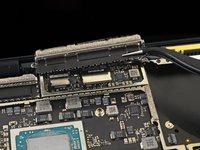
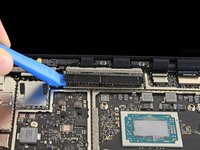
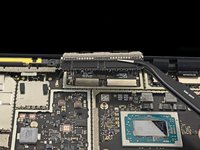
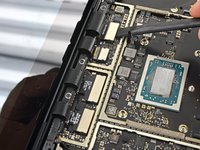
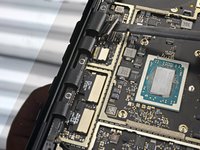
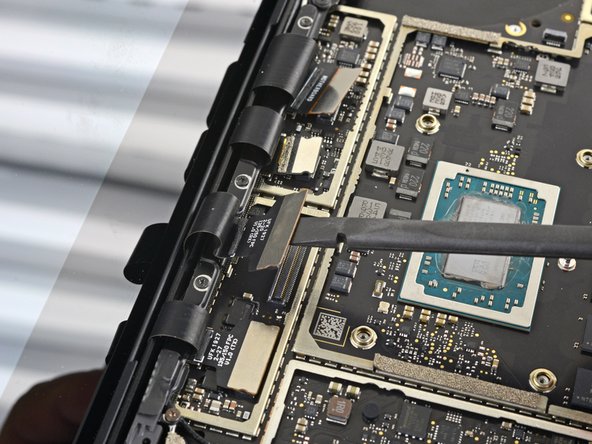
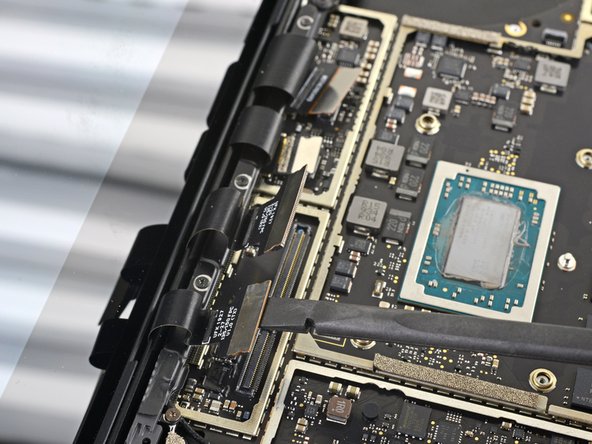
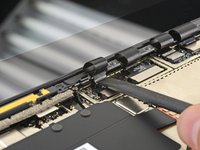
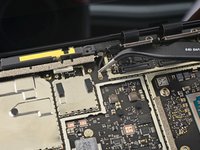
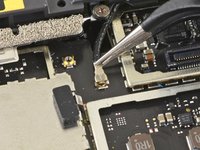
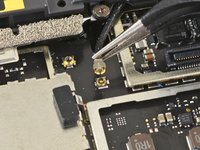
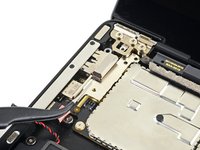
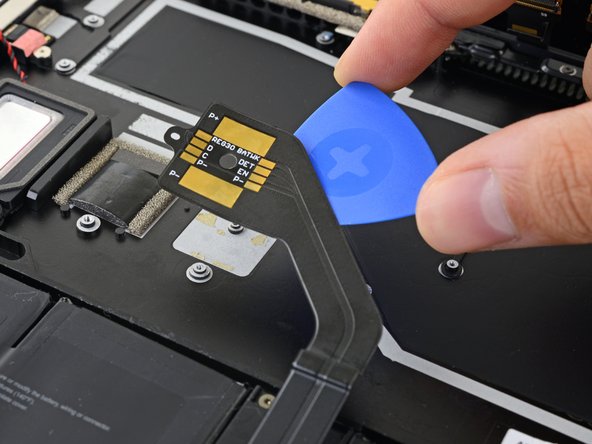
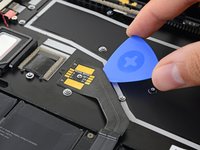
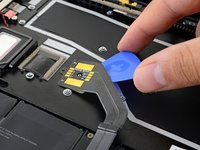
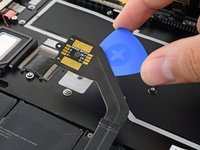
使用撬棒扁平的一端将第一根显示电缆从主板上的插座中撬出,以断开它。
I've accidentally shorted out some capacitor while doing this step. Be careful about using non plastic tools
-
-
-
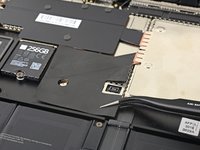
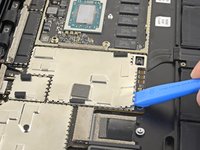
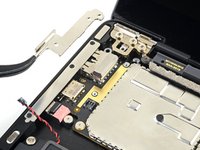
使用 T3 Torx 螺丝刀卸下固定主板的六颗 2 毫米螺丝。
Step 40 : I agree with the previous comment, and I'd add that it's also easier to get the motherboard in and out if the silver strip above the USB-A, USB-C and audio jack is also removed. It's held in by 3 tiny T3 Torx screws.
John McKee - 回复
-
-
-
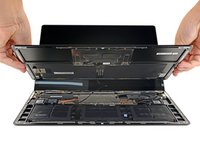
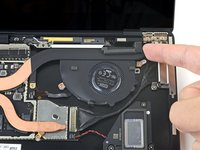
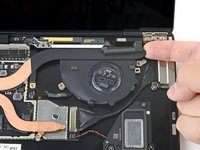
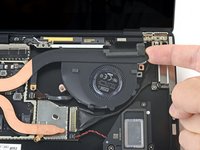
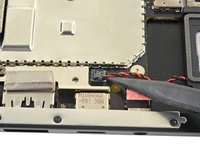
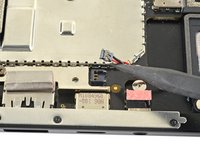
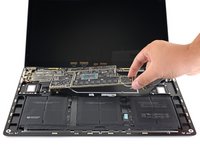
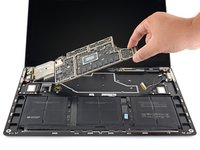
用手指抬起并卸下主板。
The right side moves but the left side seems really stuck
Try removing the far left metal bracket before removing the motherboard.
-
-
-
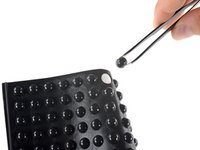
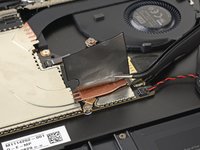
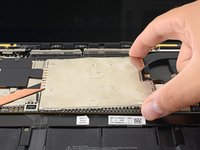
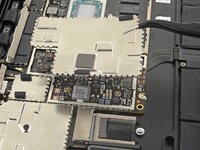
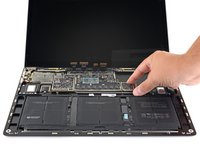
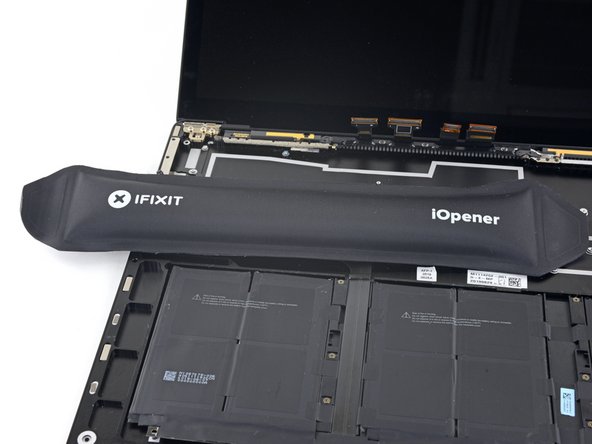
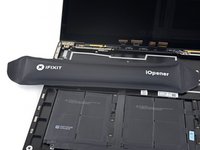
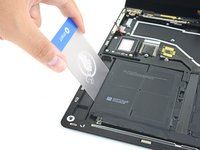
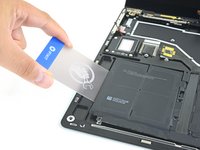
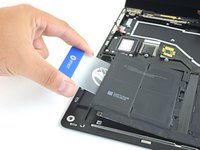
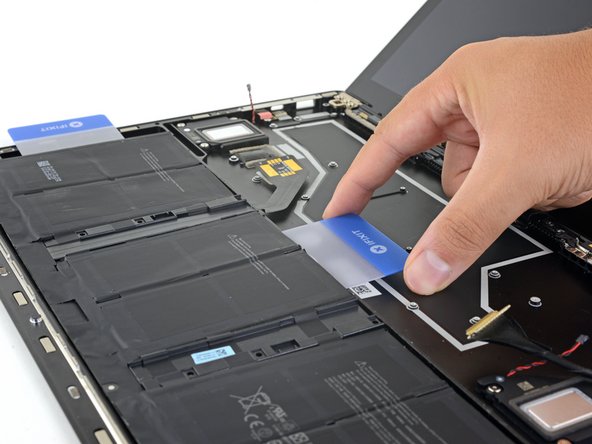
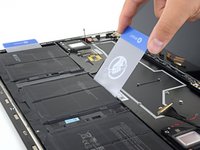
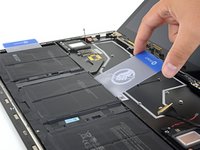
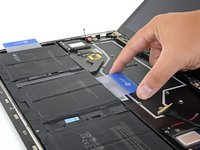
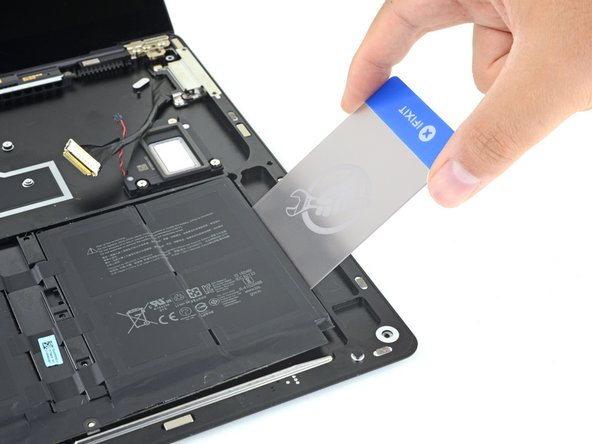
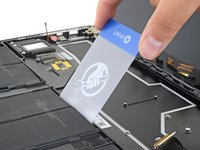
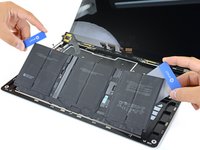
使用两张塑料卡将整个电池组件向上提起并从外壳中取出。
-
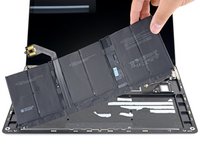
取出电池。
-
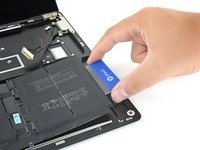
如果你的电池底部预装了粘合剂,请将其翻转过来并小心地剥去衬里以露出粘合剂。如果你的电池没有附带粘合剂,请使用薄的双面胶带(例如 Tesa 61395)将电池固定到位。
-
小心放置电池并将其放置到位。牢牢按住每个电池组 5-10 秒,将其固定到下壳上。
-


为获得最佳性能,请在完成本指南后校准新安装的电池。
将你的新更换零件与原始零件进行比较——你可能需要在安装前转移剩余的组件或去除新零件上的背胶。
要重新组装你的设备,请按逆序执行上述步骤。
将你的电子垃圾送到 R2 或 e-Stewards 认证回收商。
维修没有按计划进行?尝试一些基本的 疑难解答 或搜索我们的 [链接|https://www.ifixit.com/Answers/Device/Mi...|论坛]寻求帮助。
为获得最佳性能,请在完成本指南后校准新安装的电池。
将你的新更换零件与原始零件进行比较——你可能需要在安装前转移剩余的组件或去除新零件上的背胶。
要重新组装你的设备,请按逆序执行上述步骤。
将你的电子垃圾送到 R2 或 e-Stewards 认证回收商。
维修没有按计划进行?尝试一些基本的 疑难解答 或搜索我们的 [链接|https://www.ifixit.com/Answers/Device/Mi...|论坛]寻求帮助。
4等其他人完成本指南。


6条评论
Wow, that was hard. but I did it and it worked. however. a couple of things. two of the mounting holes in the ifixit battery do not line up with the holes in the case - not a big deal, as the adhesive does most of the holding. And, two elongated dump-bell-shaped washers/bushings fell out somewhere when taking the motherboard out. I just found them lying in the case. I have no idea where they go (i can send an image of them).. like i said, it appears to work without them -- for now.
R
I'll check on those battery mounting holes! Those two washers are mentioned in step 40. They live under the motherboard.
Got through that. The author did a great job with the instructions, thank you!
The laptop powers up and operates just fine but is not charging. We have ordered another Surface 127W power supply but does anyone know of any issues with the Microsoft power supply not being happy with the replacement battery?
Vous avez obtenu une réponse par ailleurs ?
Wow, what a job... Should probably have a caption saying "do not try this at home"! Amazing that Microsoft made it so extraordinarily complicated just to change the battery - obviously a design choice to get people to buy new machines rather than replacing batteries! This sort of design should be prohibited by law. Be warned, removing the various shields is awful, and prising the battery cells out with isopropanol is messy. However, with the fantastic instructions here, and care and perseverance it is certainly possible. Only additional note I would add is to take precautions for static. Finally completed at 3 in the morning and the laptop is back to together, runs and charges. Thanks for the guidance iFixit :)