简介
学习如何更换你的iPhone 7 Plus的屏幕。这一组件已经包含了安装好的前面板组件、听筒扬声器和电磁波防护板,使维修更加方便。
你需要做的仅仅是移除旧屏幕,并将旧屏幕上的Home键转移到新屏幕上,这样做是为了确保Touch ID的正常运行。
你所需要的
视频概述
-
在这个步骤中使用的工具:Clampy - Anti-Clamp$24.95
-
接下来的三个步骤演示了如何使用反向钳,一个旨在简化打开过程的工具。 如果你不使用 反向钳,请跳过这两个步骤以使用替代方法。
-
将蓝色手柄拉向铰链以解锁反向钳。
-
将手机塞进反向钳的两臂之间。
-
将吸盘放在屏幕上主页按钮的正上方——一个在前面,一个在后面。
-
向下推吸盘以将吸力施加到所需区域。
-
-
-
加热 iOpener并将其穿过反向钳。
-
折叠 iOpener,使其位于 iPhone 的底部边缘。
-
等待一分钟,让粘合剂有机会释放并出现开口间隙。
-
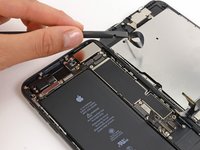
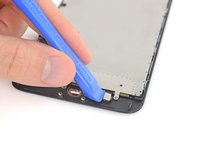
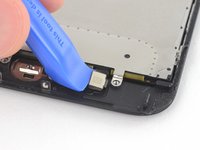
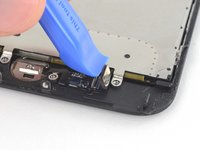
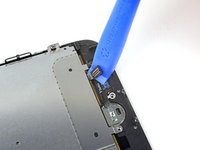
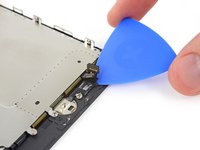
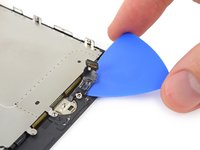
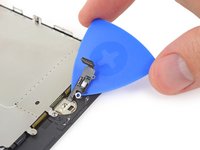
将撬片插入间隙中。
-
跳过接下来的三个步骤。
-
-
-
-
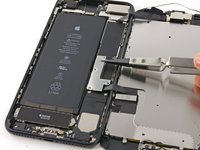
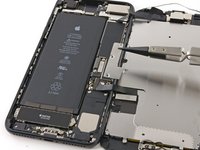
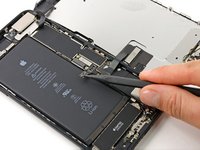
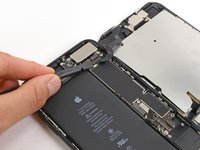
卸下四颗固定Home/Touch ID传感器支架的Y000螺丝。
-
一颗1.1mm螺丝。
-
三颗1.3mm螺丝。
-
重新组装时,请注意不要拧得太紧,否则Home 键可能不起作用。
-


将新的替换零件与原始零件进行比较——在安装之前,您可能需要转移剩余的零件或从新零件上取下粘性衬板。
要重新组装设备,请按相反顺序执行上述步骤。
将您的电子垃圾带到R2或e-Stewards认证回收商。
626等其他人完成本指南。


60指南评论
Only the glass is broken on my screen. I don't need a new digitizer. Is there a way to just replace the glass? Seems like that would be much cheaper. Thanks!
Unfortunately, by the nature of the technology, cracked glass likely means your digitizer is out of commission (does touch still register on the cracked screen?). Below that is the LCD, and that might not be broken (if the image is fine, then the LCD is likely fine). The problem is that these components are VERY VERY difficult to separate. This makes the individual replacements a nightmare. I hate to say anything is impossible, but separating these components will feel impossible without expensive tools and extensive knowledge. It will also likely end in a mess of broken components. When there is a will, there is a way. But the separation project will demand a lot of will.
Our store is having trouble with the earpiece speaker working after screen repair on just the 7 Plus, not with the 7. We have tried different techniques and still get figure what we are doing wrong. Has anyone else had this problem and know the solution?
My earpiece speaker also won't work with new screen... this is frustrating. Any solution
Ben -
There are some connections for the earpiece speaker that can be a little tricky to get properly connected during reassembly. If you look at the third photo in step 22 of the iPhone 7 Plus teardown you can see four copper pads on the cable, and four protruding copper connections on the speaker. For starters, make sure that these are all clean. When reassembling, make sure that the metal pads on the cable firmly touch the metal pins on the speaker. These are actually electrical connections, and are a little tougher to seat properly because they don't snap in like press or ZIF connectors. If the metal is all lined up and pressed against each other, then electricity should be flowing and sound should result! If the earpiece speaker was not removed and this guide was followed as is, it is most likely an issue with the connectors in step 19 of this guide.