简介
使用此向导替换Home按钮组件。
请注意,只有手机原来的Home按钮能够使用触摸ID功能。安装一个新的Home按钮只会恢复普通的Home按钮功能,而不是触摸ID功能。
你也可以使用本指南更换以下部件:
*
视频地址:
你所需要的
-
-
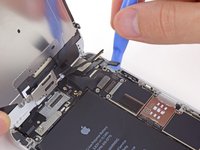
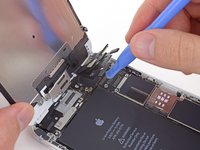
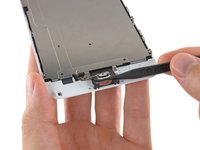
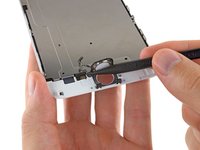
将蓝色手柄拉向铰链以解锁反向钳的手臂。
-
将反向钳手臂滑过 iPhone 的左边缘或右边缘。
-
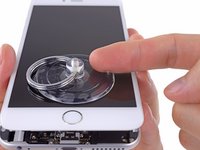
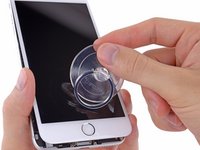
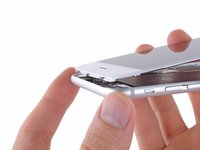
将吸盘放在靠近 iPhone 底部边缘的位置——一个在正面,一个在背面。
-
向下推吸盘以将吸力施加到所需区域。
-
-


若要重新组装你的设备,以相反的顺序执行这些步骤。
若要重新组装你的设备,以相反的顺序执行这些步骤。
122等其他人完成本指南。


23条评论
My iphone was screen broken and i change it with a original complete iphone screen, the home button works fine but the touch id dont work. I change the home button to the one that i have in the broken screen and still the touch id dont work. What can i do to fix the touch id?
replace the flex cable which connects touch ID cable with mother board
Hi guys, I replaced my front assembly and I'm having the opposite issue with my home button: The TouchID is working fine, but the home button being pressed is not working. I've tried re-seating the cable a few times. I'm normally pretty good at these kinds of things but I'm assuming I may have somehow crimped one of the ribbon cables.
My question: If something is damaged, is it more likely the cable on the back of the heat-sink that is damaged, or the home button ribbon cable itself? I realize that I will lose TouchID if its the latter, I just want to know what my options are. I'm having trouble searching the issue because everyone else has the issue where the TouchID doesn't work (for obvious reasons) but mine is working just fine.
Thanks for any advice.
Hi everyone, I replaced the home button on my cell phone iphone 6+, the home button functionality works just fine, however the biometrics fingerprint reader does not work anymore. Any suggestions? Thank you
Unfortunately, as stated in the introduction to this guide, that outcome is normal. For security reasons, the fingerprint sensor is coded to your phone's logic board at the factory. If you replace the button, you'll lose the fingerprint sensor function. Only Apple has the capability to pair new Touch ID sensors to existing phones. As far as I know, there are only two ways around this: (1) replace both your home button and logic board with a factory-paired home button and logic board harvested from another phone, or (2) pay Apple for an out-of-warranty repair (meaning you ship your phone to them and they give you a refurb in return).