当前版本的文档还未经巡查,您可以查看最新的已查核版本。
-
-
屏幕由强力粘胶固定着。为了分离它,您首先需要使用iOpener、吹风机或热风枪加热和软化粘胶。
-
在整个过程中,您可能需要多次重新加热,以防止粘胶冷却并固化。
-
加热iOpener,将其置于Pad屏幕的底部边缘约两分钟。
-


在这个步骤中使用的工具:
Anti-Clamp
$24.95
购买
-
如果您的iPad屏幕严重破裂,请穿戴皮肤和眼睛保护装备。用一层光滑的透明胶带覆盖屏幕,以防止玻璃碎片并帮助吸盘附着。或者,使用强力胶带(如防水胶带),折一个手柄。
-
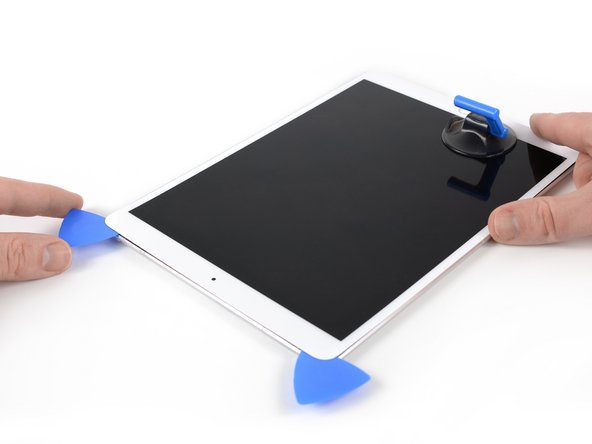
将吸盘放在iPad的主页按钮旁边,按下以创建密封。
-
为了获得最大的杠杆效应,将吸盘尽量靠近边缘,但不要超过显示屏的边缘。
-
如果您想使用反向钳,一个旨在使打开过程更容易的工具,请按照该指南操作。
-
牢固地拉起吸盘,以在前面板和后壳之间创建一个小缝隙。
-
不要拉得太用力,否则可能会破坏玻璃。如有必要,可以再次加热以进一步软化胶粘剂。
-
一旦打开了足够的缝隙,请将撬片插入缝隙中。
-
-
-
加热iPad的左边约两分钟,或者直到它变得稍微烫手。
-
如有必要,重新加热iOpener几秒钟,直到它稍微烫手。注意不要过热iOpener,否则它可能会爆裂。
-
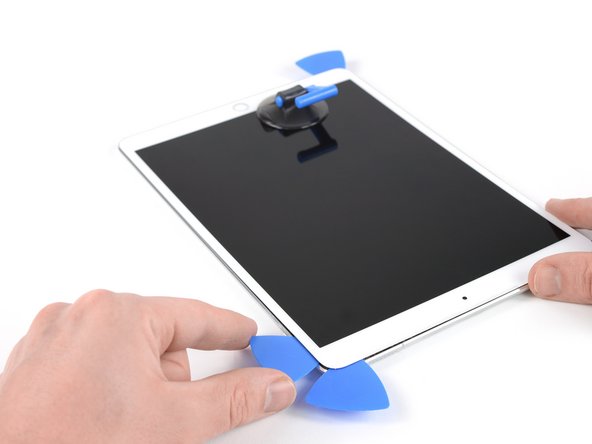
在iPad的左下角插入第二个撬片。
-
将第二个撬片沿屏幕面板的左侧划动,以分离下面的粘胶。
-
将第二个撬片留在iPad的左上角附近,以防止粘胶重新粘合。
-
-
-
-
-
在iPad顶部靠近(但不直接在)前置摄像头处插入第五个撬片。
-
轻轻扭动开胶片以将屏幕组件与iPad分离。
-
不要试图完全拆下显示屏!它仍然通过排线连接至iPad的主板。
-
如果需要,加热更多并/或切割任何阻止显示屏分离的剩余胶粘剂。
-
-
-
-
-
当您使用电池隔离器隔离电池时要小心。电池触点很容易弯曲或损坏,导致不可修复的损坏。
-
要断开电池连接,请将电池隔离器的一个齿或拆机片的尖端滑入电池电源接口下,以确保电源电路被切断。
-
不要用过大的力量将电池隔离器推入接口下。如果在将电池隔离器滑入主板下方遇到困难,您可以尝试使用一张扑克牌来断开电池连接。
-
理想情况下,电池隔离器或扑克牌在滑入主板下时应该不会遇到任何障碍。
-
在工作过程中,将电池隔离器保持在原位。
-
-
-
-
在下方,您会找到另外两个屏幕排线接口。
-
用撬棒轻轻撬起它们并断开连接。
-
-
取下屏幕组件。
-
在重新组装之前,在安装显示屏之前,请将iPad上的任何残留粘合剂去除,并使用高浓度异丙醇(90%或更高)和无纺布擦拭胶粘区域。这有助于为iPad准备新的粘合剂,并确保它将正确粘合。
-
如果您计划重新安装现有的显示屏,请将显示屏背面上的任何残留粘合剂去除,并用异丙醇清洁粘附区域。
-
在封合之前,请测试您的iPad功能,并遵循我们的显示屏贴合指南在显示屏背面安装预切割的胶带 。
-
-
-
-
-
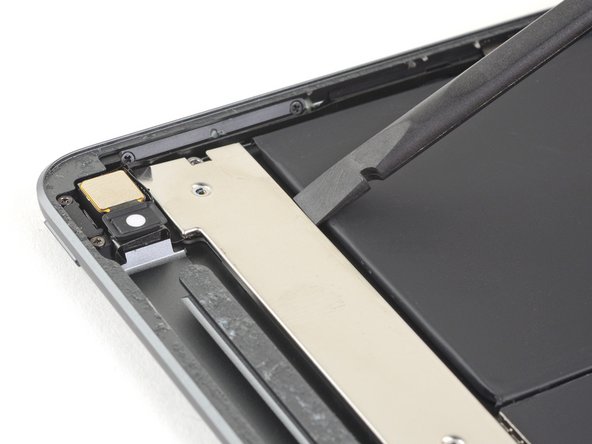
Remove the upper component bracket.
-
During reassembly, make sure that the upper component bracket slides under the clips near the rear camera.
-
-
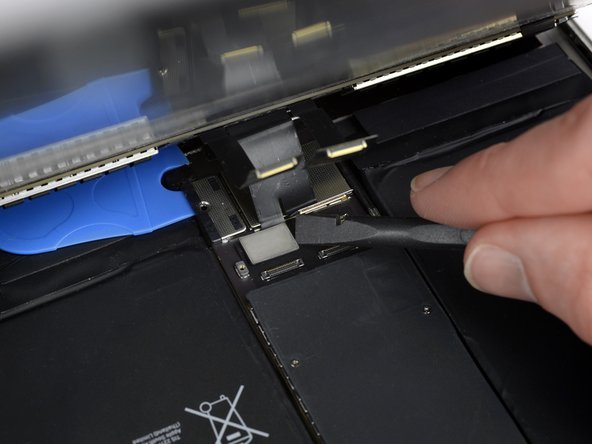
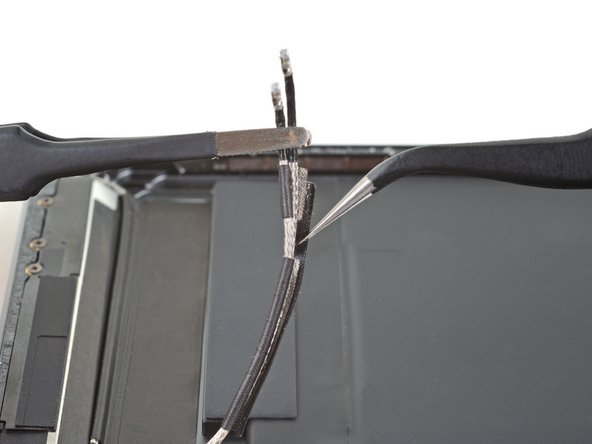
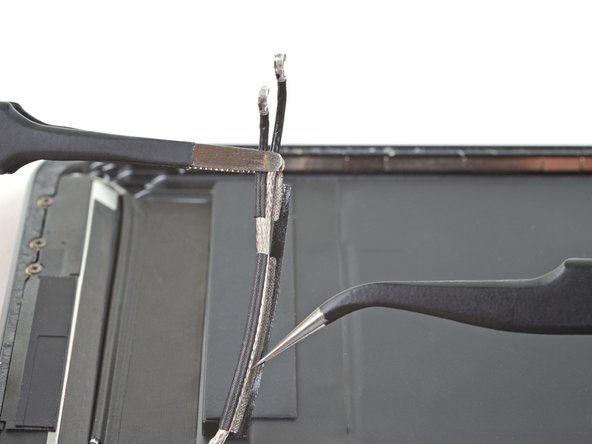
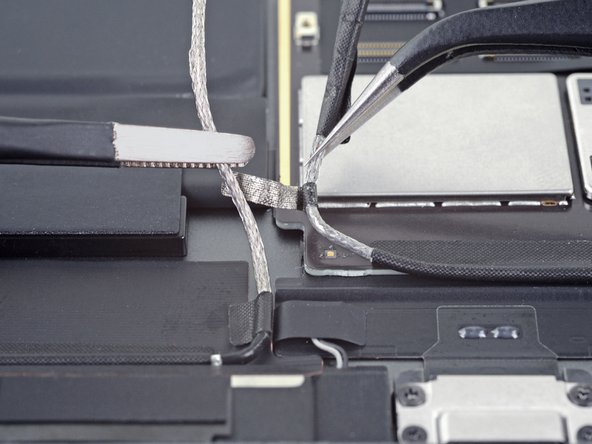
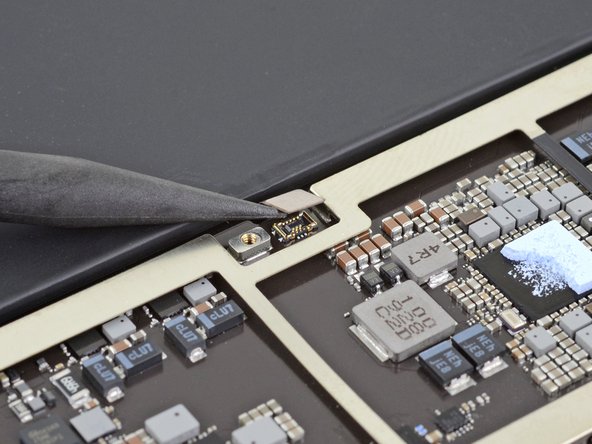
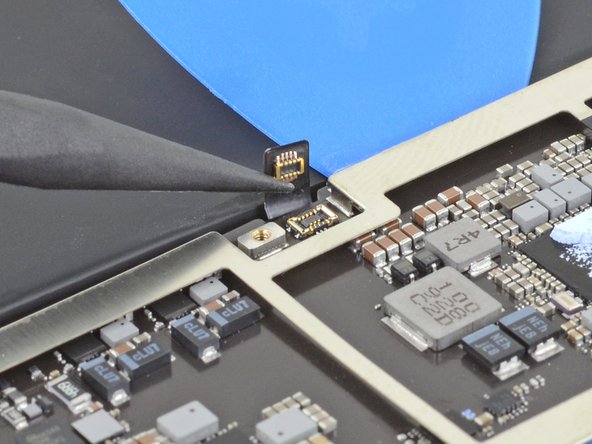
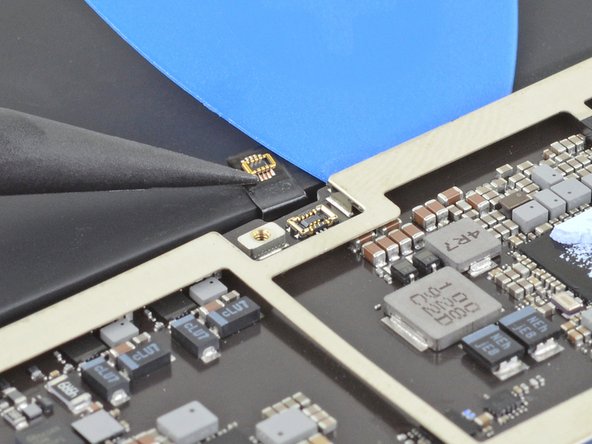
Use a pair of tweezers to disconnect a logic board antenna cable by lifting up on the cable as close to the connector as possible.
-
Take care not to puncture or bend the battery with your tool—a punctured or bent battery may leak dangerous chemicals or cause a thermal event.
-
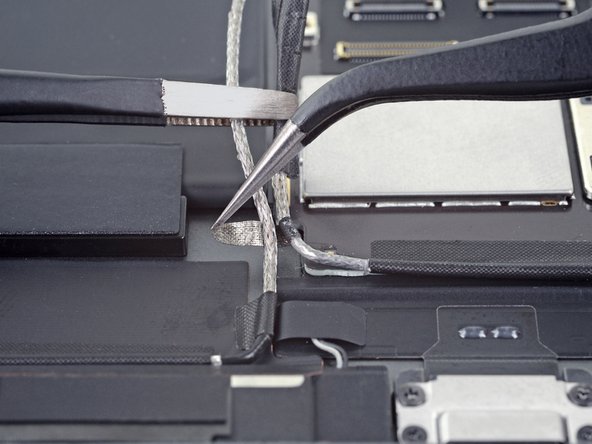
Repeat for the other logic board antenna cable.
-
-
-
-
-
-
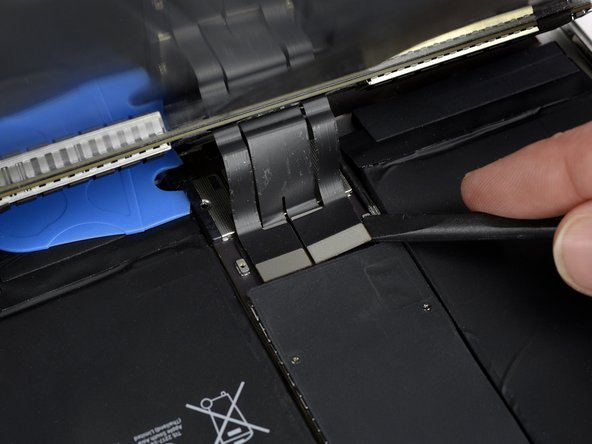
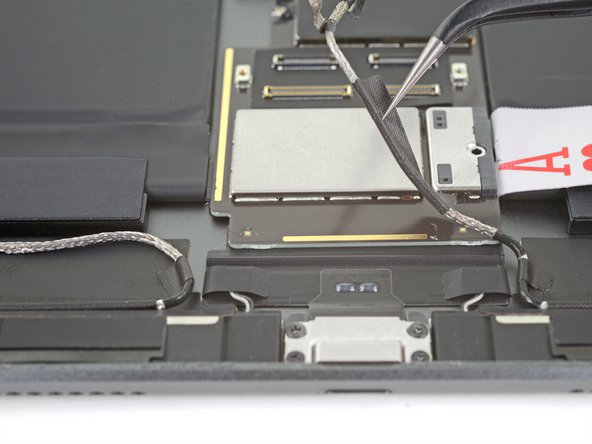
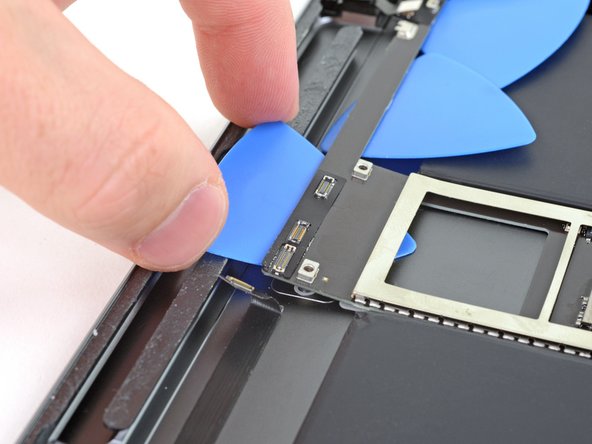
Use a pair of tweezers to peel up the tape covering the right speaker connector.
-
The right speaker connector will disconnect when you pull up on the tape.
-
Repeat for the left speaker connector.
-
-
-
-
-
-
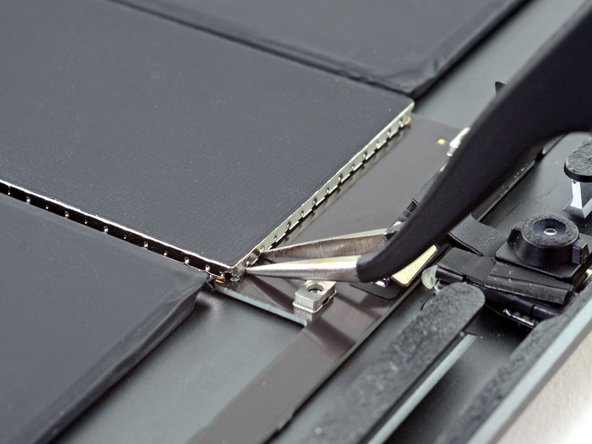
Insert the tips of a pair of tweezers into the gaps under the the logic board shield on the upper right corner.
-
Take care not to puncture or bend the battery with your tool—a punctured or bent battery may leak dangerous chemicals or cause a thermal event.
-
Pry up slightly to loosen the logic board shield.
-
Pivot the tweezers on the screw boss to avoid damaging the press connectors.
-
-
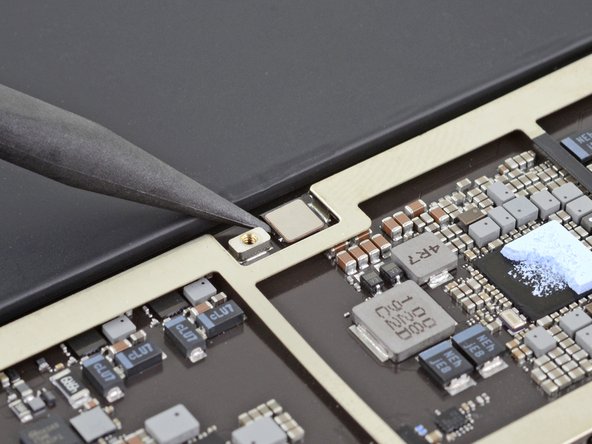
Insert the tips of a pair of tweezers into the gaps under the logic board shield on the upper left corner.
-
Pry up slightly to loosen the logic board shield.
-
Pivot the tweezers on the screw boss to avoid damaging the press connectors.
-
-
Insert the edge of an opening tool under the top edge of the logic board shield.
-
Pry up to loosen the shield.
-
Continue prying until you've loosened the entire top edge of the shield.
-
-
Grip the logic board shield with your fingers.
-
Slowly lift the shield up and remove it.
-
Try to keep the logic board shield as straight as possible. You will be putting the shield back on later.
-
-
-
-
-
-
-
-
-
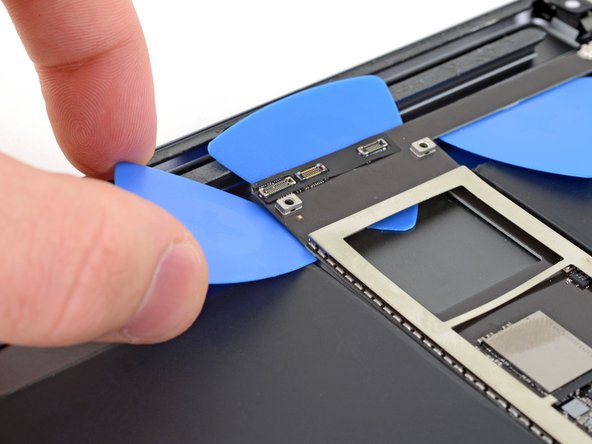
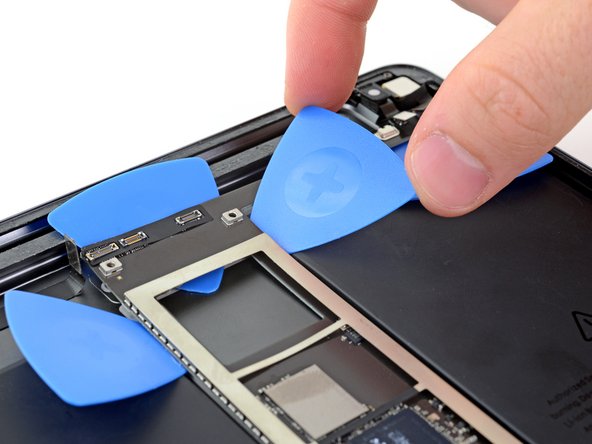
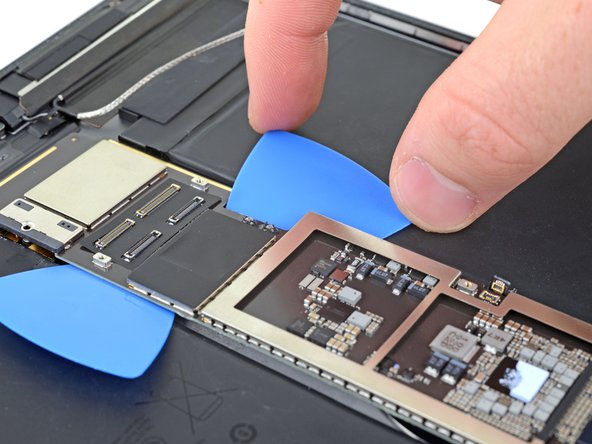
Insert an opening tool under the logic board next to the front camera.
-
Pry up the logic board until you can slide an opening pick underneath the logic board.
-
Take care to not slice the headphone jack cable.
-
-
-
-
-
-
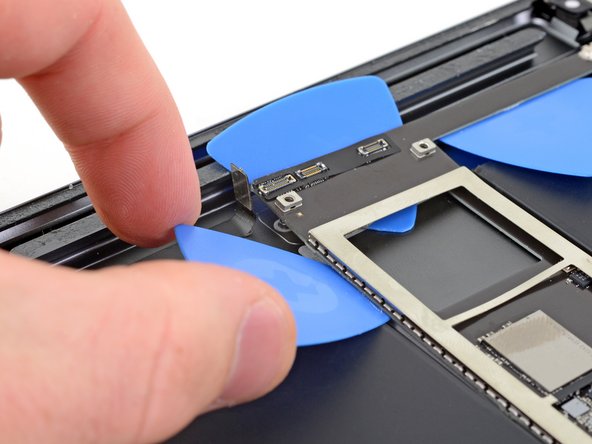
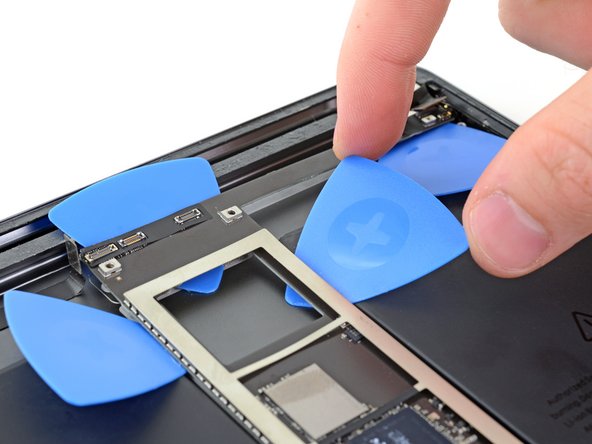
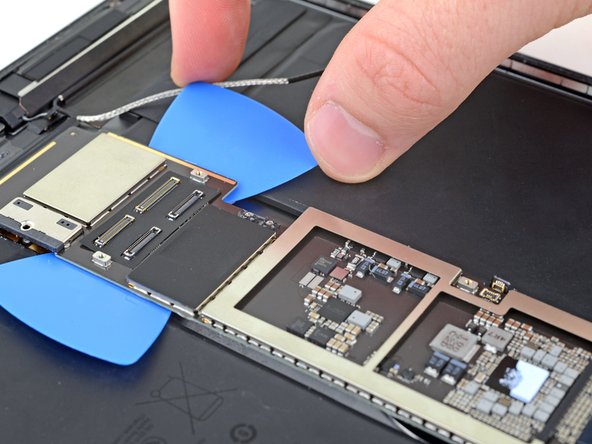
Slide the opening pick past the Smart Connector cable and down to the antenna connectors.
-
If you have trouble, apply a few drops of isopropyl alcohol to the edge of the logic board, wait a minute, and try again.
-
-
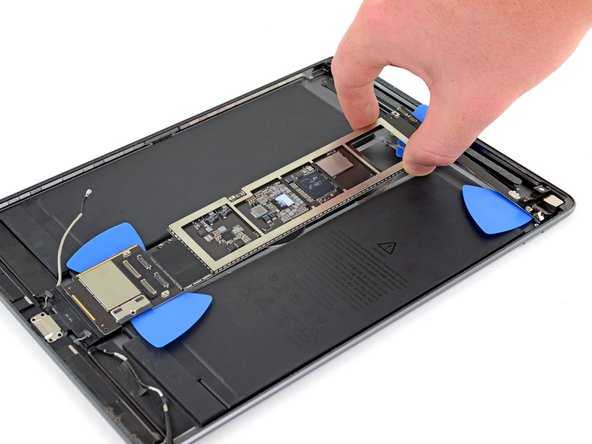
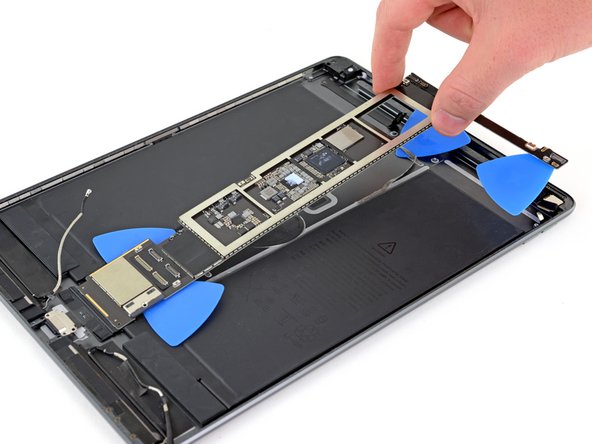
Insert an opening pick under the upper right edge of the logic board.
-
If you have trouble, apply a few drops of isopropyl alcohol to the edge of the logic board, wait a minute, and try again.
-
Slide the pick down towards the bottom of the iPad to slice the adhesive.
-
-
-
-
-
Slowly lift the logic board up and pull the charging port out of its recess.
-
If you can't lift up the logic board, identify where it is stuck and use an opening pick to slice the adhesive there.
-
You can also apply a few drops of high concentration (90% or higher) isopropyl alcohol where it's extra stuck.
-
嵌入本指南
选择一个尺寸并复制下面的代码,将本指南作为一个小插件嵌入到你的网站/论坛中。
预览