简介
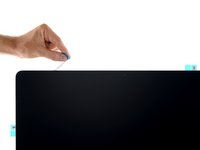
拆卸显示屏需要剪开屏幕四周的胶条。胶条被剪断后,无法用于重新将显示屏密封到位,因此你需要使用一套新的胶条。
本指南介绍了如何为大多数 21.5 英寸 Intel iMac 更换胶条。本指南中的某些图片使用的是较旧的 iMac,在视觉上存在细微差别,但这些差别不会影响维修步骤。
你所需要的
-
在这个步骤中使用的工具:iMac Intel 21.5" Cardboard Service Wedge$4.99
-
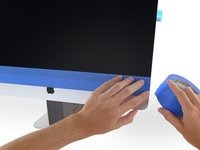
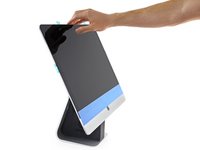
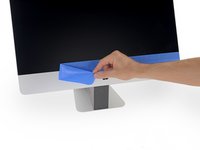
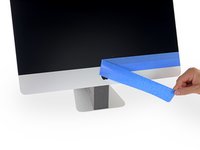
一旦铰链可以自由移动,iMac 将失去平衡,难以操作。在支架上放置一个 iMac 支架 以稳定 iMac。
-
-
-
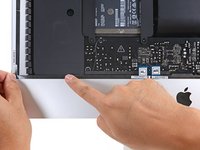
如果要重复使用现有的显示屏,还必须清除显示屏背面的旧粘胶。
-
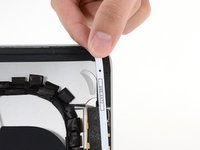
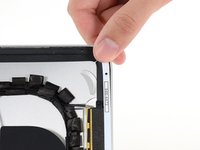
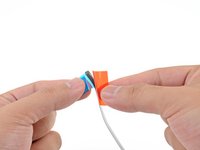
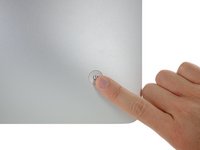
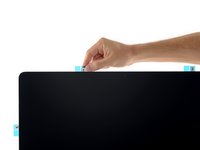
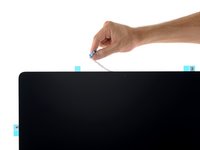
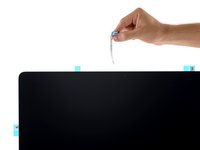
用镊子或手指剥离旧的胶条。从底部开始,向设备顶部向上剥离。
-
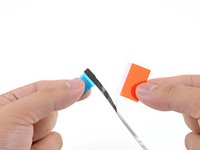
清除所有旧胶条后,用高浓度异丙醇(90% 或更高)和无绒布仔细擦去胶条残留物。顺着一个方向擦拭,不要来回擦拭。
The aluminum frame have a plastic zone. Could the isopropyl alcohol damage the plastic surface?
Hello! Isopropyl alcohol should not damage the plastic surface.
It’s not clear if you’re supposed to remove the black strips under the adhesives from the screen. Sometimes they come off when removing the main adhesives, but they seem to be two separate layers.
Only the adhesive should be removed—the black strips underneath them should stay in place.
“Only the adhesive should be removed—the black strips underneath them should stay in place.”
By fault I’ve removed the black strips, now there is a gap between the glass and the aluminum frame in the bottom.
the display is perfectly pasted, it’s only a matter of appearance…
If I open the computer again, what kind of adhesive tape (caption tape?) could I use to eliminate the gap between the glass and the frame?
Or it’s better to let it go…
Thanks for your support
Hi Massimiliano ,
You should be fine. The bottom edge doesn’t have black strips. It should be bare metal. However, there shouldn’t be any gaps between the glass and the frame. Make sure that the adhesive is fully adhered on the bottom edge.
Hi Arthur,
my English is not perfect…
I would mean that I removed all the black strips under the adhesives on the screen; so I believe that the glass has become too thin compared to the bottom aluminium frame.
I thought to open the Mac again and put some black strips to increase the thickness of the glass screen but I don’t know what kind of tape I should use (Kapton or other?).
And then I will put a new set of ifixit adhesives strips.
Maybe it’s a waste of time… it’ s only an aesthetic matter
Thanks again
Thanks for the clarification. Since there is always a chance to crack the screen glass when cutting the adhesive, I’d suggest not to open up the iMac again. However, if you do open it, I suggest using Tesa tape.
Thanks Arthur,
I will follow your suggestion… I will not open again my computer…
Now it works very well and fast.
So, the bit about the adhesive strips really needs to be clarified. Nowhere in the instructions is there talk about multiple layers of adhesive, one that should be removed and one that should remain. And looking at the pictures further on, clearly the wider sections where the adhesive go are completely clean of any black strips. However, on the screen side, I’ve noted that indeed there are two layers, at least on the top. And removing both layers leads to the adhesive *not* really taking hold and the screens falling out. Really wish this had been clearer. I’ve helped dozens of people upgrade their iMac but after the first time that I had to replace a screen due to it falling and breaking, I’ve been using clear strong adhesive tape externally on the corners to ensure that the screen stays in place. Ugly, but better than the risk.
Are you sure there are 2 layers of tape? My replacement tape comes with the sections that sticks over the 2x antenna sections on the right side of the screen (looking at the screen). The old tape has antenna section left over because only the thinner edge part was cut so that section separated.
Furthermore, the replacement tape on the antenna section is only sticky on 1 side (facing the chassis) and no sticky surface to the screen (other than the thin 5-6mm width edge like the rest of the none antenna section.
As for falling off, I'm guessing there are 1. cheap tapes that looks the part but don't stick as well 2. surfaces not cleaned and primed 3) 2 top corner breathing channel (hot air rise and go out there) got sealed off as Step 6 below + pulling and stretching the tape sealed off that channel. Happened to me the first time, had to cut back to expose the air channel. On subsequent efforts, didn't pull to stretch the tape. Went gradually a couple of inches at a time so the tape don't stretch.
Howard -
I too started removing the second layer of adhesive strips before reading these comments. PLEASE update the article to reflect that the other black strips should stay!
A few key notes
2 top corners have air gaps to let the hot air out. When applying the new tapes, its easy to stretch the tape and seal this hole using the method outlined below. Best to go slowly small section at a time to avoid stretching the tape. 2 people is helpful.
Before peeling the tape facing the LCD, its good to mount the LCD with masking tape (avoid covering mic holes) to test everything. I like to use Photo Booth and record a video to ensure camera and mics are all working properly.
2 people also helpful on the final reseal. I like to stand the iMac up vertically so can power on and do final check after LCD connection before reseal. The screen is pivots on the bottom edge and iMac chassis is wobbly on its stand so 2 people is helpful. For final check, I like to make sure screen powers on and display shows before final reseal.
-
-
-
-
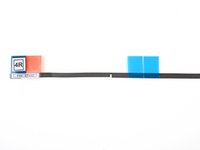
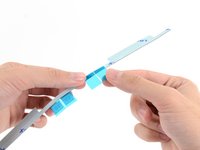
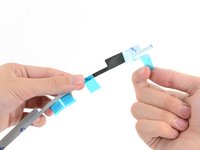
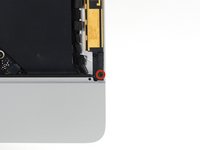
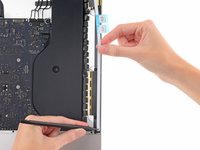
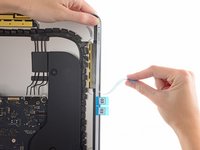
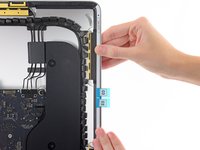
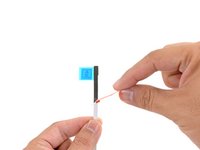
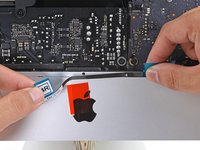
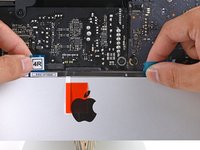
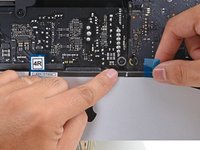
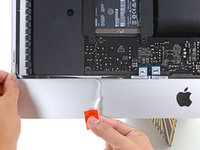
抓住条带 4R 上的红色拉片,拉动使约 2 英寸(5 厘米)的白色背胶与胶条分离。
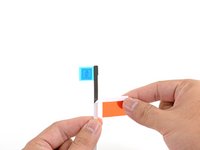
These steps instruct you to install the lower strips to the iMac frame first, as that is what Apple instructs their techs to do. If you have an iMac without a microphone hole, you can choose to install the lower strips onto the display first. Peel the blue tab instead of the red to expose the adhesive. Carefully place the adhesive along the bottom edge of the display. The L-bend on the adhesive should match the display contours.
Arthur Shi - 回复
i have no microphone hole - which is good . . . because the 4R and 4L stips must be labelled incorrectly as the L’s are on the wrong side. Also the strips don’t completely cover the bottom. And there are no holes in these strips making placement less secure. Someone certainly goofed. (Reckon I’ll use snipped off L’s to cover the open space.
Ah, the L strips don’t overlap - so they’re long enuf, but they are still reversed.
Die Löcher in den Klebestreifen passen nicht (mehr) zu den Löchern im Rahmen. Ich habe mich an den breiten Stellen orientiert und die Klebestreifen daran ausgerichtet. Das ging besser.
The holes in the adhesive strips no longer match the holes in the frame. I oriented myself towards the wide areas and aligned the adhesive strips with them. That worked better.
-
-
-
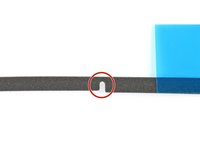
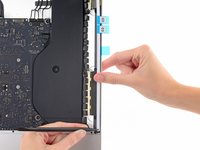
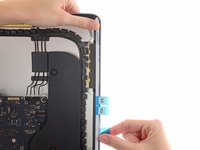
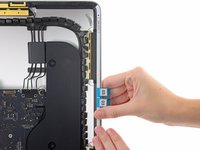
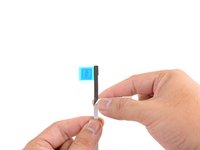
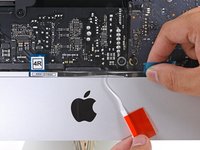
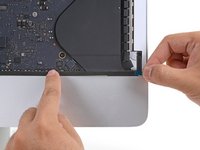
将麦克风槽口对准麦克风孔,将胶条对准底部边缘。
-
如果你的 iMac 没有麦克风孔,请对齐胶条的右端,使 L 形弯头位于右侧垂直粘合剂旁边. L 形弯曲不应与右侧垂直胶条重叠。
-
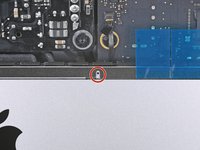
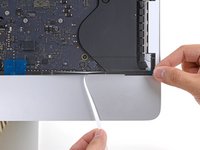
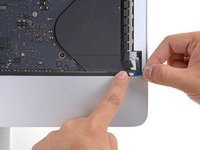
对齐胶条后,小心地将左侧露出的边缘固定在 iMac 上,以确保对齐。
The strips that I received from OWC do not have a notch cut out for the microphone. The instructions advise you, for 2017 and later 21.5” iMacs, to cut about 2 inches off from the left side of the strip so you do not cover the microphone hole.
As far as the remaining 2 inches I cut off, I snipped off a little more on the right side to leave a small gap for the microphone and placed that small remaining part in the center where it should have been if there was no microphone, just to complete the adhesive.
I have done quite a few of these now. It is easier to apply the bottom strips to the Display, rather than the housing. With the Red tabs folded at 90 degrees to the adhesive. You can then remove these tabs with the display kind in place, secured by painters tape on the out side before closing it up.
Don't make the mistake i just did - if you want to cut a notch, cut the BOTTOM 2/3rds section of the strip, not the top! :P
Also, here's a some pics of the mic location in the 2017 retina version from iFIXit: Muffled Microphone - iMac 21.5" (mid 2017) - Following Adhesive Strips.
-
-
-
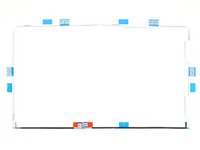
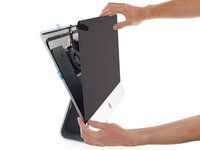
将显示屏轻轻放在 iMac 上,并仔细对齐。
In my experience, it is easier to lay the Mac flat on its back, especially if you do not have a wedge, because the display will tilt up and down and you do not want that happening. With the Mac on its back, I removed all the front adhesive strips and then angled the display (not a big angle) against the chin making sure it was even on both sides. Then reconnect the video cables and gently bring the display down into the proper position. Step 23 below seems too much of a hassle to try and get the bottom adhesive strips out while the display is resting on them, and taping the bottom of the display in Step 19 also seems to be a hassle.
-
-
-
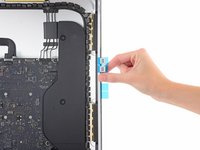
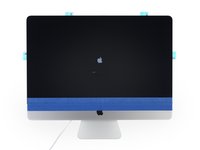
使用宽胶带将显示屏底部边缘暂时固定在 iMac 机箱上。
Noooo!! I followed this step and promptly cracked my screen!!!! You need to be extremely careful NOT to wrap the tape around the back of the computer. These images make it look like it's wrapped around, but if you do that, you won't be able to lift the screen at all to attach the display cables. Why?!!!!!
Oh no! I'm so sorry to hear this! Thank you for sharing your experience—I'm going to add a warning into the step.
-
-
-
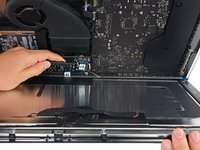
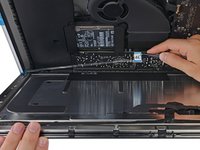
将显示屏电源线插入主板上的插座。
I am powering the unit back up to test all is working. Screen is black but fan is running loud. I’ve decoupled the power and confirmed both the display cables are connected. Note - I replaced both the HDD with a SSD as well as upgraded the RAM from 8GB to 16GB.
-
-
-
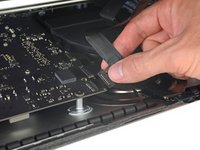
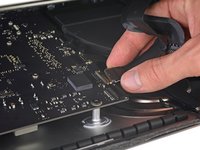
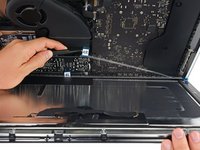
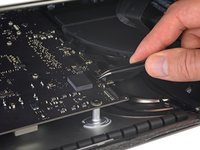
用镊子或另一只手将显示数据排线插口轻轻插入主板上的插座。
-
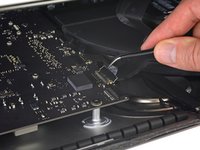
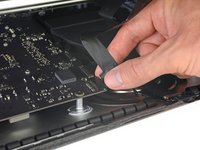
将显示屏数据线上的金属保护罩向下朝向主板固定。
While the previous step refers to “cables,” plural, this step suggests that only the display cable needs to be reinstalled in order to test working order. In my experience (iMac 21-1/2" Retina 4K Display, late 2015), I found that I had to also reconnect the camera/microphone cable in order for the screen to work. [6/7/21]
-
-
-
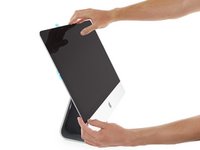
将显示屏装回 iMac 的后机箱。
-
此时,请插入 iMac 电源,并测试你的修复工作,然后再继续实际密封电脑。请务必检查已移除或断开连接的硬件是否完全正常。
At this point I tested everything to make sure it worked, including the microphone. It was a bit muffled so I poked it with a pin to try and clear it. This was incredibly stupid because (a) the muffling was due to the backing which I was about to remove from the strip (b) poking with a pin broke the microphone.
I’m not going to buy a new microphone (£72 apparently) and a new set of strips, so I’ll get an external USB microphone instead.
But to anyone else, if the microphone sound is muffled, don’t worry!
-
-
-
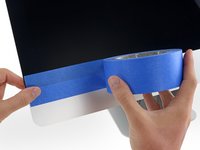
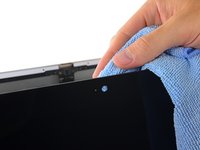
为确保粘合牢固,请小心地将 iMac 背面平放(屏幕朝上),然后小心而用力地按压显示屏的所有四个边缘。
-
撕下将显示屏固定到后壳的胶带。
Yo lo pongo sobre una manta con la pantalla apoyada sobre la manta.Pongo trapos o papel de cocina doblado alrededor de la pantalla y lo sujeto con pinzas de tender ropa.Lo dejo así 24 horas y queda perfecto. Saludos y gracias por el tutorial.
-


70等其他人完成本指南。


7条评论
Used this guide and the official iFixit strips and everything worked great, until about 6 months later when the screen fell out. I had cleaned off all dust and checked the screen 24 hours later as recommended. Is there anything I could have done better? When I reattach it with new strips I’m going to lay it upward with light pressure around the edges for 24 hours.
I’m sorry to hear that! If you can, please contact our customer support and give them some details on where the adhesive gave out. It may have been defective strips—they can get you sorted out if that’s the case!
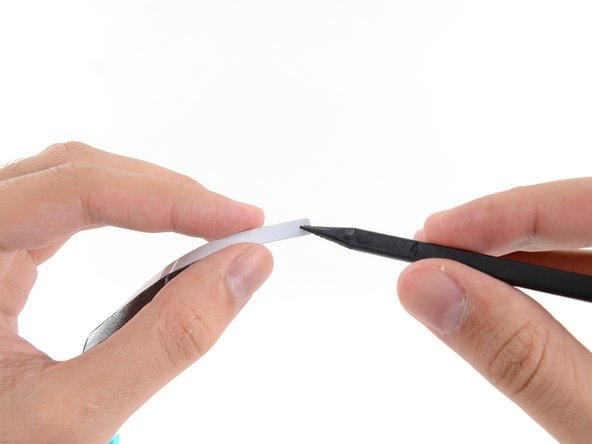
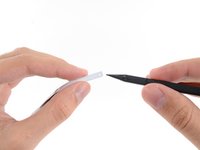
In the final stage of removing the numbered tab, the blue tab for the lower portion of strip 3 cam off before revealing any of the white release film. Do you have any tips on how to remove it once it’s stuck everywhere else or is it a case of just leaving it.
Adam Court - 回复
Hey Adam! You can try inserting a needle or the point of a pair of tweezers underneath the white liner. You may be able to loosen the liner enough to grasp and remove it. Otherwise, if it's a small portion, I wouldn't worry too much about it.
Worked perfectly. Great kit, loved the Haribo. Fantastic guys.
Kenny Gair - 回复
I made one out of a square cardboard box, and working well so far
Will Moindrot - 回复