跳转到主内容
Nook Color Display Replacement

Nook Color Display Replacement

Matthew Perdomo

Matthew Perdomo6 其他贡献者

最后更新于 June 27, 2024

20 - 30 分钟
中等
需要更多图片
缺少的步骤

Use this guide to replace a cracked or malfunctioning display on your Nook Color tablet (identified by model number BNRV200).

The Nook Color uses an LG display made of two glass layers separated by a thin crystal layer. Your display may need to be replaced if it becomes cracked or the touchscreen no longer responds. The display could also experience "screen burn-in" which is when some of the pixels powering the display malfunction and cause uneven lighting and colors.

Before replacing the display, be sure to remove the device from any external power source and to completely shut down the device.

你所需要的

工具

查看更多...

  1. Nook Color Display Replacement, Back Cover: 步骤 1 中的图像 1,2 Nook Color Display Replacement, Back Cover: 步骤 1 中的图像 2,2
    • Remove the two 3.8 mm screws located in the back right corner of the device using the T5 Torx screwdriver.

  2. Nook Color Display Replacement: 步骤 2 中的图像 1,2 Nook Color Display Replacement: 步骤 2 中的图像 2,2
    • Pry off the back cover with the plastic opening tool. Go around the device with the tool to ensure complete detachment.

  3. Nook Color Display Replacement, Front Cover: 步骤 3 中的图像 1,1
    • Remove the ten 4.0 mm screws from the device's perimeter using the T5 Torx screwdriver.

  4. Nook Color Display Replacement: 步骤 4 中的图像 1,2 Nook Color Display Replacement: 步骤 4 中的图像 2,2
    • Pry off the front panel using the plastic opening tool.

  5. Nook Color Display Replacement: 步骤 5 中的图像 1,2 Nook Color Display Replacement: 步骤 5 中的图像 2,2
    • Lift up on the connectors to disconnect them using the plastic opening tool.

  6. Nook Color Display Replacement, Motherboard: 步骤 6 中的图像 1,3 Nook Color Display Replacement, Motherboard: 步骤 6 中的图像 2,3 Nook Color Display Replacement, Motherboard: 步骤 6 中的图像 3,3
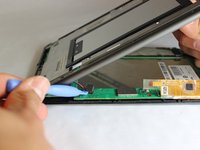
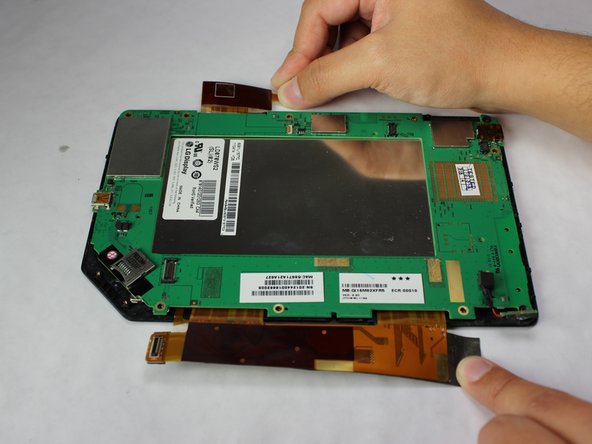
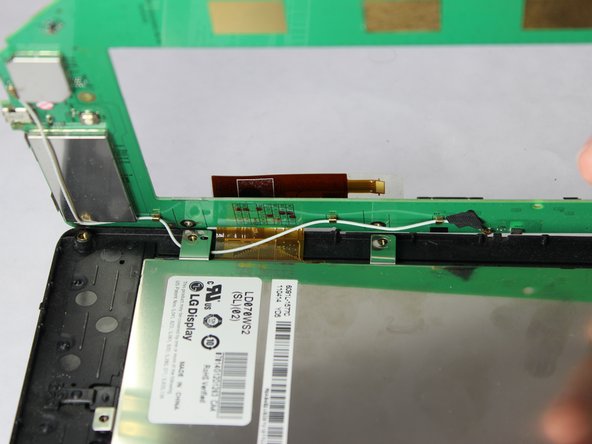
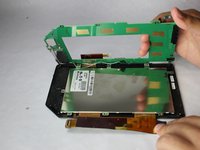
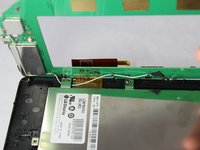
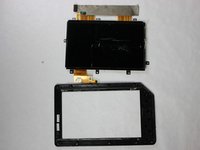
    • Gently lift and peel the orange and grey ribbon connectors to disconnect the screen and motherboard.

    You might want to tell them that the little yellow ribbon has a little thing you have to lift to remove the ribbon from the mother board. I thought I killed it. The rest of your instructions are perfect. Thanks

    alicemariebass6860 - 回复

  7. Nook Color Display Replacement: 步骤 7 中的图像 1,1
    • Remove the easy-to-miss T5 Torx 3.8 mm screw located in the tabbed corner of the device.

  8. Nook Color Display Replacement: 步骤 8 中的图像 1,2 Nook Color Display Replacement: 步骤 8 中的图像 2,2
    • Lift the motherboard gently from the side with the larger connector ribbon.

    • Slide the white cable gently from underneath its holding place to free the motherboard completely.

    • Remove the motherboard carefully from the device.

  9. Nook Color Display Replacement, Display: 步骤 9 中的图像 1,3 Nook Color Display Replacement, Display: 步骤 9 中的图像 2,3 Nook Color Display Replacement, Display: 步骤 9 中的图像 3,3
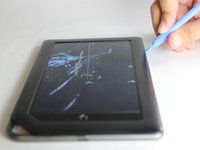
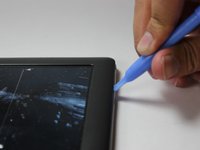
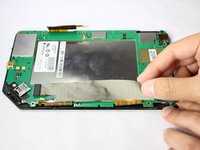
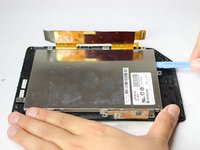
    • Use a plastic opening tool to gently pry the display upwards.

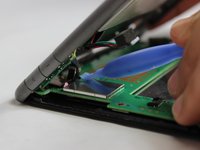
    • Lift the display out with your hands until the display has separated from the frame.

结论

To reassemble your device, follow these instructions in reverse order.

6等其他人完成本指南。

Matthew Perdomo

于01/20/15注册

497 声望

创作了3篇指南

团队

USF Tampa, Team 11-5, Blackwell Winter 2015 USF Tampa, Team 11-5, Blackwell Winter 2015 的会员

USFT-BLACKWELL-W15S11G5

3 名成员

创作了14篇指南

1指南评论

this site doesn't sell the Nook Color display. Where did you get yours?

Suzette Garoutte - 回复

添加评论

浏览统计数据:

过去 24 小时: 1

过去 7 天: 3

过去 30 天: 31

总计 3,845