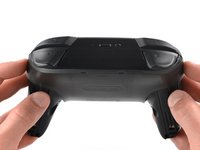
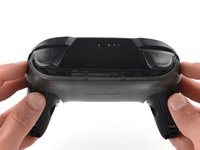
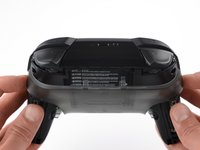
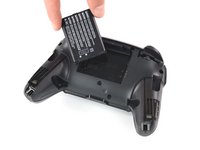
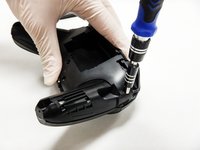
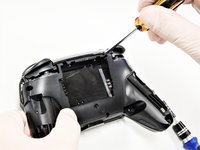
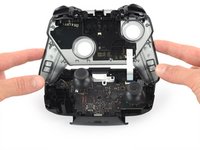
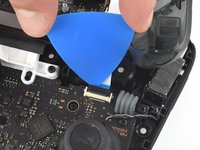
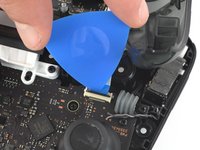
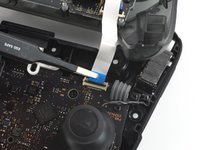
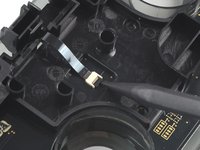
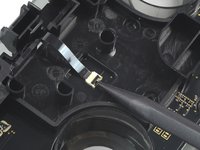
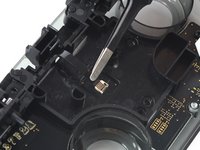
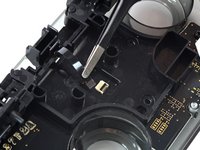
跳转到主内容

Nintendo Switch Pro 手柄肩键更换

你所需要的

  1. Nintendo Switch Pro 手柄肩键更换, 拆卸螺丝: 步骤 1 中的图像 1,1
    • 将手柄翻转过来,使条码贴纸朝向天花板。

    • 使用JIS #00 螺丝刀卸下两颗位于手柄末端,用于固定手柄的黑色 8.4 毫米螺丝。

  2. Nintendo Switch Pro 手柄肩键更换, 拆卸握把外壳: 步骤 2 中的图像 1,3 Nintendo Switch Pro 手柄肩键更换, 拆卸握把外壳: 步骤 2 中的图像 2,3 Nintendo Switch Pro 手柄肩键更换, 拆卸握把外壳: 步骤 2 中的图像 3,3
    • 将手柄蓋从主体上拉出,小心地卸下它们。

  3. Nintendo Switch Pro 手柄肩键更换, 拆卸螺丝: 步骤 3 中的图像 1,1
    • 使用 JIS #00 螺丝刀,卸下四颗用于固定透明塑料后盖的6.8毫米银色螺丝。

  4. Nintendo Switch Pro 手柄肩键更换, 撬开塑料盖: 步骤 4 中的图像 1,3 Nintendo Switch Pro 手柄肩键更换, 撬开塑料盖: 步骤 4 中的图像 2,3 Nintendo Switch Pro 手柄肩键更换, 撬开塑料盖: 步骤 4 中的图像 3,3
    • 用指甲小心撬开透明的塑料盖。

  5. Nintendo Switch Pro 手柄肩键更换, 拆下透明塑料盖: 步骤 5 中的图像 1,1
    • 拆下透明的塑料后盖。

  6. Nintendo Switch Pro 手柄肩键更换, 拆卸电池: 步骤 6 中的图像 1,3 Nintendo Switch Pro 手柄肩键更换, 拆卸电池: 步骤 6 中的图像 2,3 Nintendo Switch Pro 手柄肩键更换, 拆卸电池: 步骤 6 中的图像 3,3
    • 使用指甲或塑料撬棒,从如图所示的左侧撬起锂离子电池。

    • 只需轻轻地用力即可,请勿大力出奇迹。

  7. Nintendo Switch Pro 手柄肩键更换, 拆卸螺丝: 步骤 7 中的图像 1,3 Nintendo Switch Pro 手柄肩键更换, 拆卸螺丝: 步骤 7 中的图像 2,3 Nintendo Switch Pro 手柄肩键更换, 拆卸螺丝: 步骤 7 中的图像 3,3
    • 使用菲利普十字螺丝刀拆下图中所示的位于手柄背部的5个5mm的螺丝。

    • 握把上方的两颗螺丝和电池仓下方的一颗螺丝安装的比较前显。这三颗螺丝很容易就卸下来。

    • 靠近ZR和ZL肩按钮的两个螺钉安装的比较深。使用延长杆或长轴的十字螺丝刀即拆卸这两颗螺丝。

  8. Nintendo Switch Pro 手柄肩键更换: 步骤 8 中的图像 1,3 Nintendo Switch Pro 手柄肩键更换: 步骤 8 中的图像 2,3 Nintendo Switch Pro 手柄肩键更换: 步骤 8 中的图像 3,3
    • 如同翻书一样小心缓慢地拆开控制器的塑料外壳。

    • 此时请注意不要卸掉前盖,因为前盖上的电路板和主板之间有白色排线连接着。

  9. Nintendo Switch Pro 手柄肩键更换, 打开卡扣: 步骤 9 中的图像 1,2 Nintendo Switch Pro 手柄肩键更换, 打开卡扣: 步骤 9 中的图像 2,2
    • 用撬片小心地向上撬开排线插口上的黑色卡扣。

  10. Nintendo Switch Pro 手柄肩键更换, 拆下排线: 步骤 10 中的图像 1,2 Nintendo Switch Pro 手柄肩键更换, 拆下排线: 步骤 10 中的图像 2,2
    • 使用你的手指或者平头镊子从排线接口上拆下排线。

  11. Nintendo Switch Pro 手柄肩键更换, 拆下前盖: 步骤 11 中的图像 1,1
    • 拆下前盖。

  12. Nintendo Switch Pro 手柄肩键更换, 拆卸螺丝: 步骤 12 中的图像 1,1
    • 使用十字螺丝刀卸下上半部分主板上的两个 6.8 毫米长的螺钉。

  13. Nintendo Switch Pro 手柄肩键更换, 打开 ZIF 接口: 步骤 13 中的图像 1,2 Nintendo Switch Pro 手柄肩键更换, 打开 ZIF 接口: 步骤 13 中的图像 2,2
    • 使用撬棒向上撬开 ZIF 接口上的锁定卡扣

  14. Nintendo Switch Pro 手柄肩键更换: 步骤 14 中的图像 1,2 Nintendo Switch Pro 手柄肩键更换: 步骤 14 中的图像 2,2
    • 从接口上拔下黑色排线。

    • 只需用很小的力即可移除排线。

  15. Nintendo Switch Pro 手柄肩键更换: 步骤 15 中的图像 1,2 Nintendo Switch Pro 手柄肩键更换: 步骤 15 中的图像 2,2
    • 从外壳上取下肩键。

结论

要重新组装设备,请按照与说明相反的顺序进行操作。

12等其他人完成本指南。

由衷感谢以下译者:

en zh

100%

这些译者帮助我们修补全世界! 您也想加入吗?
开始翻译 ›

Simon Lin

于10/10/19注册

364 声望

撰写一个指南

团队

Cal Poly, Team S11-G2, Regan Fall 2019 Cal Poly, Team S11-G2, Regan Fall 2019 的会员

CPSU-REGAN-F19S11G2

5 名成员

创作了42篇指南

5条评论

This guide does show how to remove the trigger/bumper casing and board from the controller but does not show how to remove the triggers/bumpers from the casing they are in.

Boushi Adams - 回复

Yeah, this is a pretty big point to be missing, especially with the Flex Cable for the shoulder button inputs being right beside the post you need to pull out to remove the ZL and ZR buttons. Guidance on how to remove the post safely without damaging the cable would be great.

Alex Crocker -

Used the guide to repair a shattered right shoulder button successfully. Thanks!

Christian - 回复

After reinstalling the shoulder buttons I have found them to stop working, all four, I checked my ribbon cable from the buttons to the board and even replaced it. I also confirmed the ribbon cable connector on the main board is working as well. Can anyone make any further troubleshooting suggestions?

David - 回复

添加评论

浏览统计数据:

过去 24 小时: 20

过去 7 天: 132

过去 30 天: 618

总计 32,287