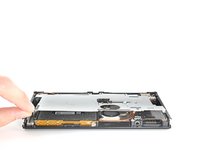
简介
使用本指南更换任天堂 Switch OLED 的电池。
为了您的安全起见,在拆卸您的 Switch 之前,请将电池电量放电至 25% 以下。这样可以降低电池在维修过程中意外损坏而引发火灾的风险。如果电池肿胀,请采取适当的预防措施。
Switch OLED 使用 JIS 螺丝,但在紧要关头也可以使用十字螺丝刀。iFixit 的十字螺丝刀与 JIS 型螺丝兼容。
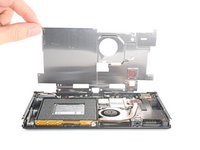
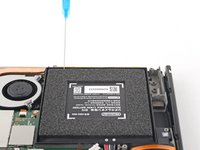
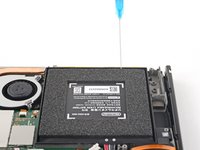
注意: 拆下屏蔽板时,需要更换屏蔽板和散热片之间的导热膏。由于普通导热膏无法弥合较大的缝隙,因此最接近的替代品是 K5 Pro 粘稠导热膏。
你所需要的
-
-
-
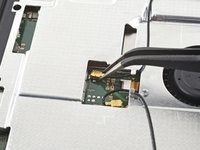
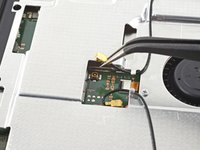
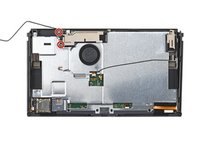
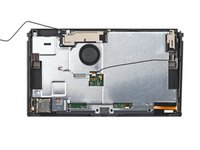
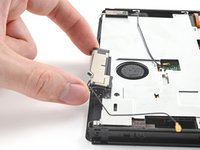
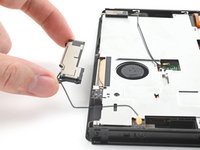
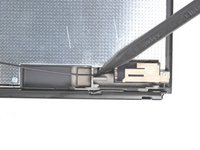
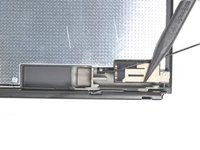
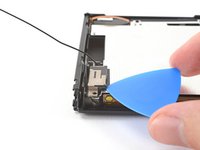
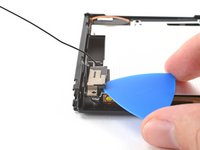
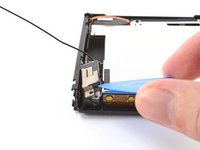
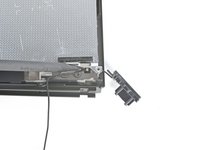
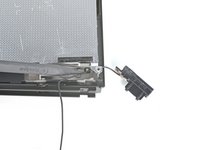
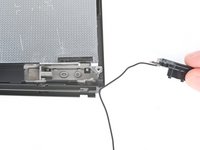
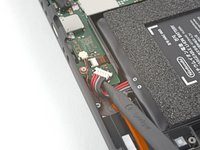
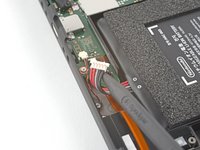
使用镊子或手指,向上提拉并断开主Wi-Fi天线的同轴电缆
-
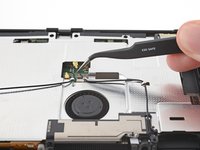
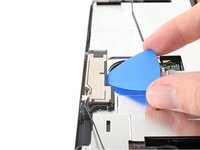
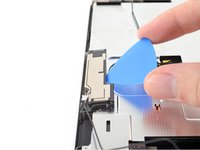
重新安装时,接口可能较难对准。请逐一处理:将每个连接器悬置于对应插槽上方,用撬棒平头端垂直下压。此时应听到清晰咔嗒声,表明连接器已准确卡入定位
-


要重新组装设备,请按照相反的顺序遵循这些说明。
为获得最佳性能,请在完成本指南后校准新安装的电池。
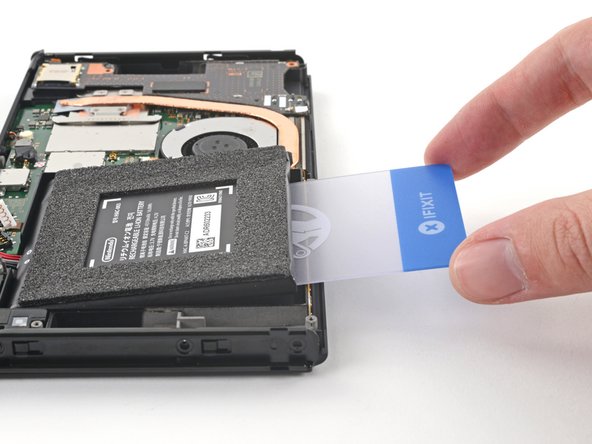
将新更换部件与原部件进行比较--在安装之前,你可能需要转移剩余部件或去除新部件上的背胶。
将电子垃圾送到R2 或 e-Stewards 认证的回收商。
维修没有按计划进行?请尝试一些基本故障排除,或向我们的任天堂 Switch OLED 社区寻求帮助。
12等其他人完成本指南。


2指南评论
Worked well. In step 9 I found I had to loosen all screws on the joycon sides as the case really wouldn’t move and it was hard to see where it was ”locked”. When tilting for the isoprop alocohol, really do not over tilt or the alocohol will leak out from the cable hole. The old adhesive under the battery was really strong - don’t give up but don’t expect removal to be easy. But be slow and careful and stick with it and it will come loose eventually. Finally, K5 Pro is not available where I live - used MX-6 instead and it appears to work fine. Other than that, thank you for the guide - very helpful and my switch is as new again.
Es ist etwas schwer den Deckel der Switch abzubekommen, aber mit etwas hebeln geht der dann doch ab. Schwieriger war es jedoch den Akku vom Klebestreifen zu lösen. Ich habe von der Kabelseite die Plastikkarte ein wenig eingeschoben und dann immer von links nach rechts bewegt und dabei leicht rein geschoben. Ansonsten sind die Anleitung von IFIXIT sind Top und ich habe schon einiges danach selbst reparieren können. Schön das es euch gibt.