跳转到主内容
Nikon COOLPIX S610c Motherboard Replacement

Nikon COOLPIX S610c Motherboard Replacement

Kevin Backers

Kevin Backers4 其他贡献者

最后更新于 August 5, 2020

1小时
中等

If camera no longer works at all, then it might be time to replace the motherboard. Follow this guide to remove the motherboard from your camera.

你所需要的

工具

  • Phillips #00 Screwdriver
    Phillips #00 Screwdriver
  • Spudger
    Spudger
  1. Nikon COOLPIX S610c Motherboard Replacement, Rear Casing: 步骤 1 中的图像 1,1
    • Remove the three 3x3mm screws attached to the rear casing.

  2. Nikon COOLPIX S610c Motherboard Replacement: 步骤 2 中的图像 1,1
    • The panel can be identified by the wifi logo on its upper half on the camera's side.

    • Remove the 5x3mm screw holding down the panel on the side closest to the lens.

  3. Nikon COOLPIX S610c Motherboard Replacement: 步骤 3 中的图像 1,1
    • Pry the panel off from the bottom using your fingernail.

  4. Nikon COOLPIX S610c Motherboard Replacement: 步骤 4 中的图像 1,1
    • Remove the 3x2mm screw underneath the panel near the top of the camera.

  5. Nikon COOLPIX S610c Motherboard Replacement: 步骤 5 中的图像 1,2 Nikon COOLPIX S610c Motherboard Replacement: 步骤 5 中的图像 2,2
    • Remove the 4x3mm on the opposite side near the selector wheel.

    • Remove the 2x2mm and 3x2mm screws underneath the a/v flap.

  6. Nikon COOLPIX S610c Motherboard Replacement: 步骤 6 中的图像 1,2 Nikon COOLPIX S610c Motherboard Replacement: 步骤 6 中的图像 2,2
    • Pry the back panel away from the body of the camera, using the space you just opened up.

    • Be careful not to damage the ribbon cable on the opposite end of the camera.

    • A small piece of the frame of the camera may fall off, but it can be easily put back into place during reassembly.

  7. Nikon COOLPIX S610c Motherboard Replacement: 步骤 7 中的图像 1,2 Nikon COOLPIX S610c Motherboard Replacement: 步骤 7 中的图像 2,2
    • Pry up the plastic ribbon connectors on the body of the camera to release the ribbon cables.

    • The center connector is detached by flipping the black latch up and away from the center of the camera.

    • The smaller connector is detached by flipping the tan latch up and away from the edge of the camera.

  8. Nikon COOLPIX S610c Motherboard Replacement, Front Casing: 步骤 8 中的图像 1,1
    • Remove the three 3x3mm screws that attach the front casing to the bottom.

  9. Nikon COOLPIX S610c Motherboard Replacement: 步骤 9 中的图像 1,1
    • Remove the two 3x2 screws and two 3.5x2.5 screws attaching the rear panel to the motherboard.

  10. Nikon COOLPIX S610c Motherboard Replacement: 步骤 10 中的图像 1,2 Nikon COOLPIX S610c Motherboard Replacement: 步骤 10 中的图像 2,2
    • Lift the back panel off the motherboard.

    • Be careful not to damage the ribbon cable that attaches the mother board to the rear panel.

  11. Nikon COOLPIX S610c Motherboard Replacement: 步骤 11 中的图像 1,2 Nikon COOLPIX S610c Motherboard Replacement: 步骤 11 中的图像 2,2
    • Detach the ribbon cable from the motherboard by flipping up the latch on the ribbon connector.

    • Note that the white ribbon connector latch flips away from the ribbon cable.

  12. Nikon COOLPIX S610c Motherboard Replacement: 步骤 12 中的图像 1,2 Nikon COOLPIX S610c Motherboard Replacement: 步骤 12 中的图像 2,2
    • Remove the final 4x3mm screw at the top of the camera near the lens.

  13. Nikon COOLPIX S610c Motherboard Replacement: 步骤 13 中的图像 1,2 Nikon COOLPIX S610c Motherboard Replacement: 步骤 13 中的图像 2,2
    • Pry the front casing away from the body of the camera.

    • Be careful not to damage the wires that attach the front panel to the motherboard.

    • Short the leads on the capacitor near the flash to avoid a nasty shock when separating the casing from the body.

  14. Nikon COOLPIX S610c Motherboard Replacement: 步骤 14 中的图像 1,1
    • Unscrew the three 3x2mm screws that attach the cables to the front casing.

  15. Nikon COOLPIX S610c Motherboard Replacement, Lens Assembly: 步骤 15 中的图像 1,2 Nikon COOLPIX S610c Motherboard Replacement, Lens Assembly: 步骤 15 中的图像 2,2
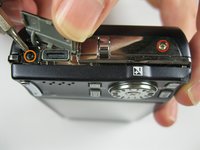
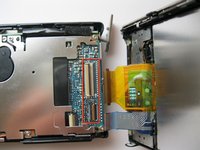
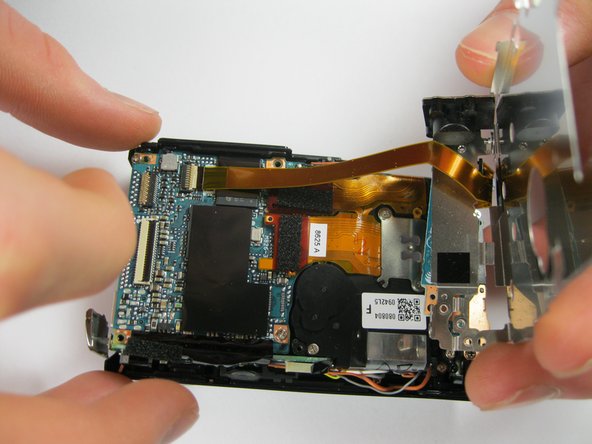
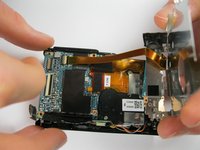
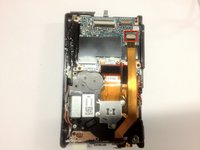
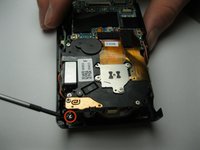
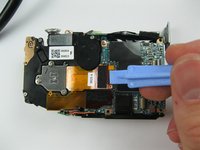
    • Pry up the ribbon connector that connects the ribbon cable to the lens assembly.

    • Take note that the ribbon connector pulls away from the ribbon.

  16. Nikon COOLPIX S610c Motherboard Replacement, Motherboard: 步骤 16 中的图像 1,1
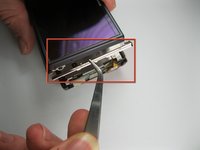
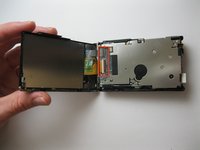
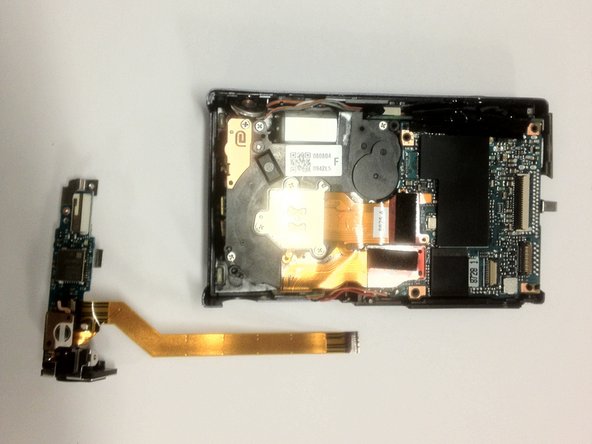
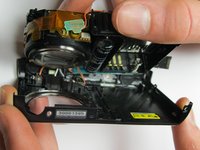
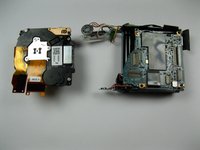
    • Once the lens assembly has been removed, the mother board cannot be disassembled any further.

结论

To reassemble your device, follow these instructions in reverse order.

Kevin Backers

于01/26/12注册

301 声望

创作了4篇指南

团队

Cal Poly, Team 9-5, Regan Winter 2012 Cal Poly, Team 9-5, Regan Winter 2012 的会员

CPSU-REGAN-W12S9G5

5 名成员

创作了12篇指南

0条评论

添加评论

浏览统计数据:

过去 24 小时: 0

过去 7 天: 1

过去 30 天: 2

总计 555