跳转到主内容

当前版本的文档还未经巡查,您可以查看最新的已查核版本

你所需要的

  1. 这个步骤还没有翻译 帮忙翻译一下

    : 步骤 1 中的图像 1,3 : 步骤 1 中的图像 2,3 : 步骤 1 中的图像 3,3
    • Here are the tools for this task. A couple of plastic opening tools and definitely a few guitar picks of different thickness will make the job easier.

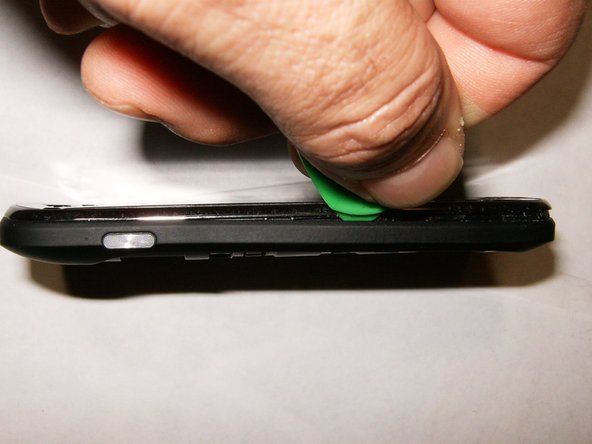
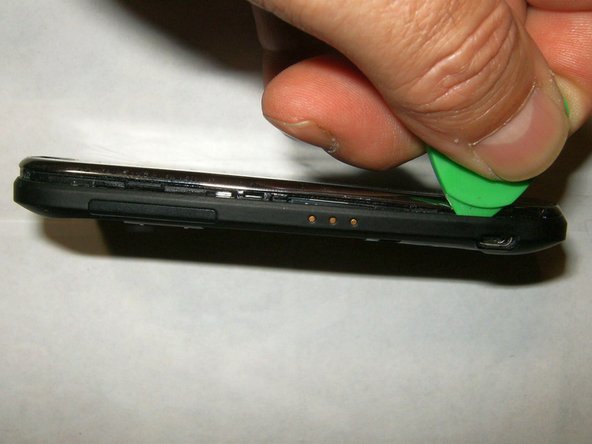
    • Power down the phone. Remove the battery cover and the battery. Remove Sim card and SD card if installed.

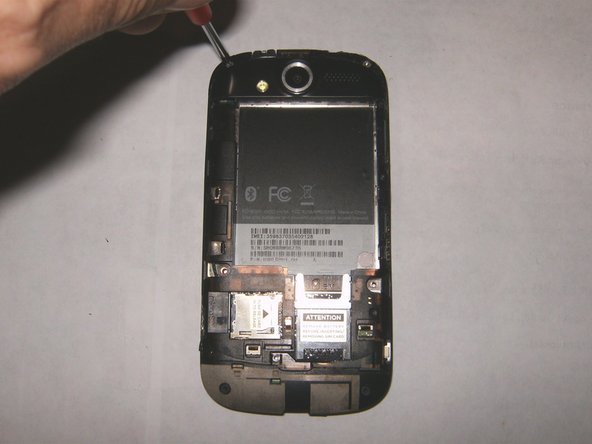
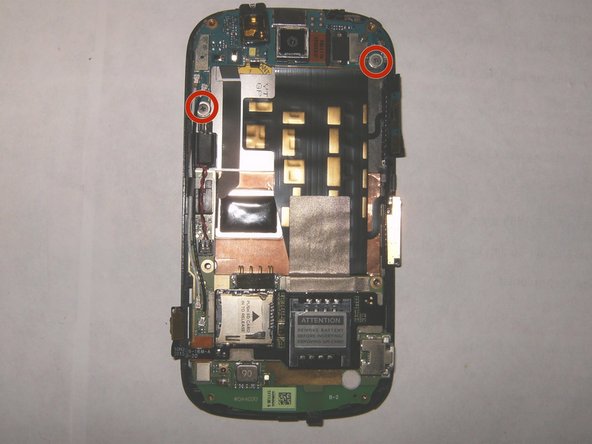
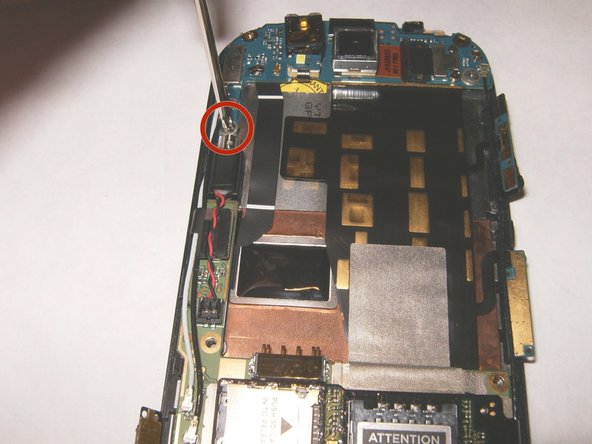
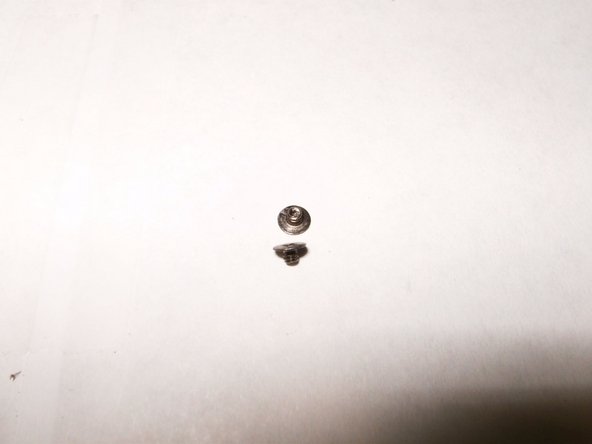
    • Remove the two Torx 5 screws and the small Phillips screw to remove the bezel

  2. 这个步骤还没有翻译 帮忙翻译一下

    : 步骤 2 中的图像 1,3 : 步骤 2 中的图像 2,3 : 步骤 2 中的图像 3,3
    • Torx 5 screw on the left and right side.

    • Small 3mm Phillips on the bottom center

    • Phillips screw is 3mm and 5mm for the Torx

  3. 这个步骤还没有翻译 帮忙翻译一下

    : 步骤 3 中的图像 1,3 : 步骤 3 中的图像 2,3 : 步骤 3 中的图像 3,3
    • Use a plastic opening tool, or a guitar pick starting at the top of the phone

    • and working all the way around

    • and do not insert it around the buttons. Exert light downward force to loosen the clips that hold the frame on.

  4. 这个步骤还没有翻译 帮忙翻译一下

    : 步骤 4 中的图像 1,3 : 步骤 4 中的图像 2,3 : 步骤 4 中的图像 3,3
    • The bezel should come off easy once the clips have been loosened.

    • There are four screws that hold the midframe to the phone.

    • They are T5x5mm, remove those. The bottom two screws also hold the WiFi antenna in place

  5. 这个步骤还没有翻译 帮忙翻译一下

    : 步骤 5 中的图像 1,3 : 步骤 5 中的图像 2,3 : 步骤 5 中的图像 3,3
    • Remove the WiFi antenna by gently prying it up.

    • Place it out of the way.

    • There are three button ribbons in recessed areas along the frame. Two on the left,

  6. 这个步骤还没有翻译 帮忙翻译一下

    : 步骤 6 中的图像 1,3 : 步骤 6 中的图像 2,3 : 步骤 6 中的图像 3,3
    • one on the right. They are simply adhered to the plastic frame.

    • Use an opening tool to gently remove them from the frame

    • by bending them into a downward direction.

  7. 这个步骤还没有翻译 帮忙翻译一下

    : 步骤 7 中的图像 1,3 : 步骤 7 中的图像 2,3 : 步骤 7 中的图像 3,3
    • Make sure that they are out of the way of the frame.

    • Gently lift them off the frame with a opening tool.

    • Insert a small guitar pick between the midframe and the display.

    • Stay away from the contacts in the mid frame so as to not damage these.

  8. 这个步骤还没有翻译 帮忙翻译一下

    : 步骤 8 中的图像 1,3 : 步骤 8 中的图像 2,3 : 步骤 8 中的图像 3,3
    • Move the opening tool (pick) all the way around the frame to release the internal clips.

    • The midframe will now simply come off.

    • Here is the logic board on top of the display assembly. It is held in place by two Phillips screws on the top and some plastic clips on the bottom

  9. 这个步骤还没有翻译 帮忙翻译一下

    : 步骤 9 中的图像 1,3 : 步骤 9 中的图像 2,3 : 步骤 9 中的图像 3,3
    • Remove the right

    • and left screw.

    • Both screws are identical 2mm in size

  10. 这个步骤还没有翻译 帮忙翻译一下

    : 步骤 10 中的图像 1,3 : 步骤 10 中的图像 2,3 : 步骤 10 中的图像 3,3
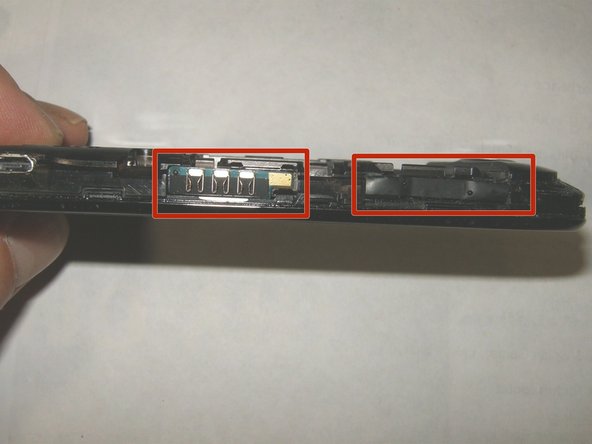
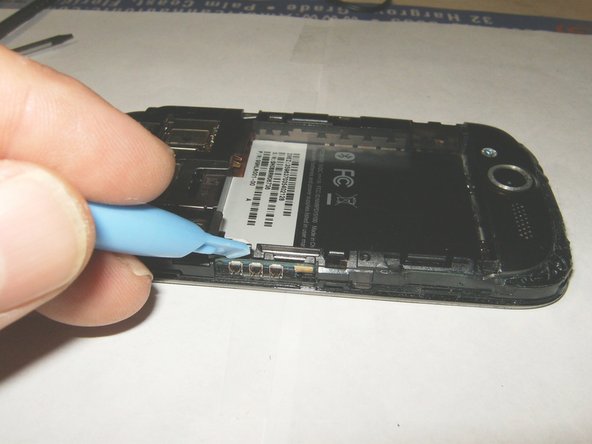
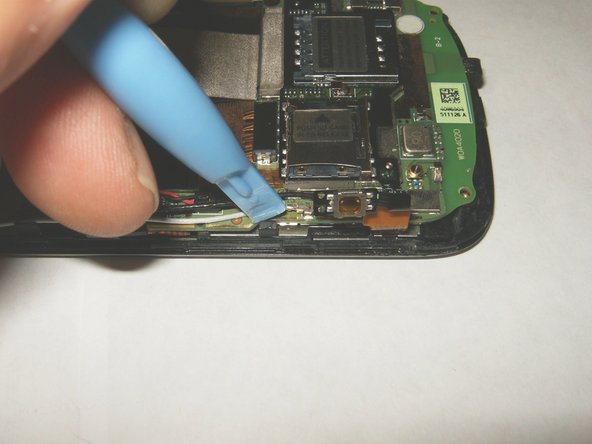
    • The power button is adhered to a landing at the top of the frame. Use a plastic opening tool to gently loosen it of the landing.

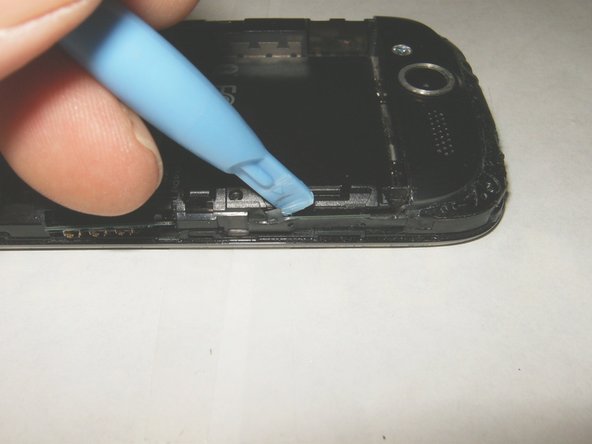
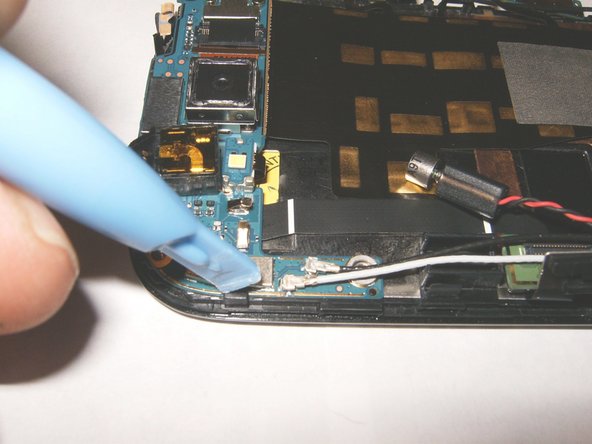
    • Use an opening tool to gently lift the logic board from the bottom until it clears the plastic clips.

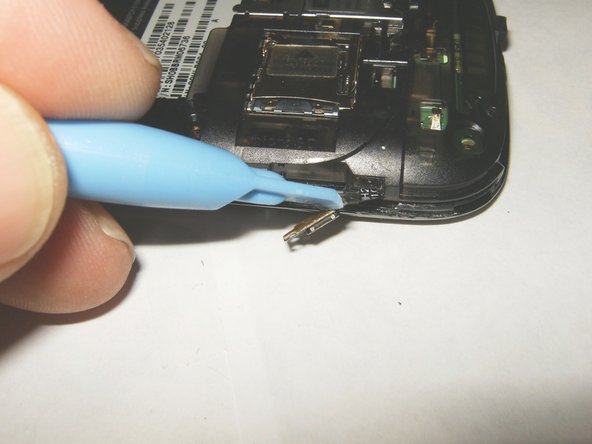
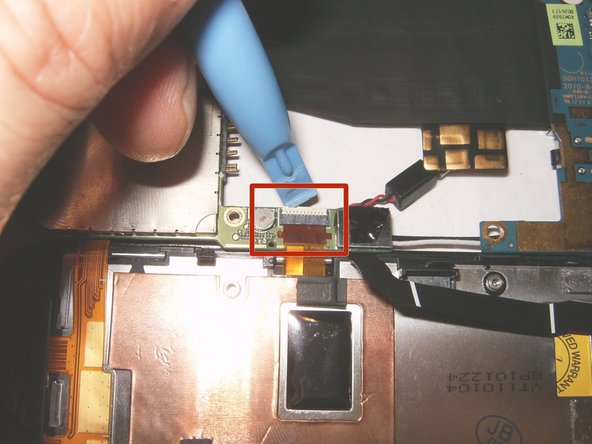
    • Use an opening tool to release the clip on the side of the logic board.

  11. 这个步骤还没有翻译 帮忙翻译一下

    : 步骤 11 中的图像 1,3 : 步骤 11 中的图像 2,3 : 步骤 11 中的图像 3,3
    • Remove the vibrate motor from its holder by simply pulling up on it. This will give access to the digitizer ribbon cable

    • Remove the digitizer ribbon cable from its snap-in connector

    • Remove the LCD ribbon cable from its snap-in connector

  12. 这个步骤还没有翻译 帮忙翻译一下

    : 步骤 12 中的图像 1,3 : 步骤 12 中的图像 2,3 : 步骤 12 中的图像 3,3
    • Release the board from the clips. Start at the top

    • then the bottom

    • and the sides

  13. 这个步骤还没有翻译 帮忙翻译一下

    : 步骤 13 中的图像 1,3 : 步骤 13 中的图像 2,3 : 步骤 13 中的图像 3,3
    • Do not lift the logic board but flip it to the left.

    • It is still connected by the LCD ribbon cable.

    • Remove the black Kapton tape from the connectors locking flap

  14. 这个步骤还没有翻译 帮忙翻译一下

    : 步骤 14 中的图像 1,3 : 步骤 14 中的图像 2,3 : 步骤 14 中的图像 3,3
    • With the Kapton tape removed, the locking flap becomes accessible

    • Loosen the clamp connector by gently pulling it up.

    • Now you can separate the logic board from the LCD.

  15. 这个步骤还没有翻译 帮忙翻译一下

    : 步骤 15 中的图像 1,3 : 步骤 15 中的图像 2,3 : 步骤 15 中的图像 3,3
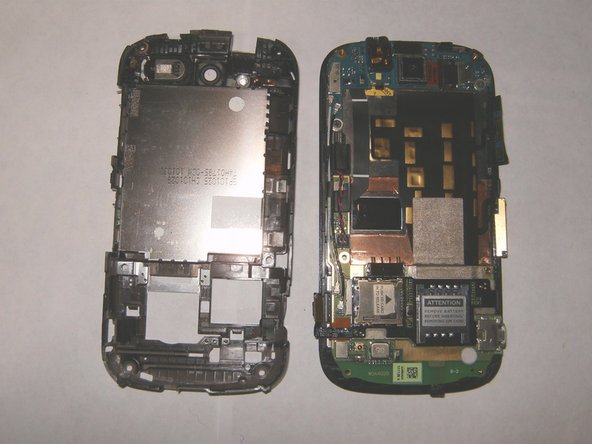
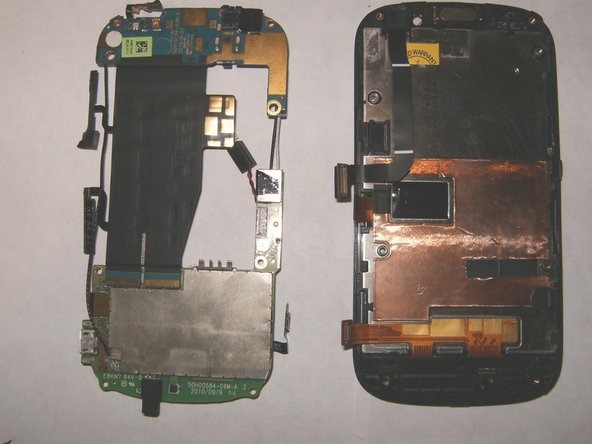
    • Here is the back of the display assembly with the main part being the LCD.

    • Digitizer ribbon

    • LCD ribbon

    • the button bar ribbon cable

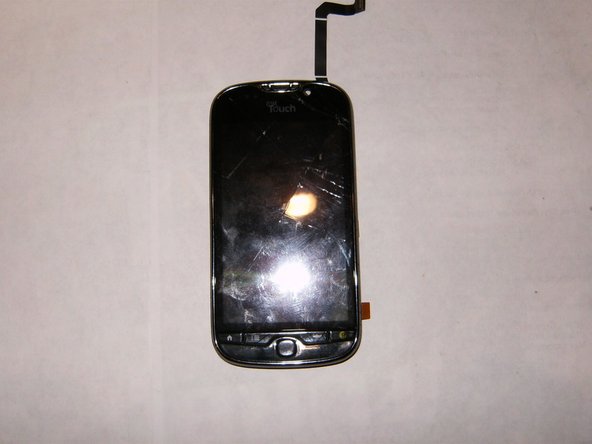
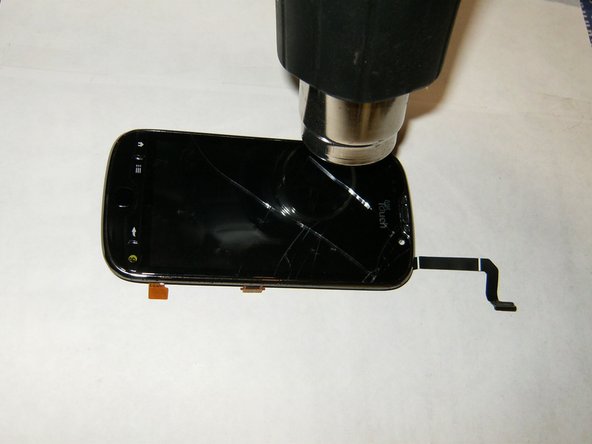
    • Now it is time to remove the digitizer. Turn the display assembly LCD side up

    • To soften the glue one can use a hairdryer on high, or a hotair gun on low. Continue to move the hot air source along the outside of the digitizer.

  16. 这个步骤还没有翻译 帮忙翻译一下

    : 步骤 16 中的图像 1,3 : 步骤 16 中的图像 2,3 : 步骤 16 中的图像 3,3
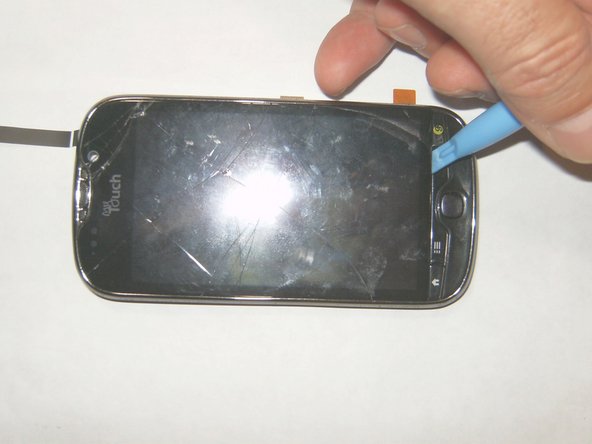
    • Keep moving it so that the sides are about equally hot.

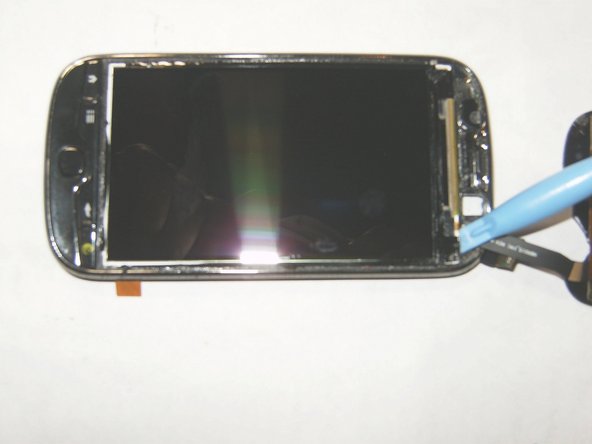
    • Use a plastic opening tool at the bottom of the digitizer and move it along the outside to the top.

    • Only move along the outside of the digitizer, do not insert the opening tool to deep since it could scratch the LCD.

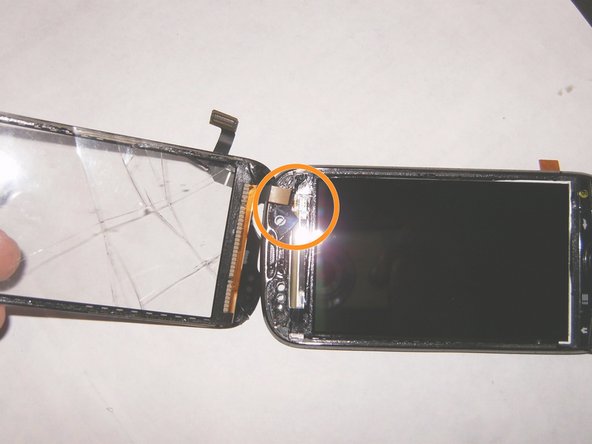
    • The digitizer can not yet be removed since the ribbon cable is still attached to the assembly. It can not be pulled out since the opening is partially blocked by the LCD.

  17. 这个步骤还没有翻译 帮忙翻译一下

    : 步骤 17 中的图像 1,3 : 步骤 17 中的图像 2,3 : 步骤 17 中的图像 3,3
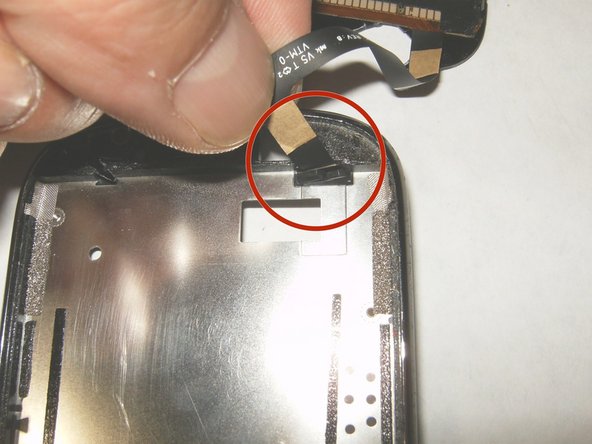
    • The LCD prevents the connector from the digitizer cable to fit through the opening. It will be necessary to remove the LCD.

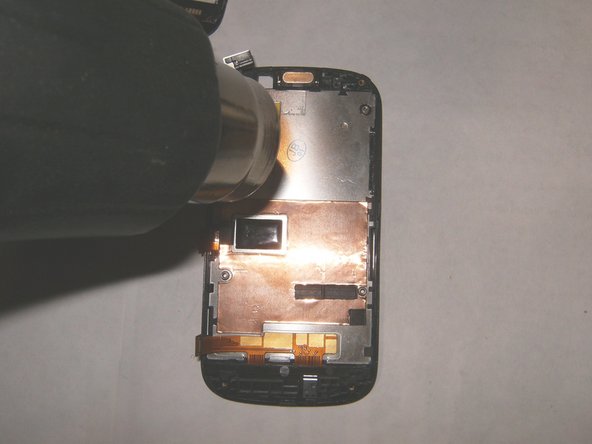
    • Turn the display assembly face down. Warm the back of the LCD with a hot air source until the adhesive softens.

    • Turn the assembly over and use an opening tool to remove the LCD from the frame.

  18. 这个步骤还没有翻译 帮忙翻译一下

    : 步骤 18 中的图像 1,3 : 步骤 18 中的图像 2,3 : 步骤 18 中的图像 3,3
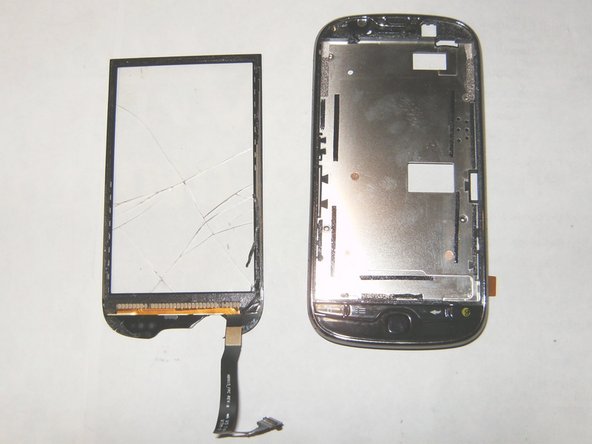
    • Remove the LCD from the frame.

    • guide the connector from the digitizer ribbon cable through the opening.

    • Digitizer is now removed and ready for replacement. Most digitizers come with replacement adhesive. It is important to clean the mating surfaces of any glass reside as well as dirt etc. Also, do not forget to remove the clear plastic that covers both sides of the new digitizer, before installation.

终点

9等其他人完成本指南。

oldturkey03

于09/29/10注册

784,188 声望

创作了119篇指南

团队

Global Fixers Global Fixers 的会员

Community

33 名成员

创作了558篇指南

0条评论

添加评论

浏览统计数据:

过去 24 小时: 1

过去 7 天: 6

过去 30 天: 11

总计 2,619