跳转到主内容

GE A1050 LCD Replacement

你所需要的

  1. GE A1050 LCD Replacement, LCD: 步骤 1 中的图像 1,3 GE A1050 LCD Replacement, LCD: 步骤 1 中的图像 2,3 GE A1050 LCD Replacement, LCD: 步骤 1 中的图像 3,3
    • Remove the batteries, hand strap, and memory card if so equipped.

    • Remove the two Phillips screws from the bottom.

    • Remove the two Phillips screws from the left side.

  2. GE A1050 LCD Replacement: 步骤 2 中的图像 1,3 GE A1050 LCD Replacement: 步骤 2 中的图像 2,3 GE A1050 LCD Replacement: 步骤 2 中的图像 3,3
    • Remove the two screws from the right side.

    • The two screws from the left side are shorter than the ones from the right. Keep those separated.

    • Start splitting the case from the battery compartment to the sides. No special tool is needed to split the case.

  3. GE A1050 LCD Replacement: 步骤 3 中的图像 1,3 GE A1050 LCD Replacement: 步骤 3 中的图像 2,3 GE A1050 LCD Replacement: 步骤 3 中的图像 3,3
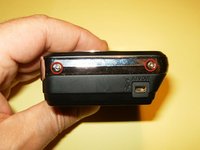
    • Do not remove the back side of the case, just flip it over. The speaker is connected by wires to the main body, but positioned in the back case.

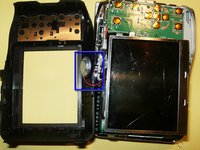
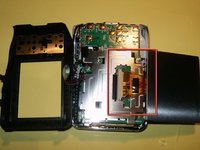
    • Flip the LCD to the bottom. You can not yet remove it, because it is still attached to the board.

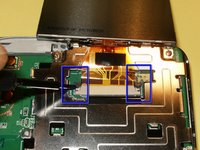
    • The LCD cable is held into the connector via some compression clips. Move both ends carefully away from the connector, toward the LCD.

    • The clips only move about an 1/8 of an inch. Be careful not to use too much force.

  4. GE A1050 LCD Replacement: 步骤 4 中的图像 1,1
    • After exchanging the LCD for a new one, and after reassembling your camera, you should have a working LCD.

结论

To reassemble your device, follow these instructions in reverse order.

另外一个人完成了本指南。

oldturkey03

于09/29/10注册

781,510 声望

创作了119篇指南

团队

Global Fixers Global Fixers 的会员

Community

32 名成员

创作了531篇指南

0条评论

添加评论

浏览统计数据:

过去 24 小时: 0

过去 7 天: 3

过去 30 天: 8

总计 1,734