跳转到主内容
Dell Inspiron 13-7347 Display Assembly Replacement

Dell Inspiron 13-7347 Display Assembly Replacement

Kyle Smith

Kyle Smith4 其他贡献者

最后更新于 February 16, 2025

15分钟
中等
不正确的工具
更好的介绍

This is a guide for removal and replacement of the Display Assembly for the Dell Inspiron 17-7347 laptop.

你所需要的

当你通过这些链接购买商品时,iFixit 会赚取佣金。
  1. Dell Inspiron 13-7347 Display Assembly Replacement, Battery: 步骤 1 中的图像 1,3 Dell Inspiron 13-7347 Display Assembly Replacement, Battery: 步骤 1 中的图像 2,3 Dell Inspiron 13-7347 Display Assembly Replacement, Battery: 步骤 1 中的图像 3,3
    • Flip the device over, so that the back is facing up.

    • Using a Phillips screwdriver, remove the 10 2.5mm x 8mm screws

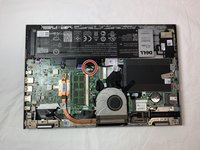
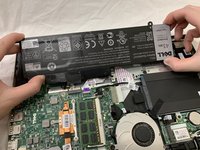
    • Use the suction cup to lift off the back case.

  2. Dell Inspiron 13-7347 Display Assembly Replacement: 步骤 2 中的图像 1,3 Dell Inspiron 13-7347 Display Assembly Replacement: 步骤 2 中的图像 2,3 Dell Inspiron 13-7347 Display Assembly Replacement: 步骤 2 中的图像 3,3
    • Remove the two 2mm x 3mm screws that secure the battery to the device.

  3. Dell Inspiron 13-7347 Display Assembly Replacement: 步骤 3 中的图像 1,3 Dell Inspiron 13-7347 Display Assembly Replacement: 步骤 3 中的图像 2,3 Dell Inspiron 13-7347 Display Assembly Replacement: 步骤 3 中的图像 3,3
    • Unplug the cable that connects the USB / SD Reader IO Board to the motherboard.

  4. Dell Inspiron 13-7347 Display Assembly Replacement: 步骤 4 中的图像 1,3 Dell Inspiron 13-7347 Display Assembly Replacement: 步骤 4 中的图像 2,3 Dell Inspiron 13-7347 Display Assembly Replacement: 步骤 4 中的图像 3,3
    • Lift the battery steadily from the device.

    • Tilt the battery upward while removing.

  5. Dell Inspiron 13-7347 Display Assembly Replacement, Fan: 步骤 5 中的图像 1,2 Dell Inspiron 13-7347 Display Assembly Replacement, Fan: 步骤 5 中的图像 2,2
    • You should be able to identify the fan.

    • This is the 2mm x 2mm JIS #00 screw.

    • This is the 2mm x 3mm JIS #00 screw.

  6. Dell Inspiron 13-7347 Display Assembly Replacement: 步骤 6 中的图像 1,2 Dell Inspiron 13-7347 Display Assembly Replacement: 步骤 6 中的图像 2,2
    • Remove the 2mm x 2mm JIS #00 screw.

    • Remove the 2mm x 3mm JIS #00 screw.

  7. Dell Inspiron 13-7347 Display Assembly Replacement: 步骤 7 中的图像 1,2 Dell Inspiron 13-7347 Display Assembly Replacement: 步骤 7 中的图像 2,2
    • Detach the cable that connects the fan and the motherboard.

    • The cable is extremely fragile.

  8. Dell Inspiron 13-7347 Display Assembly Replacement: 步骤 8 中的图像 1,2 Dell Inspiron 13-7347 Display Assembly Replacement: 步骤 8 中的图像 2,2
    • Detach the cord that connects the fan and the motherboard.

  9. Dell Inspiron 13-7347 Display Assembly Replacement: 步骤 9 中的图像 1,1
    • Remove the fan.

  10. Dell Inspiron 13-7347 Display Assembly Replacement, Hard Drive: 步骤 10 中的图像 1,2 Dell Inspiron 13-7347 Display Assembly Replacement, Hard Drive: 步骤 10 中的图像 2,2
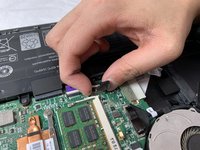
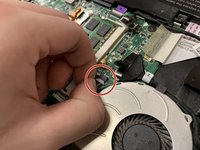
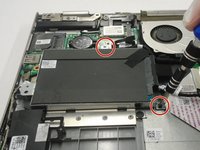
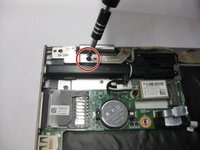
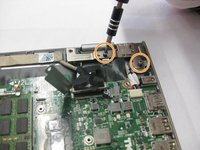
    • Using a Phillips #0 screwdriver, loosen and remove the two 3.0 mm hard drive screws.

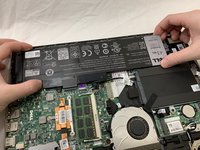
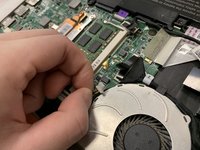
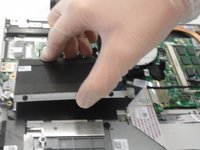
    • Lift the hard drive up and out of the device.

  11. Dell Inspiron 13-7347 Display Assembly Replacement, Display Assembly: 步骤 11 中的图像 1,3 Dell Inspiron 13-7347 Display Assembly Replacement, Display Assembly: 步骤 11 中的图像 2,3 Dell Inspiron 13-7347 Display Assembly Replacement, Display Assembly: 步骤 11 中的图像 3,3
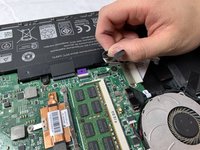
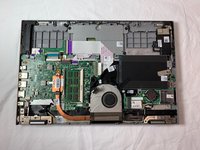
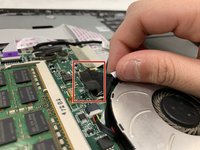
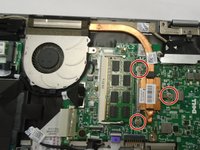
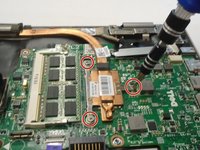
    • Using a Phillips #0 screwdriver, loosen the three 3.0 mm heat sink screws.

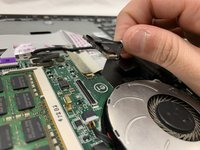
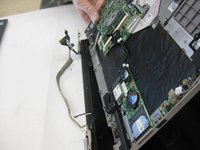
    • Remove the Heat Sink.

    • When reinstalling the heat sink, be sure to clean both contact surfaces with isopropyl alcohol and reapply thermal paste.

  12. Dell Inspiron 13-7347 Display Assembly Replacement: 步骤 12 中的图像 1,1
    • Using a Phillips #0 screwdriver, remove the two 5.0 mm screws on the metal bracket.

    • Remove the metal bracket.

  13. Dell Inspiron 13-7347 Display Assembly Replacement: 步骤 13 中的图像 1,1
    • Loosen and reposition the display cable.

    • The display cable will not be removed. Do not attempt to remove the display cable.

  14. Dell Inspiron 13-7347 Display Assembly Replacement: 步骤 14 中的图像 1,3 Dell Inspiron 13-7347 Display Assembly Replacement: 步骤 14 中的图像 2,3 Dell Inspiron 13-7347 Display Assembly Replacement: 步骤 14 中的图像 3,3
    • Using a Phillips #0 screwdriver, remove the 5.0mm screw on the left display hinge bracket.

    • Using a Phillips #0 screwdriver, remove the two 5.0mm screws on the right display hinge bracket.

    • Lift and remove the display assembly.

结论

To reassemble your device, follow these instructions in reverse order.

0条评论

添加评论

浏览统计数据:

过去 24 小时: 0

过去 7 天: 1

过去 30 天: 2

总计 662