
Dell Inspiron 13 7378 Heat Sink Replacement
简介
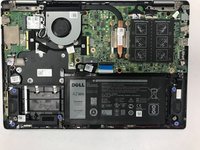
转到步骤 1The Dell Inspiron 13 7378 is a widely used laptop model, however, it is not immune to technical issues. One of the most prevalent problems faced by this device is CPU overheating. To mitigate this issue, it is crucial to replace the cooling system and prevent any harm to the internal components of the laptop. This guide will provide you with step-by-step instructions on how to perform this maintenance procedure in a professional manner.


-
-
-
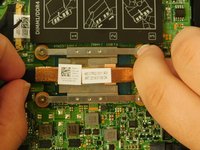
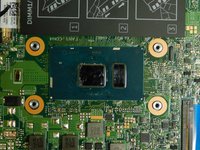
Carefully remove the four screws securing the heat sink by using a Phillips screwdriver.
-


Replace the back cover to complete the process.
Replace the back cover to complete the process.
3等其他人完成本指南。
团队

Gateway, Team 1-3, Saknee Spring 2022 Gateway, Team 1-3, Saknee Spring 2022 的会员
GCC-SAKNEE-S22S1G3
5 名成员
创作了16篇指南