跳转到主内容
Asus Chromebook C300SA-DS02 Display Assembly Replacement

Asus Chromebook C300SA-DS02 Display Assembly Replacement

Celina Monteiro

Celina Monteiro2 其他贡献者

最后更新于 December 10, 2019

35 - 40 分钟
中等

This guide will walk you through the step by step process of removing the display assembly from the laptop. To replace just the LED screen component within rather than the entire assembly, refer to Asus Chromebook C300SA-DS02 Screen Replacement.

你所需要的

工具

  • iFixit Opening Tool
    iFixit Opening Tool
  • Phillips #0 Screwdriver
    Phillips #0 Screwdriver
  • Spudger
    Spudger

查看更多...

  1. Asus Chromebook C300SA-DS02 Display Assembly Replacement, Keyboard: 步骤 1 中的图像 1,2 Asus Chromebook C300SA-DS02 Display Assembly Replacement, Keyboard: 步骤 1 中的图像 2,2
    • Power the laptop off and make sure the charger is unplugged before starting.

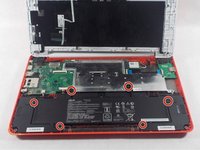
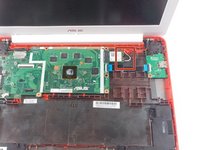
    • Remove the eight 8.0mm Phillips #0 screws on the bottom of the laptop.

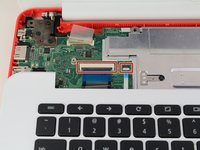
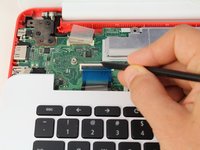
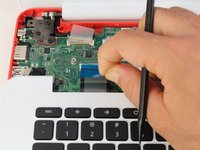
    • Remove the three 6.0mm Phillips #0 screws.
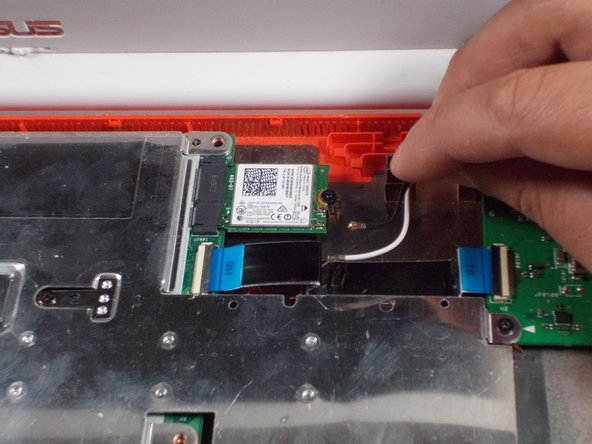
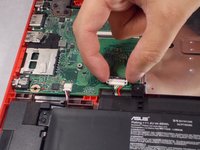
  2. Asus Chromebook C300SA-DS02 Display Assembly Replacement: 步骤 2 中的图像 1,3 Asus Chromebook C300SA-DS02 Display Assembly Replacement: 步骤 2 中的图像 2,3 Asus Chromebook C300SA-DS02 Display Assembly Replacement: 步骤 2 中的图像 3,3
    • Open the laptop.

    • Using an iFixit opening tool, pry along the edges of the keyboard.

    • Lift the keyboard and slide it gently towards you.

    • Do not completely remove the keyboard. It is still connected to the back panel by a pair of ribbon cables.

  3. Asus Chromebook C300SA-DS02 Display Assembly Replacement: 步骤 3 中的图像 1,3 Asus Chromebook C300SA-DS02 Display Assembly Replacement: 步骤 3 中的图像 2,3 Asus Chromebook C300SA-DS02 Display Assembly Replacement: 步骤 3 中的图像 3,3
    • Disconnect the two ZIF connectors by prying up the locking bar with a spudger and removing the ribbon cable.

  4. Asus Chromebook C300SA-DS02 Display Assembly Replacement: 步骤 4 中的图像 1,1
    • Remove the keyboard from the laptop.

  5. Asus Chromebook C300SA-DS02 Display Assembly Replacement, Battery: 步骤 5 中的图像 1,2 Asus Chromebook C300SA-DS02 Display Assembly Replacement, Battery: 步骤 5 中的图像 2,2
    • Remove the six 5.6mm Phillips #0 screws around the battery.

  6. Asus Chromebook C300SA-DS02 Display Assembly Replacement: 步骤 6 中的图像 1,2 Asus Chromebook C300SA-DS02 Display Assembly Replacement: 步骤 6 中的图像 2,2
    • Using your thumb and index finger, pinch the multi-color cable and disconnect it from the motherboard.

  7. Asus Chromebook C300SA-DS02 Display Assembly Replacement: 步骤 7 中的图像 1,1
    • Lift the battery out of the laptop.

  8. Asus Chromebook C300SA-DS02 Display Assembly Replacement, Display Assembly: 步骤 8 中的图像 1,2 Asus Chromebook C300SA-DS02 Display Assembly Replacement, Display Assembly: 步骤 8 中的图像 2,2
    • Unplug the black and white cable from the motherboard.

    • These two wires connect to the antenna within the display assembly. The white cable is longer and connects to the bottom import.

  9. Asus Chromebook C300SA-DS02 Display Assembly Replacement: 步骤 9 中的图像 1,1
    • Peel back the tape covering the display cable.

    • Ease the cable towards the screen and out from the connector.

  10. Asus Chromebook C300SA-DS02 Display Assembly Replacement: 步骤 10 中的图像 1,1
    • Use a Phillips #0 driver to remove the six 5mm screws on the top right and left display hinges.

  11. Asus Chromebook C300SA-DS02 Display Assembly Replacement: 步骤 11 中的图像 1,1
    • Gently lift the display assembly up and away from the laptop.

结论

To reassemble your device, follow these instructions in reverse order.

Celina Monteiro

于10/17/17注册

233 声望

创作了2篇指南

团队

UMass Dartmouth, Team S1-G7, Simcock Fall 2017 UMass Dartmouth, Team S1-G7, Simcock Fall 2017 的会员

UMASSD-SIMCOCK-F17S1G7

3 名成员

创作了9篇指南

0条评论

添加评论

浏览统计数据:

过去 24 小时: 0

过去 7 天: 0

过去 30 天: 0

总计 205