简介
使用本指南更换Apple Watch Series 3 电池。
你所需要的
-
-
仅将刀片的细边插入间隙,然后朝您的方向倾斜刀片以加宽间隙,并将显示屏略微抬起。
-
将弯曲刀片的边缘放入显示器和外壳之间的薄间隙中。 从显示屏的短边开始,最靠近圆形圈。
It’s difficult to grip case in a way that keeps fingers safe from the blade but doesn’t hit the side buttons and turn the device on!
If it’s a struggle to get the display to release, warm case for a few more minutes.
I have tried so may times to get the display to release but nothing works. Should have bought a new watch LOL. Kept the iOpener on 2 times for 10 minutes and it still won't open. There must be a better way.
Hi Susan,
if you're struggling to get the adhesive loose enough a hair dryer, heat gun, or hot plate may also be used, but be careful not to overheat the device. The edge should feel slightly too hot to the touch.
-
-
-
-
卸下固定金属盖板的Y型#000螺丝。
-
用一把镊子取下盖板。
-
首先打开盖板。
-
然后将其关闭一半,将其完全取出。
What if I’m unable to unscrew the screw? I’m using the right tool, but it just won’t do it. It feels like it can’t “lock in” if you know what I mean in order to be able to get enough grip to turn the screw. Any suggestions?
-
-
-
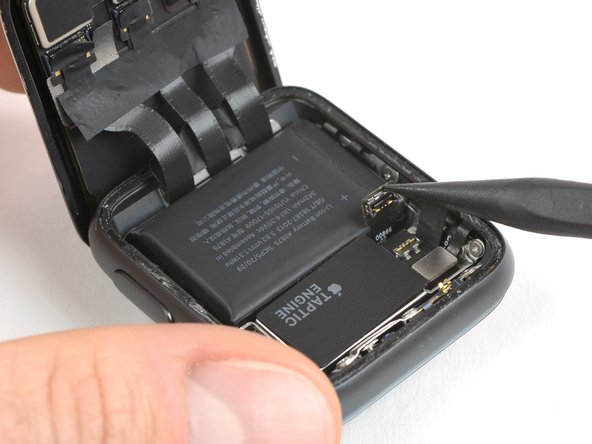
使用撬棒的尖端直接向上撬起连接器来断开电池连接。
-
稍微弯曲连接器,确保它不会意外接触到主板。
-
-
-
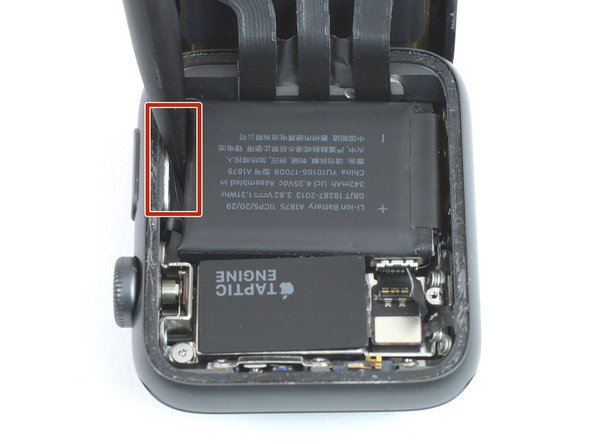
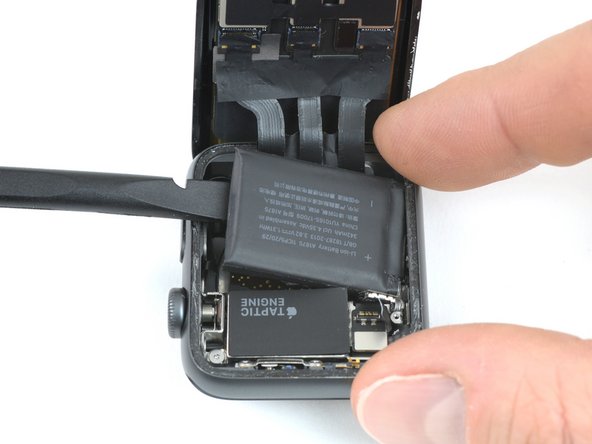
使用撬棒的平端在电池和电源按钮旁边的框架之间撬动。这样,在拉出电池时,不要挤压或折叠任何电缆。
-
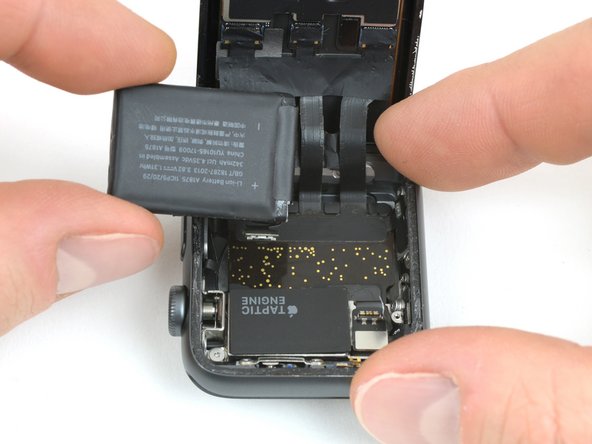
缓慢但稳定地提起电池,使其与下面的粘合剂分离,将其固定到位。
-
取出电池。
I had some regular sized (old ifixit) guitar picks and that worked well too.
amiller770 - 回复
I was able to make one out of a soda bottle and got the battery out with no damage
-


团队

9条评论
Hi
I’m having problem with my Apple Watch series 3, a red snake shown in the watch, I bought a brand new battery here in ifix and i proceed to install it but I’m having the same problem. Can someone help me.
thanks
Have you checked our Apple Watch troubleshooting page for the charging issue?
followed all the steps properly. But the Apple watch does not switch on! The new battery does not seem to work.
After replacing the Battery will the watch be waterproof enough to swim with/ have the same water resistance as when it was new
If you cleaned both the backside of the lens and the case groove where the adhesive was very well and replaced the adhesive getting it squarely on the case lip just as the original one was installed, I would expect the watch to be as sealed and water resistant as it was when new.
There seems to be a lot of talk about the force touch gasket, but given apple removed support for force touch anyways, is it ok to just remove the gasket altogether? or will that effect the fit of the parts and effect water resistance?
Hi Bob,
removing the force touch gasket will lower your screen accordingly deeper into the housing (we noticed that with the next iteration being a tad thinner). So you might feel a little ridge when touching the edges of the display during use. Water resistance will be the same as when you have the force touch gasket or not.
FYI for whoever this might help, I just took apart my cellular series 3 watch, this one is from the first year of the series 3 (when it was the newest watch). There were 2 differences, one of them didn't matter, but one of them was of critical importance.
I bought the iFixit kit for this battery replacement. One, rather than the panel being a separate black panel like in the pictures here, it was one continuous black sticker I had to peal up.
Secondly, the side panel that they say to use a Y000 screwdriver on, I tried using the Y000 tip included in my iFixit kit, AND IT DID NOT FIT. luckily I had a few tri point drivers around so I was able to undo it, but they are not labeled, so that doesn't help anyone else in this situation.
Ist die Batterie auch für die Apple Watch SE 40mm geeignet?
Für eine Rückmeldung/Antwort danke ich vorab.
I have heated up the iOpener to 165 degrees and left it on for more than a minute. No way I can lift the screen off with the exact knife. Tried different angles in various places, but no go. I also used a hair dryer un til the watch screen was too hot to touch and even tried a very hard cutting tool blade and also no go. Could n ever get the blade under the face I applied enough force where I could see that the blade left small marks, not very big, but could never get anything to move or lift. What am I doing wrong? I spent 47 years at a global computer company and I am used to taking apart small things and applying force when required. I don’t know what I am doing wrong. Please help me.
Rafael Blanco - 回复
Getting the initial gap is not easy. Maybe a playing card could work its way in the tiny gap and cut some adhesive. After that there might be some success with an exacto knife. Or you want to try a piece of aluminum foil (folded for more rigidity) for cutting the adhesive. Be aware of the force touch gasket and that it might get damaged during that procedure.
Tobias Isakeit -
I finally used a hot air gun set to 150 deg. C heating up the edges by slowly spinning the watch around before the technique worked. Difficult is the level noted and it’s correct. Finally worked and watch perfectly functioning.
Chris Giavotto - 回复
I used a heat gun, too. I was worried after reading comments that it would burn up the LCD, so I heated it a little bit at a time, rotating it like you did, and checking to see if I could get my knife under it. I must have hit one of the buttons because it did turn on, but that did reassure me that the display was okay.
It's open. Now that the watch and I have had a few minutes to cool down, I'm ready for the next step. Not as difficult as I thought it could be. Tomorrow, I'll be replacing the battery in an iPod Touch 6th Gen.
bester -
I had to heat the iOpener 2 times and leave it on top of the watch for 10 minutes.
Axel Trujillo - 回复