简介
内部恢复功能里面有许多有用的应用。
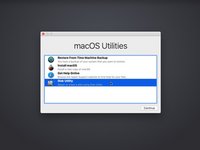
该指南将向你展示如何使用内部恢复功能将新的macOS系统装到空白的固态硬盘上。
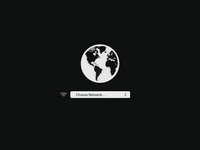
自带的恢复功能仅在2009年以后的苹果电脑上提供。如果您的电脑是2010或者2011年的,请务必更新至最新的macOS以启用内部恢复功能。
-
-
-
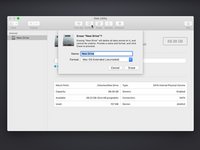
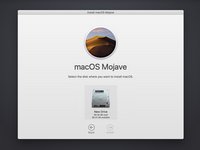
从“恢复菜单”打开“磁盘工具”,选择您的硬盘,点击顶部菜单的“抹掉”。
-
为您的硬盘取一个新名字,确保格式为“macOS Extended(Journaled)” 或者是 “APFS”, 如果有 “模式”选项,选择“GUID 分区图”
-
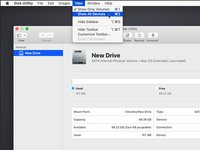
硬盘格式化完成后,按Command + Q键退出磁盘工具,回到恢复菜单。
-


您的电脑在安装macOS的过程中可能会重新启动多次。一旦安装完成,您可以查阅迁移助手 教程将您的数据从旧的硬盘拷贝到新的硬盘上。
253等其他人完成本指南。

41指南评论
Perfect, it is soooooo easy
Cheers
Michael
Hi there, will this work when upgrading an Early 2011 Macbook Pro with a new SSD and RAM? I don’t want to keep or clone any data that I currently have on the computer. I just want to do a clean install of MacOS without transferring over any old files. Thank you!
Fiona, the Early 2011 MacBook Pros didn’t ship with internet recovery, but as long as it had a recent-ish version of MacOS before the SSD upgrade the firmware should have updated, which enables internet recovery! This is a great method for installing a fresh copy of MacOS to a new SSD.
Hello. Thank you for the article Taylor. I use a MBP 9,2 and wish to replace my ageing 500GB HDD with 500GB SSD and undergo a clean install of macOS. I’ll follow this article and install by the Internet Recovery method. I have a Time Machine backup, from which I want to restore only certain files and folders pertaining to my studies and work. I also want to restore only Keychain. Can you advise me regarding these or direct me by providing helpful links? Thank you.
My situation:
(a) Running Mojave on early 2015 MBP, original SSD
(b) Want to upgrade SSD to 1TB
I was planning to:
(1) replacing the SSD,
(2) install Catalina on new SSD from internet using this guide, and
(c) then restore my other apps and user data from my Time Machine backup.
Would that work or should I anticipate some hiccups, especially with step (c). Also my Time Machine backups can they still be written to the same network location as my current location?