简介
Samsung's line of phones-that-don't-fit-in-your-pocket is back! And in a Microsoftian move, they're going from Note5 straight to Note7. On the surface, it looks like an S7 Edge with a bigger screen and a fancy stylus, but we know better: no guts, no glory. It's teardown time!
Update: We added some sweet X-ray imagery, from our friends at Creative Electron.
Do you enjoy the odd teardown? We’ve got three (way cooler than two) ways to stay up to date with the latest repair news: find us on Twitter, join our inner circle on Facebook, and check out our Instagram!
你所需要的
视频概述
-
-
It's a mix of new and familiar as we peruse the Note7's specs:
-
Curved panel 5.7" Super AMOLED display with 2560 × 1440 resolution (518 ppi) and Gorilla Glass 5
-
Qualcomm Snapdragon 820 processor with 4 GB RAM + Adreno 530 GPU
-
12-megapixel, ƒ/1.7 rear camera with OIS, dual pixel autofocus, 4K video; 5-megapixel/1080p selfie camera
-
64 GB internal storage, with an additional 256 GB available via MicroSD expansion
-
Iris scanner, fingerprint scanner
-
S Pen stylus, USB-C, and headphone jack (phew)
-
IP68 dust and water resistance rating
-
-
-
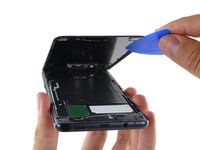
As we boldly go where no tinkerer has gone before, we come across some
starports hiding out near the bottom edge. From left to right we observe: -
USB-C port
-
Microphone port
-
Speaker grille
-
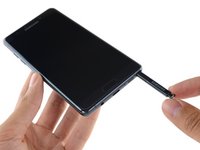
That last one's not a port at all, it's the illustrious S Pen. Removing the S Pen is as smooth as slicing warm butter.
-
-
-
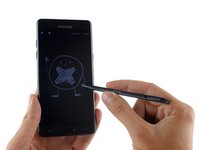
Our teardown hands are itching to get down to business, but we take a moment to test out the S Pen.
-
First impressions: this stylus stacks up pretty well against Microsoft's Surface Pen and Apple's Pencil.
-
The S Pen is smaller (and more stow-able) than either, but still has a scan rate of 360 Hz and senses 4,096 levels of pressure compared to the Pencil's 240 Hz and the Surface Pen's 1,024 levels of sensitivity.
-
-
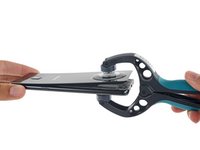
在这个步骤中使用的工具:iSclack$24.99
-
If opening stubbornly adhered Samsung devices was an Olympic sport, our teardown room would be filled with gold medals.
-
We take a minute to stretch while the iOpener works its magic, softening the adhesive under the rear glass.
-
Bang! The gun sounds. We fly off the starting blocks, iSclack and opening pick in hand. Pop! The rear glass dislodges from the chassis. Whoosh! The rest of the adhesive didn't stand a chance. Ka-pow! We're in.
-
-
-
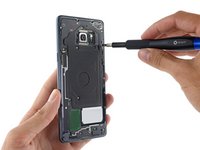
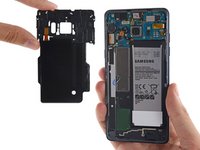
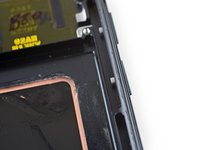
Tinkerers love Phillips screws. Seeing these good ol' familiar screws draws our focus down to what they're securing: a sweet wireless charging coil.
-
We suspect the NFC antenna is also bundled into this wafer-thin assembly. NFC is no stranger to Galaxy Phones.
-
With that, we get our first full reveal of the Note7. [Cue oohs and aahs]
-
-
-
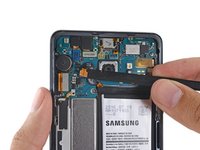
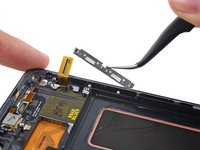
We come across an unusual battery cable design. At first glance, this is most definitely a slide. We're getting a little motion sick just looking at all of those winding curves.
-
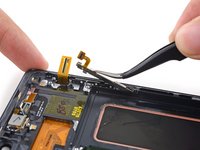
Fortunately for us, a flick of a spudger is all it takes to pry the (off-kilter) battery connector cable off the motherboard.
-
With battery disconnected we delve deeper.
-
First victim: the single speaker, with built in antenna.
-
-
-
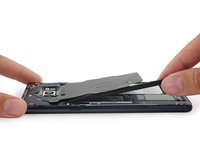
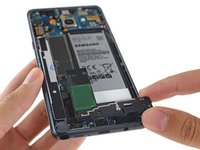
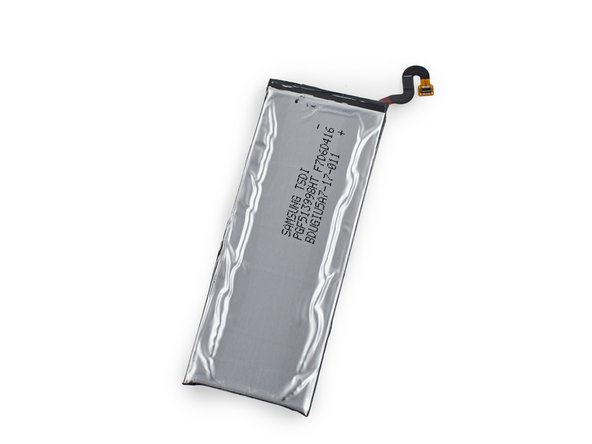
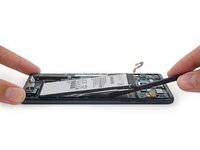
We could almost hear the battery laugh in our faces when we tried to pluck it out bare-handed—but our inner Hulk emerges as we muscle with all the might our spudger can muster.
-
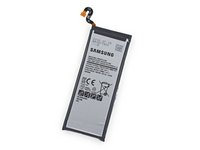
This 3500 mAh, 13.48 Wh battery is significantly more powerful than the 10.45 Wh one found in the similarly sized iPhone 6s Plus, but it falls just a bit short of its smaller sibling, the Galaxy S7 Edge, which comes in at 13.86 Wh.
-
Curiously, the Note7's battery is fortified by walls carved from the rear case, providing extra structural integrity, and maybe even some water protection.
-
-
-
-
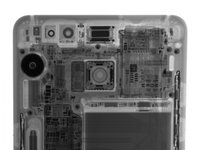
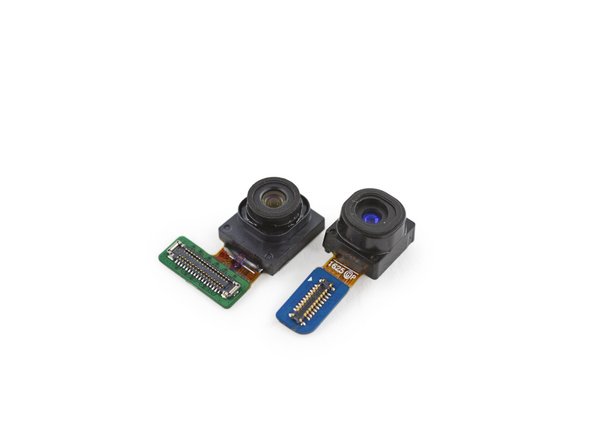
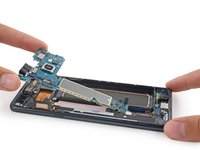
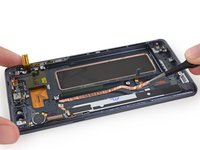
Out comes the motherboard, with three little cameras in tow.
-
Front and rear cameras are familiar fare on smartphones, so what's the third camera for?
-
For comparison we have the iris scanner (right) with the Note7's 5-megapixel, ƒ/1.7 selfie cam (left).
-
And for the X-ray comparison, here we have the two cameras still in the device.
-
-
在这个步骤中使用的工具:Tweezers$4.99
-
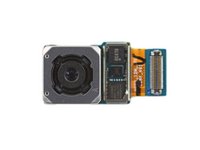
With the motherboard deftly extracted, we take our tweezers to the hefty main camera and line him up for closer look.
-
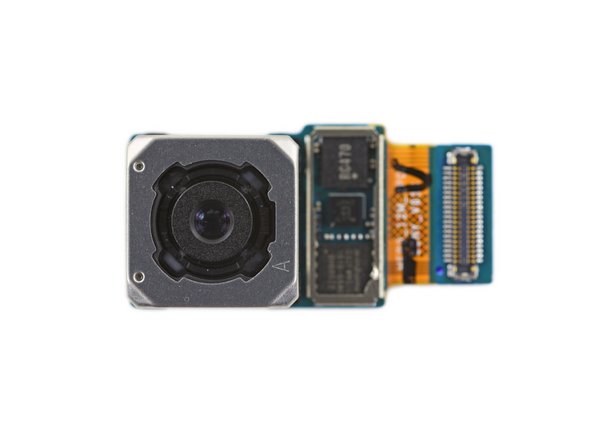
It's déjà vu all over again as we pull out what appears to be the same Sony IMX260-based main camera that we uncovered in the S7 and S7 Edge.
-
... And the similarities go further, all the way down to:
-
the Winbond Q32FWXGIG serial flash memory
-
STMicroelectronics L2G2IS 2-Axis MEMS OIS Gyroscope
-
Renesas OIS Driver
-
-
-
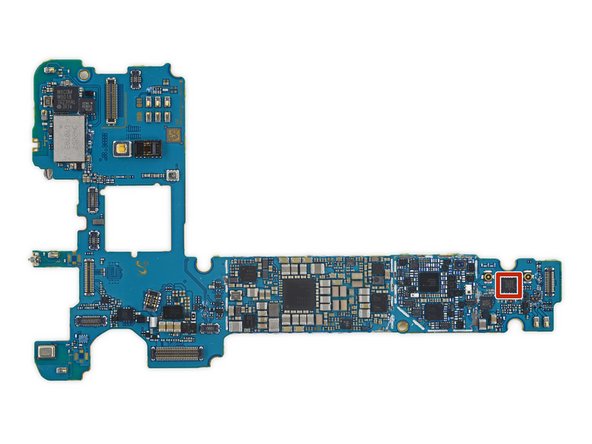
We're down to the meat and potatoes of this teardown, and it seems like Samsung unified more than their product numbering—this chipset is nearly identical to that found in the S7 and S7 Edge.
-
Samsung K3RG2G20CMMGCJ 4 GB LPDDR4 SDRAM layered over a Qualcomm Snapdragon 820
-
Samsung KLUCG4J1CB-B0B1 64 GB Universal Flash Storage 2.0
-
Avago AFEM-9040 multiband multimode module
-
NXP PN67T NFC controller
-
Qorvo QM78064 high band RF fusion module, TQF6260 front-end module and QM63001A diversity receive module
-
Qualcomm WCD9335 audio codec and DSP Group DBMD4 audio/voice processor
-
Murata FAJ15 front-end module
-
-
-
More note-worthy chips hide on the backside:
-
Samsung 3420S7 G707A3 Wi-Fi module (most likely contains a Broadcom BCM4359 Wi-Fi SoC)
-
Wacom W9018 touch control IC
-
ZF10 110630 0625 (likely NXP Semiconductor I/O expander)
-
Qualcomm PM8996 and PM8004 PMICs
-
Qualcomm QFE3100 envelope tracker
-
IDT P9221S wireless power receiver (likely an iteration of IDT P9220) + Samsung S2MPB02 camera power management + Maxim Integrated MAX77838 power management IC
-
-
-
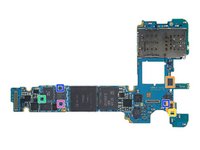
IC identification, pt. 2:
-
Infineon (previously Cypress Semiconductor) CY8CMBR3145 capacitive touch button controller
-
Samsung Image Processor (likely)
-
Samsung S2MM005X01 power management
-
Maxim Integrated MAX77854F power management
-
Maxim Integrated MAX98506 audio amplifier
-
Texas Instruments BQ25898S battery charger
-
ON Semiconductor FPF3688 load switch
-
-
-
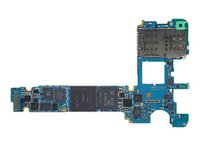
IC identification, pt. 3:
-
RDA Microelectronics RDA6213 FM radio transceiver
-
Antenna switch module (likely)
-
NXP Semiconductor BGU8103 GPS/GLONASS/Galileo/BeiDou low noise amplifier
-
NXP Semiconductor BGS8H2 LTE low noise amplifier
-
NXP Semiconductor BGS8L2 LTE low noise amplifier
-
NXP Semiconductor BGS8M2 LTE low noise amplifier
-
Infineon BGS12SN6 SPDT RF switch
-
-
-
IC identification, pt. 4 (sensors):
-
Maxim Integrated MAX86902 heart rate sensor (likely)
-
STMicroelectronics LSM6DS3 3-axis accelerometer/gyroscope
-
Bosch Sensortec BMP280 pressure sensor
-
AKM Semiconductor AK09916 3-axis electronic compass
-
Seiko Instruments S-5712CCDL1-I4T1U hall effect sensor
-
-
-
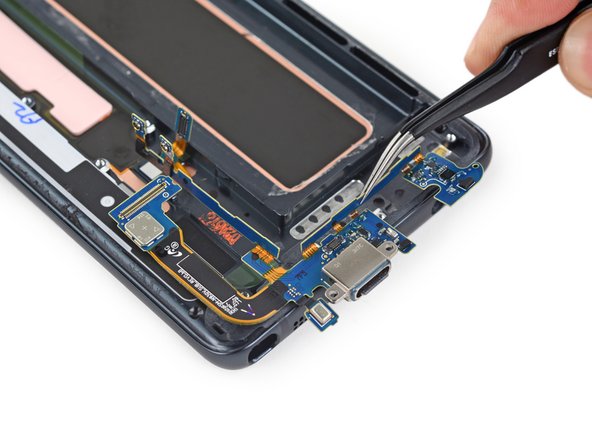
Heading south, we hit the modular headphone jack—ready to let the music flow while keeping water out, with a nice sealing gasket.
-
The USB-C port is new to the Note line—and while reversibility is handy, change is hard. Samsung kindly includes a micro-USB-to-C adapter to keep your cables relevant.
-
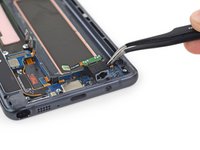
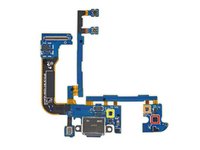
Out goes the daughterboard array! Unlike the one found in the S7, this board used rigid PCB interconnects. This keeps the spidery cable from being flimsy. No one likes flimsy.
-
IC identification:
-
Qualcomm QFE2550 antenna tuner
-
Seiko Instruments S-5712CCDL1-I4T1U hall sensor
-
Semtech SX9320 proximity sensor (likely)
-
-
-
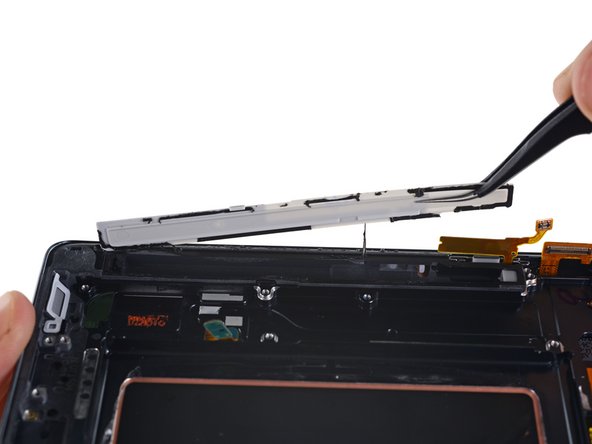
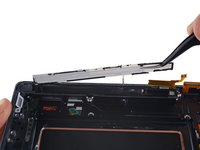
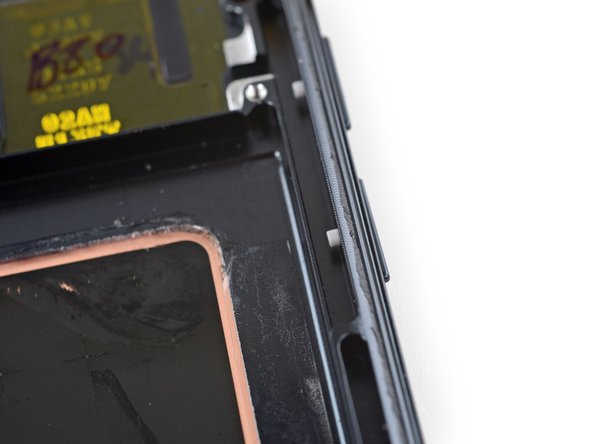
If you like tiny heat pipes, Note7 has you covered. This looks like the same "liquid cooling" copper heat dispersal apparatus we pulled from the vanilla S7 and S7 Edge.
-
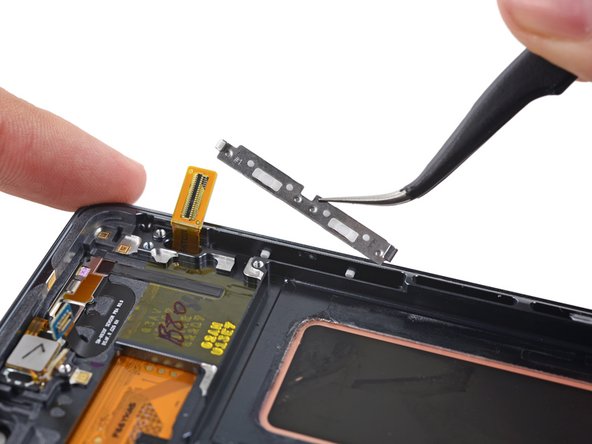
Nearby, a note-able amount of glue secures this plastic cover over the S Pen chamber. It's probably there to help ingress-proof the stylus' slot.
-
Inside, a simple clip grabs the S Pen notches, and a gray rubber bumper protects the nib.
-
-
-
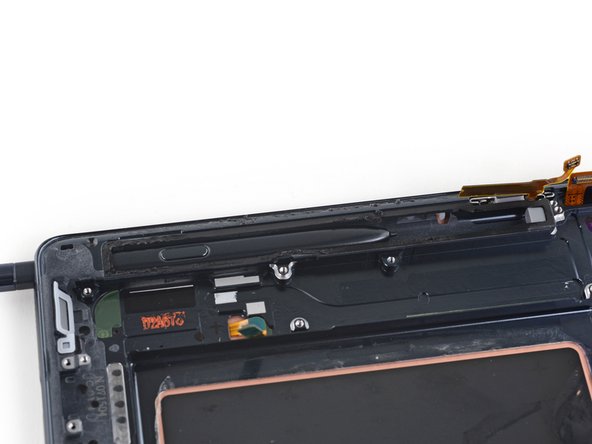
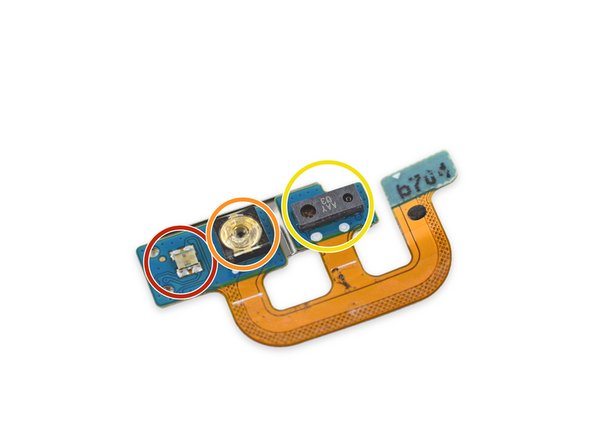
The volume buttons look pretty complicated, but that doesn't slow us down. Braced with years of experience plucking our unibrows, we dive in, a pair of tweezers in hand.
-
First out are the microswitches, followed by a reinforcement bracket full of rubber gaskets. Not quite the same, but similar to another waterproofing approach we've seen.
-
But...what's this? The button covers are oddly trapped within the outer case. We can't pop them out!
-
- Many components are modular and can be replaced independently.
- Improved cable routing means the charging port board can be removed without disassembling the display.
- The battery can be removed without first ousting the motherboard, but tough adhesive and a glued-on rear panel make replacement very difficult.
- Front and back glass make for double the crackability, and strong adhesive on the rear glass makes it very difficult to gain entry into the device.
- Because of the curved screen, replacing the front glass without destroying the display is probably impossible.


最后的想法
可修复性评分


(10是最容易修复)

48条评论
would you think its worth upgrading from the s7edge to the Note 7?
Scott Ream - 回复
I would do that.
I would get the iPhone 7 :)
Yeah I would, that stylus is so %#*@ sexy.
okdna -
For sure, note 7 is a beast of a phone, you wont regret it