跳转到主内容
iRobot Roomba 870  Bumper Sensor Replacement

iRobot Roomba 870 Bumper Sensor Replacement

Jacob Lindberg

Jacob Lindberg2 其他贡献者

最后更新于 November 21, 2022

30分钟
中等
特色学生指南

Is your Roomba not able to sense surrounding obstacles, preventing it from avoiding such barriers? If so, here is the guide to fix the problem with a simple change of the bumper sensor. All you need are the standard #0 and #1 Phillips Screwdriver heads in order to remove the two types of screws involved with this replacement.

你所需要的

工具

查看更多...

  1. iRobot Roomba 870  Bumper Sensor Replacement, Bumper Sensor: 步骤 1 中的图像 1,2 iRobot Roomba 870  Bumper Sensor Replacement, Bumper Sensor: 步骤 1 中的图像 2,2
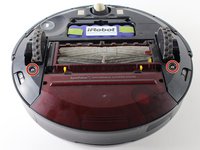
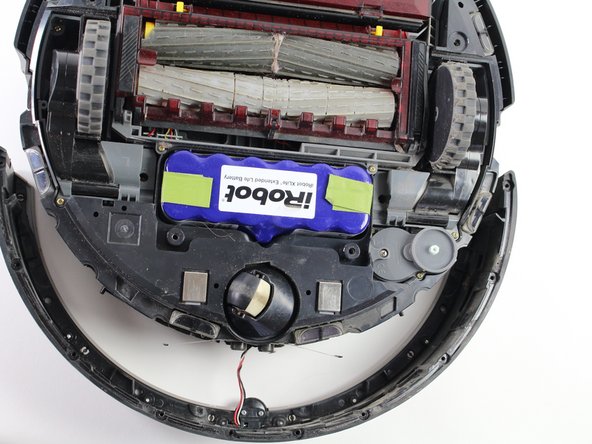
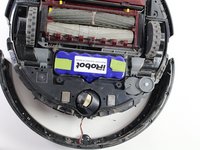
    • Flip the iRoomba over so that the underside is facing up.

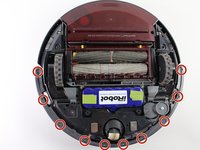
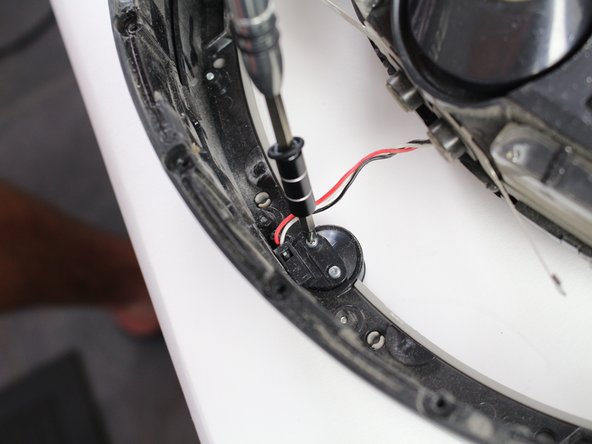
    • Using the Phillips #0 screwdriver, remove the 4.0 mm screw in the center of the yellow side brush.

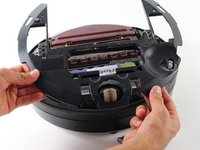
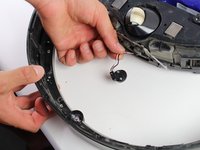
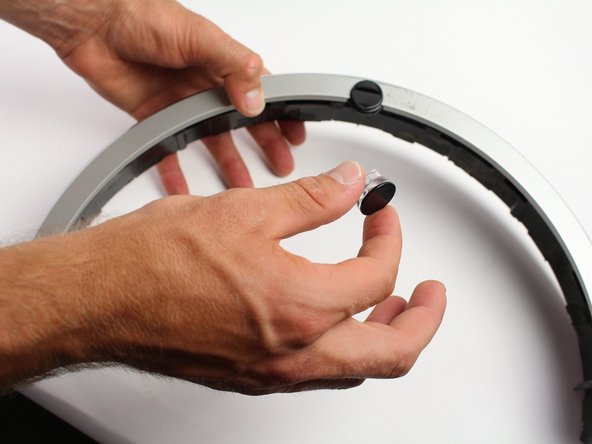
    • Remove the yellow side brush.

  2. iRobot Roomba 870  Bumper Sensor Replacement: 步骤 2 中的图像 1,3 iRobot Roomba 870  Bumper Sensor Replacement: 步骤 2 中的图像 2,3 iRobot Roomba 870  Bumper Sensor Replacement: 步骤 2 中的图像 3,3
    • Remove the two 3.5 mm Phillips screws that hold the battery cover onto the Roomba with a Phillips #0 screwdriver.

    • Remove the battery cover.

  3. iRobot Roomba 870  Bumper Sensor Replacement: 步骤 3 中的图像 1,3 iRobot Roomba 870  Bumper Sensor Replacement: 步骤 3 中的图像 2,3 iRobot Roomba 870  Bumper Sensor Replacement: 步骤 3 中的图像 3,3
    • Remove the two remaining 3.5 mm Phillips #0 screws that attach the base-plate to the bottom of the Roomba.

    • Remove the entire base-plate from the bottom of the Roomba.

  4. iRobot Roomba 870  Bumper Sensor Replacement: 步骤 4 中的图像 1,3 iRobot Roomba 870  Bumper Sensor Replacement: 步骤 4 中的图像 2,3 iRobot Roomba 870  Bumper Sensor Replacement: 步骤 4 中的图像 3,3
    • Remove the ten 3 mm screws that attach the bumper guard to the bumper with a Phillips #1 screwdriver.

    • Remove the bumper guard.

  5. iRobot Roomba 870  Bumper Sensor Replacement: 步骤 5 中的图像 1,2 iRobot Roomba 870  Bumper Sensor Replacement: 步骤 5 中的图像 2,2
    • Be careful when removing the bumper from the Roomba to prevent damage to the sensor wires. Remove slowly!

    • Lift up the Roomba so that its bumper is not resting on anything, and slowly separate the bumper from the device.

  6. iRobot Roomba 870  Bumper Sensor Replacement: 步骤 6 中的图像 1,3 iRobot Roomba 870  Bumper Sensor Replacement: 步骤 6 中的图像 2,3 iRobot Roomba 870  Bumper Sensor Replacement: 步骤 6 中的图像 3,3
    • Remove the two 3 mm screws that attach the sensor connector to the bumper/sensor with a #1 Phillips Screwdriver.

    • Carefully detach the sensor connector from the bumper and the sensor.

  7. iRobot Roomba 870  Bumper Sensor Replacement: 步骤 7 中的图像 1,2 iRobot Roomba 870  Bumper Sensor Replacement: 步骤 7 中的图像 2,2
    • The sensor is now loose on the bumper. Be careful not to rapidly move the bumper for fear of dislodging the sensor and breaking it.

    • Flip the bumper over, ensuring the sensor remains inside the sensor compartment.

    • Gently remove the bumper from the black infrared sensor.

结论

To reassemble your device, follow these instructions in reverse order.

13等其他人完成本指南。

Jacob Lindberg

于04/19/17注册

449 声望

撰写一个指南

团队

Cal Poly, Team S14-G3, Banghart Spring 2017 Cal Poly, Team S14-G3, Banghart Spring 2017 的会员

CPSU-BANGHART-S17S14G3

4 名成员

创作了10篇指南

3指南评论

Can not get to the plug-in area on the board to replace sensor this way. DOES NOT work this way.

jkeysgate - 回复

man kommt nicht an den Stecker. Die Anleitung bringt überhaupt nichts.

Reinhard Totzauer - 回复

Incomplete. This NEEDs to explain how to access the plug on the board.

Ed T. - 回复

添加评论

浏览统计数据:

过去 24 小时: 0

过去 7 天: 19

过去 30 天: 141

总计 8,407