跳转到主内容

iRobot Braava 320 Body Shell Replacement

你所需要的

  1. iRobot Braava 320 Body Shell Replacement, Battery: 步骤 1 中的图像 1,1
    • Flip your device over and locate the battery cover.

    • The battery cover is located in the center of the device in between both wheels.

  2. iRobot Braava 320 Body Shell Replacement: 步骤 2 中的图像 1,1
    • Using a Flathead #4 screwdriver, gently turn the 12mm screw that holds the battery cover in.

    • The screw does not remove, it stays attached to the cover.

  3. iRobot Braava 320 Body Shell Replacement: 步骤 3 中的图像 1,2 iRobot Braava 320 Body Shell Replacement: 步骤 3 中的图像 2,2
    • Gently remove the battery from the tray and disconnect the battery cable.

    • To remove the battery, pull it straight up. To disconnect the cable, gently pull it straight out of the connector.

    • To reinstall the cable, hold it near the end and gently push it in the connector.

  4. iRobot Braava 320 Body Shell Replacement, Body Shell and Control Panel: 步骤 4 中的图像 1,1
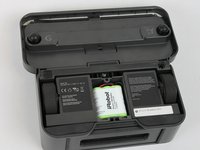
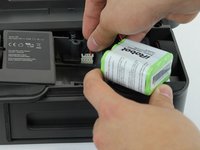
    • With the battery removed, rotate your device so the front of it is facing you.

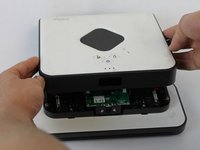
    • Remove the four 10mm Phillips #2 screws that attach the shell.

  5. iRobot Braava 320 Body Shell Replacement: 步骤 5 中的图像 1,2 iRobot Braava 320 Body Shell Replacement: 步骤 5 中的图像 2,2
    • Using both hands, hold the device together while you flip it over.

    • Starting from the front, gently lift up the shell and slowly tilt back until it is fully removed.

结论

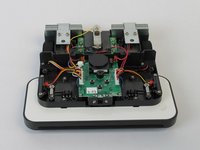
To reassemble your device, follow these instructions in reverse order.

另外一个人完成了本指南。

Adam Lewis

于02/28/17注册

214 声望

撰写一个指南

团队

USF Tampa, Team S1-G3, Nance Spring 2017 USF Tampa, Team S1-G3, Nance Spring 2017 的会员

USFT-NANCE-S17S1G3

4 名成员

创作了10篇指南

0条评论

添加评论

浏览统计数据:

过去 24 小时: 1

过去 7 天: 1

过去 30 天: 5

总计 706