跳转到主内容
加入维修社区 - 创建账户

此翻译由机器生成,尚未经过人工审核。 会说这种语言吗? 查看评论

iPod Touch 4th Generation 前面板组件更换

你所需要的

    1. iPod Touch 4th Generation 前面板组件更换, 前面板: 步骤 1 中的图像 1,1
      • iPod Touch第4代前面板通过粘合剂连接在后壳上。 强烈建议使用热风枪软化粘合剂。

      • 当热风枪温度调节在“低”位置时,开始加热触摸屏下部靠近主home键的位置。

      • 建议以绕圈圈的方法加热所需的部分,以均匀地散发整个装置的热量。

      添加评论

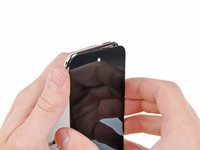
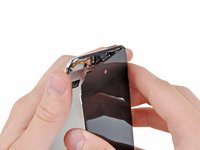
    2. iPod Touch 4th Generation 前面板组件更换: 步骤 2 中的图像 1,2 iPod Touch 4th Generation 前面板组件更换: 步骤 2 中的图像 2,2
      • 当心,因为触摸将是非常热的。使用 时用毛巾拿着它可能会有帮助。

      • 将撬棒的边缘插入前玻璃面板和靠近home键的塑料挡板之间。

      • 不要试图在塑料表圈和钢制后盖之间撬动。

      • 向上撬前面板的底部边缘,注意不要过度弯曲玻璃面板。

      • 如果撬起前面板组件太困难,请重新加热并重试。

      添加评论

    3. iPod Touch 4th Generation 前面板组件更换: 步骤 3 中的图像 1,1
      • 当有足够的空间抓住前面板的底部边缘时,将其从Touch上抬起,沿其左右边缘剥离粘合剂。

      • 如果粘合剂太难分离,在继续步骤之前使用热风枪软化。

      询问修复机器人
      添加评论

    4. iPod Touch 4th Generation 前面板组件更换: 步骤 4 中的图像 1,2 iPod Touch 4th Generation 前面板组件更换: 步骤 4 中的图像 2,2
      • 因为第四代Touch的构造,除非主板被移除,否则数字转换器电缆不能断开。 处理前面板部件时要特别小心,因为它是通过非常精致的数字转换器电缆连接到Touch的其余部分的。

      • 此外,显示数据电缆非常短,并连接到前面板组件顶部附近的主板。 如果在取下前面板组合件的顶部边缘时没有断开连接,请在将前面板组合件从Touch上取下之前,务必用工具将其断开。

      • 小心地将前面板组件的顶部分离粘合剂,将其固定在Touch上,注意连接两个组件的短数字转换器电缆。

      添加评论

    5. iPod Touch 4th Generation 前面板组件更换: 步骤 5 中的图像 1,1
      • 卸下以下八个十字#00号螺丝:

      • 一个3.5毫米十字螺丝

      • 两个3.0毫米十字螺丝

      • 一个2.3毫米十字螺丝

      • 一个2.4毫米十字螺丝

      • 三个2.0毫米十字螺丝

      添加评论

    6. iPod Touch 4th Generation 前面板组件更换: 步骤 6 中的图像 1,1
      • 使用撬棒的边缘从后置摄像头上撬起薄钢盖。

      • 请注意位于相机旁边挡板旁边的小弹簧(用黄色标注部分)。

      • 从iPod上取下钢盖。

      添加评论

    7. iPod Touch 4th Generation 前面板组件更换: 步骤 7 中的图像 1,3 iPod Touch 4th Generation 前面板组件更换: 步骤 7 中的图像 2,3 iPod Touch 4th Generation 前面板组件更换: 步骤 7 中的图像 3,3
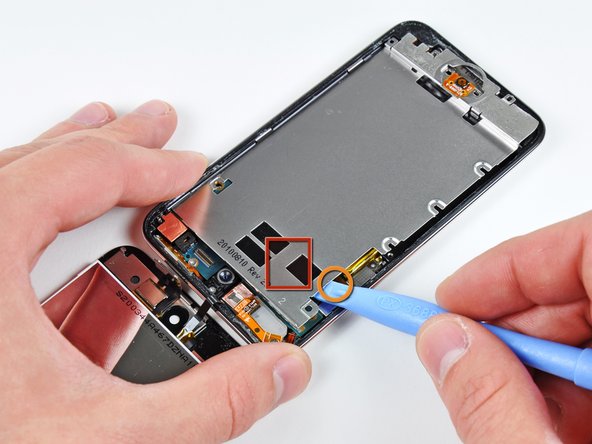
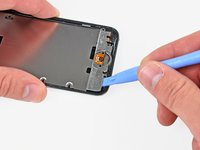
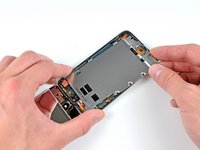
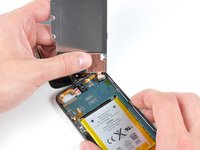
      • 将开启工具的边缘插入触摸屏左下角附近的钢板下。

      • 缓慢向上撬动,将钢板从固定其与塑料内壳的粘合剂中分离。

      • 如果钢板仍连接在逻辑板上,请重新加热该区域以松开粘合剂,然后使用开启工具缓慢地将钢板从逻辑板上分离。

      • 钢板下方有一条细小且脆弱的排线。撬起钢板时,请务必小心,切勿扯断排线。

      • 如果操作不当,该排线可能会粘在钢板上并极易撕裂。请缓慢操作,注意不要拉扯到排线。

      添加评论

    8. iPod Touch 4th Generation 前面板组件更换: 步骤 8 中的图像 1,2 iPod Touch 4th Generation 前面板组件更换: 步骤 8 中的图像 2,2
      • 稍微倾斜钢板,将它从后壳中取出。

      • 注意不要撕开将后置摄像头连接到钢板中间平面的连接带。

      • 将钢板从后壳提起,然后剥下粘在后置相机上的连接带。

      添加评论

    1. iPod Touch 4th Generation 前面板组件更换, 上主板: 步骤 9 中的图像 1,1
      • 拆下主板板顶边附近的三个螺丝:

      • 一个2.0毫米十字螺丝

      • 两个2.3毫米十字螺丝

      添加评论

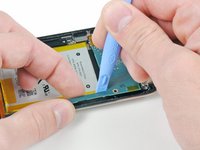
    2. iPod Touch 4th Generation 前面板组件更换: 步骤 10 中的图像 1,1
      • 使用撬棒的边缘轻轻地撬动后置摄像头,但不要将其从后壳上取下。

      • 请勿尝试移除后置摄像头。

      添加评论

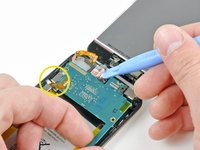
    3. iPod Touch 4th Generation 前面板组件更换: 步骤 11 中的图像 1,2 iPod Touch 4th Generation 前面板组件更换: 步骤 11 中的图像 2,2
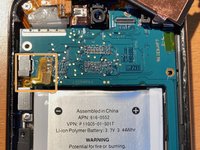
      • 使用撬棒轻轻抬起电池旁边的主板边缘,以便用另一只手抓住电池。

      • 不要过力弯曲主板,因为它非常薄且脆弱。

      • 音量控制键带状电缆仍然连接时,请小心不要抬起太多,否则很容易撕裂。

      • 在用一只手轻轻提起主板的同时,使用撬棒在主板板的顶部边缘提上位于连接带附近的主板。

      • 当最后一个显示屏组件连接器从后壳顶部边缘摘除时,主板可以提起。

      添加评论

    1. iPod Touch 4th Generation 前面板组件更换, 前面板组件: 步骤 12 中的图像 1,3 iPod Touch 4th Generation 前面板组件更换, 前面板组件: 步骤 12 中的图像 2,3 iPod Touch 4th Generation 前面板组件更换, 前面板组件: 步骤 12 中的图像 3,3
      在这个步骤中使用的工具:
      Tweezers
      $4.99
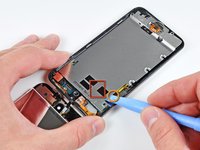
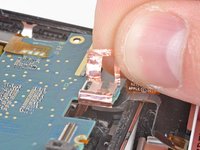
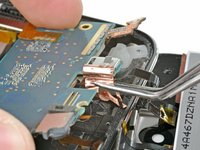
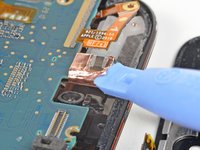
      • 使用开启工具的边缘,开始剥离缠绕在逻辑板上边缘中心附近连接器周围的铜箔胶带。

      • 继续剥离胶带,直到它与逻辑板完全分离。

      • 如果手头有镊子,使用它来剥离胶带会简单得多。

      添加评论

    2. iPod Touch 4th Generation 前面板组件更换: 步骤 13 中的图像 1,1
      • 使用开启工具的边缘,将连接器从逻辑板上的插孔中撬出。

      • 将前面板组件从 Touch 上拆下。

      • 如果你要安装新的显示屏组件,则需要用新的粘合剂替换旧的粘合剂。

      • 尽可能清除旧的粘合剂,然后在适当的位置贴上新的胶条。

      • 你还需要转移安装在前置摄像头和传感器窗口上方的金属板。你可以使用热风枪或吹风机来完成此操作。

      • 重新组装设备后,首次开机时出现白屏是常见现象。你只需进行软重置即可修复。具体方法是同时按住电源按钮和主屏幕按钮,直到设备重启;或者将电池电量完全耗尽直到设备关机。

      • 仔细检查排线是否在显示屏和金属板之间受到挤压。将其向后折叠,以免被挤压。如果排线受到挤压,可能会导致出现无法修复的白屏,因为排线上的电路可能已损坏。

      添加评论

结论

要重新组装设备,请按相反顺序执行这些说明。

取消:我没有完成这个指南。

1065等其他人完成本指南。

84指南评论

When installing the new panel, it can be quite hard to get the connector onto the board with only one set of hands. You will need to use a second person to hold the iPod and the new front panel in such a way that the connector lines up, then use your tweezers to press the new connector in place. It's pretty much impossible to do with only one person...

Kevin Hulett - 回复 分享

will the glass be as it was for before ones

like i heard that the glass will come out after some days

or it will not fix very easily

can u guide me please

shripadh - 回复 分享

ah ha, yes, a bit of practice is needed for sure on this, I have done quite a few now and that is by far the most frustrating part.

Biggest fear here is ripping the volume controller flex on the logic board, seen with the 4 pads top left of photo, i have had two rip on me and it's a real nuisance to change out the volume control flex. You can ignore step 10 really as you can still perform the operation without detaching the camera.

Dave - 回复 分享

Dave - Where did you get a replacement volume controller flex? I can't seem to find much of anything on the subject.

Rosalind - 回复 分享

添加评论

浏览统计数据:

过去 24 小时: 22

过去 7 天: 136

过去 30 天: 613

总计 1,282,909