简介
在iPod Touch 第五代中,逻辑板、电池、前置摄像头、Lightning连接器、扬声器、耳机插孔和home键被焊接在一起,形成一个整体。使用本指南拆卸整个总成。
你所需要的
-
-
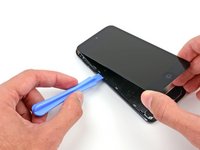
屏幕的底部(接近Home键位置)粘合剂最强。
-
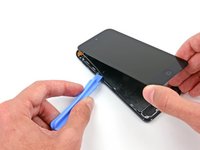
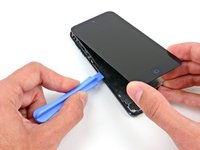
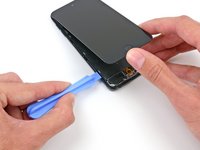
使用热风枪或者吹风机(低档位)来软化粘合剂。
-
在您进行下一步骤撬起屏幕前,您有可能需要再进一步加热来让粘合剂加温变得软化。
-
-
-
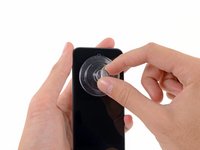
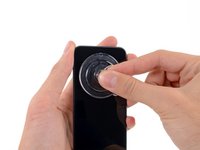
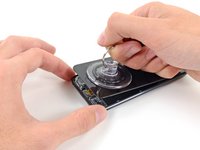
将吸盘放置于玻璃底部中心位置,Home键略微向上位置。
-
按压吸盘,确保吸盘已经牢固吸住玻璃。
Be very careful. I have bought the ifixit kit. Tried with the suction cup and it didn’t work. None of the tools actually helped. Follower the instructions carefully and still ended up with a cracked screen. I wish I could go back in time and not doing any of this. I literally just cried and have no money for a new screen.
-
-
-
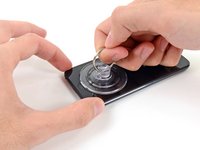
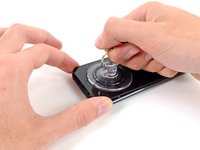
紧紧抓住桌面上的iPod。
-
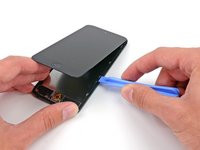
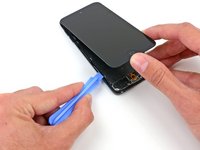
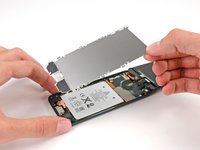
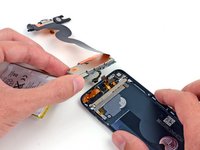
将吸盘向上提起,朝向iPod的顶部。 耐心等待,并用力拉紧,直到粘合剂破裂,显示器从后壳上出来。
-
可能需要使用热风枪来软化粘合剂(特别是在较冷的气候条件下)。 如果您可以将屏幕分开,但粘合剂仍然粘在一起,像披萨上的奶酪一样,您可以用剃刀刀片轻轻地切割粘合剂。
Step 2.5: Recover iPod from far side of the room due to suction assisted throwing.
thanks, Apple
Did as shown, button switch works fine, when I reinstall button, it's like it won't touch the switch to engage.
What next?
I've got the same problem, managed to get the screen off, transferred the little steel plate to the new home button and put it in. The switch works fine when I press it with my finger, but it won't work with the home button??? - Did you manage to solve this problem?
Tom -
I've got the same problem. Been trying to find a solution for a few days now. Lots of people ask this question, but no one ever answers it. How did you solve it?
tirgang -
It sounds like you need to replace the home button dome switch rather than the actual home button. I'm currently searching for one myself. My customer jammed the home button and now it doesn't click. The dome switch is located on the home button ribbon cable and not on the home button.
The "home button" repair shows the physical button, but it's not actually the repair for the switch, which is what should be shown as the home button repair. The switch has a little black plastic tab that breaks off with excessive presses, and that's why the button plate cannot engage the switch when the screen is reinstalled. You will need to replace the switch, or modify it with something small enough to press the switch when the LCD is lowered.
Rene -
I also ran in to the Home button not working issue. I have not idea what changed with the button, but it would not work (from the outside) after the battery replacement & re-assembling. If you opened the iPod up, you could press the switch directly and it clicked & worked, but it seemed finicky. I ended up putting the tiniest dot of hot melt on the center of the switch (smaller than the switch 'dome', and thin too, maybe 0.6-0.7mm thick), re-assembled, and it works fine now.
Use the hair dryer or a heat gun to loosen the adhesive. This did not work with just a suction cup for me.
I also had to use a heat gun and the opening tool instead of just a suction cup to open the assembly. The rest of the guide worked really well!
When putting back together, make sure the display connector is in firm or you might get lines. And also, perform a hard reset - my power wasn't working, I took it apart and checked the power flex cable, but all it needed was a hard reset when put back together.
Suction cup and hair dryer method never worked for me. Even tried my heat gun. Finger went numb before I gave up. Used thin prying + suction cup and eventually opened it but screen cracked in the process when I was too aggressive opening it.
In hind-sight, it would have been very helpful to know that the adhesive is just in the 2 areas to either side of the home button, nothing along the edges.
Biggest complaint is the time wasted, should have just bought a replacement iPod, better return on my money/time.
The adhesive strips are only located to the left and right of the home button. Imagine two small squares of tape in each corner. Be careful heating. I used a heat gun on the lowest heat, but I think I may have overheated the area and damaged the digitizer on the bottom of the screen. I now have small green lines on that section of the screen. I too had to use a thin metal spudger to release the adhesive.
-
-
-
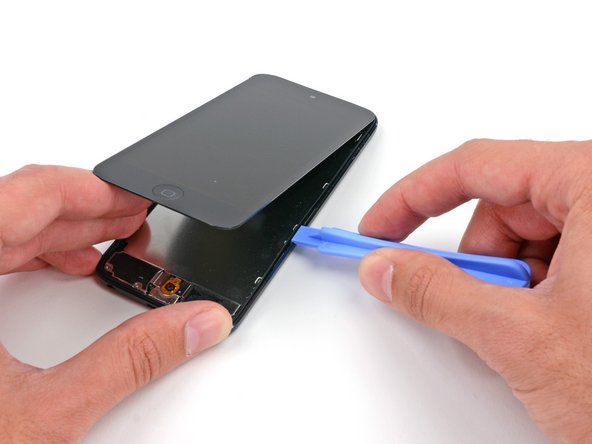
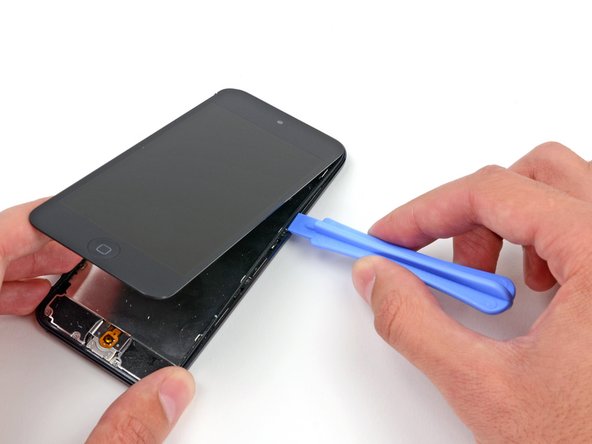
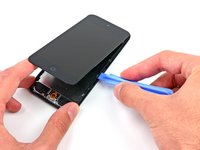
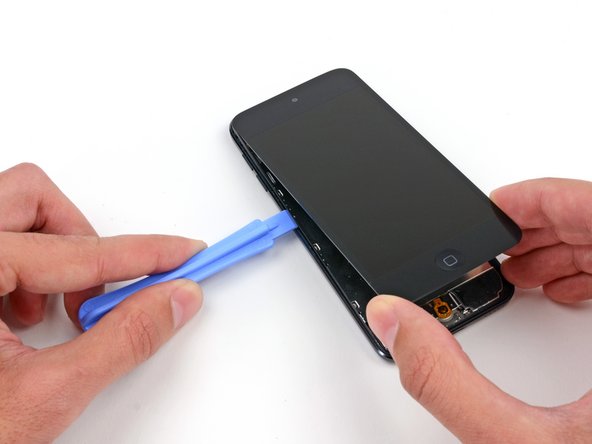
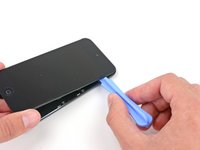
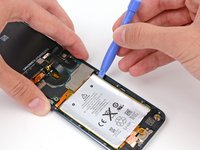
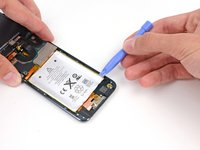
从设备的右上方开始,将塑料打开工具插入塑料框架和铝后壳之间的间隙中。
-
将工具向下滑动,从外壳中松开框架。
Careful! This piece is super fragile. It really helps to understand the way the clips work. I struggled for 10 min with not a single un-clip, snapped the plastic frame in 2 places because I didn't understand the clips, and as soon as I figured out how they work the piece was off like a prom dress.
The clips are metal n shapes around the outside of the frame. They need to be pushed away from the center of the device to release the frame. You need to get something in between the plastic and clip to release, a guitar pick is probably too thick. A thin opening device would probably work but I used a razor blade. I'm not sure if these clips are on all of the newer Apple devices, but I've never encountered one before (usually work on android devices.)
I hope this helps prevent someone from having to replace the frame.
I wish I had read this comment before I broke my frame, hah! It made sense once I had the clips out, but while they were still in it was mystifying. Thankfully it won't be too big of a problem since all of the frame will still clip in, it just won't be connected.
-
-
-
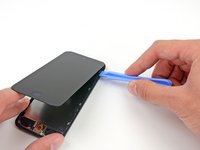
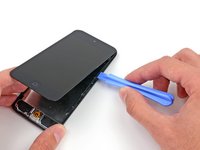
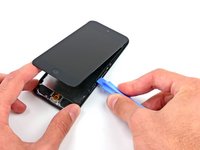
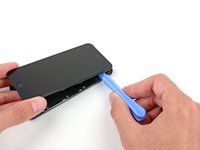
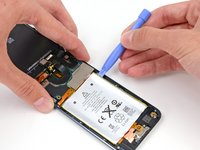
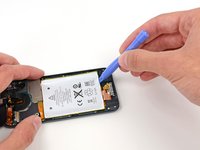
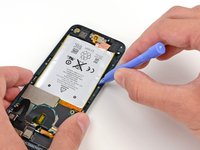
在接下来的两个卡扣上重复先前的操作。
-
在塑料框架和铝制后壳上的第二个卡扣之间插入塑料打开工具。
-
晃动工具,来使得卡扣从外壳上释放。
Hello how are you? I don't know what happens when I go back and put everything I close and the home button doesn't work, I disarm it and check the flex and it works when I press it but with the home button it doesn't.
-
-
-
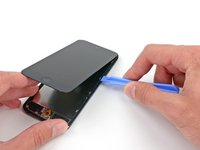
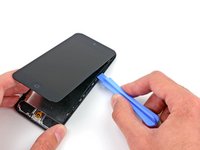
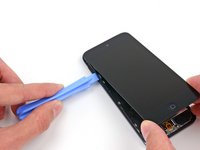
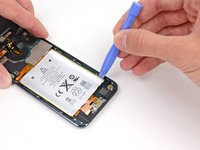
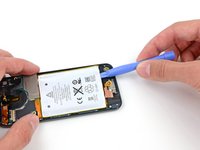
按照相同方法。松开最后一个将塑料框架与外壳固定的卡扣。
They have the exact same dimensions.
do you think if i use reolacement scren of itouch 5th gen to my itou h 6th gen this would work? i cant find screen for itouch 6th gen so im thnking to use the screen of 5th gen pls help me
-
-
-
-
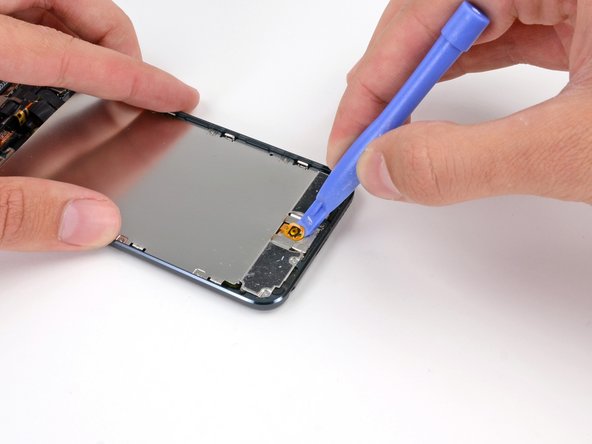
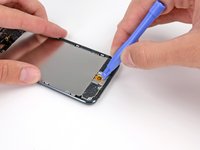
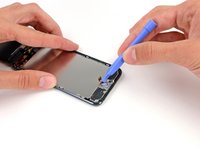
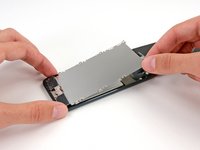
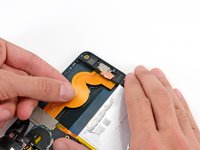
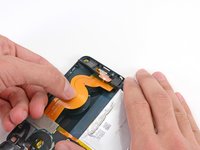
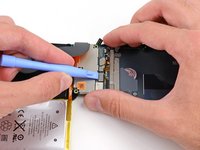
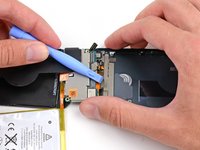
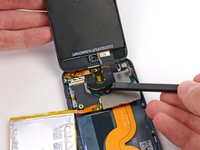
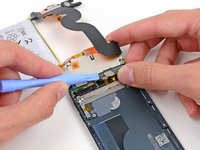
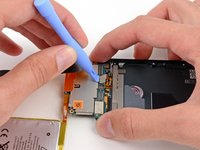
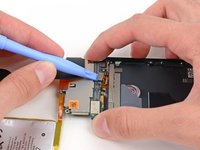
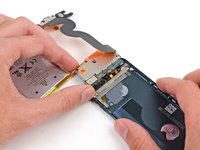
使用塑料打开工具从LCD板上撬起Home键开关。
-
可能需要使用热风枪或吹风机来软化Home键背面的粘合剂。 始终用低热。
If you have trouble lifting the home button switch up with the plastic opening tool, you can try using an opening pick instead.
Hi I just replaced my screen on my ipod touch 5th gen and i connect all the ribbon chords and every thing and when i connect one of the ribbons from the screen to the motherboard the motherboard starts to get hot! The screen isnt actually fully on, I wanted to make sure it turned on before I snapped it back in place. Any ideas? When I disconnect the ribbon the temp goes down. Screen is an OEM screen from Apple. I read somewhere, and i have personally have done it, that you can short the battery on the ipod touch 4th and it fixes it but im not sure on the 5th.
I have the same problem. I am going to change the battery. I let you to know if it solved the problem. Please let me know if you solve your problem. Thanks
Eddie, Did you ever fix this? I have exactly the same issue, Board gets hot and screen remains black. Although i did Hear Siri and iTunes recognises it.
You need to make sure that all the adhesive covers for the battery and the board are on so that it isn't shorting with the metal cover, this may fix some issues with the board / battery heating up a lot and display not working. I just put some electrical tape over the batter solder and screen cables so that it's all in place properly and no shorting of electric terminal points on the board.
Ben -
With some newer versions of the gen 6 iPod, it seems that removing the home button from its adhered position is not necessary. I removed mine and then realized that it was adhered to the metal of the dock, not the actual LCD shield. Just something to keep in mind, might save you some grief later if you have to re-adhere it.
-
-
-
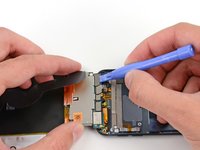
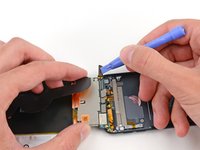
移除三颗将后壳与逻辑板相固定的 1.6 mm #00 十字螺丝
Hi, the MPN on that WiFi flex confirms this is not an iPod Touch 6th gen, it is 5th Gen. I am trying to source a 6th Gen WiFi Flex.
-
-
-
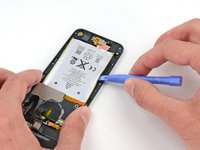
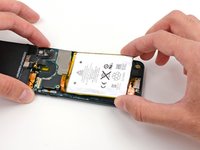
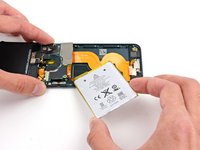
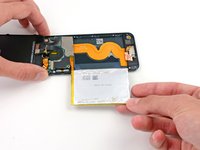
这里有两条胶带将电池固定到位。
-
将iPod翻转到背面,铝制后壳上。 切勿加热电池。
-
铝合金外壳不必太烫; 随时使用手指触碰确保不会加热过热。
Instead of a heat gun or hair dryer, I used a rice sock (http://www.wikihow.com/Make-a-Rice-Sock) to apply heat evenly across the entire back of the case while the case still sat upright for me to work on getting the battery loose. It was a lot easier than trying to heat the back of the case, then flip the case over and work feverishly before it cooled.
I'm sure this works, but it doesn't seem like the proper way to do this. I didn't like the feeling of prying on a flimsy battery at all. That's not practical. Instead get some molybdenum wire start it underneath the corners, then wrap the ends of the wire on like 2 pencils then tape them so u dont have to wrap the wire around your fingers because it will hurt lol. then apply heat, i went about 130 degrees is what my infrared gun said. I used a geat gun on low and a good distance away. Then just work the wire down the adhesive obviously lol. This worked out very easily for me and I felt safe and more confident about what I was doing. Good luck.
If you really don’t want to remove the battery, you may lift the mainboard slightly instead and disonnect display, back camera flexes and antenna connector. Then gently pull back camera module out of the seat. This gives you enough room to connect new display and back camera flexes. Back cam module would be hanging while you connect everything that got disconnected. Screw back the mainboard and push camera module to its seat.
-
-
-
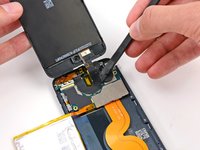
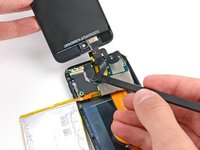
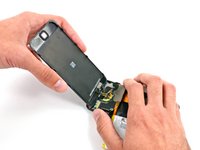
使用撬棒扁平一端来将前置摄像头从显示组件的插座中撬出。
My camera ceased to work after this. Anybody have the same issue?
A reboot can sometimes work. Once the camera is seen not to be working (say it was connected after the device goes to sleep), the iPod gives up trying to show any live images from the either front or rear cameras
mark -
How do you replace the front facing camera
I have a similar issue, the rear camera doesn't work and the facing camera sometimes works but very slow...everything else works well.
Any ideas on how to fix this problem?
-
-
-
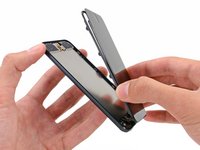
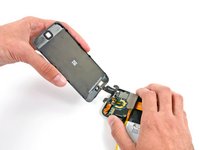
将整个组件翻转平放,露出整个逻辑板。
-
使用塑料打开工具来断开逻辑板上的数字化线缆。
When reassembling, the digitizer and display cable connections very easily come loose. Make sure you press them in securely then I held down the logic board with my left hand while rescrewing it down one handed with my right hand otherwise they would disengage. Took several tries to get it right.
-
-
-
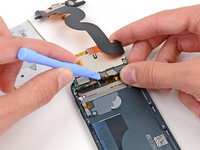
将主板翻转过来,以露出背面的连接器。
-
使用塑料撬棒的边缘轻轻地将天线接线从主板的背面撬开。
-


要重新组装设备,请按照相反的顺序进行操作
要重新组装设备,请按照相反的顺序进行操作
40等其他人完成本指南。


4条评论
Step 33: If you replace the logic board you will necessarily need to desolder and resolder the battery and Lighting Connector cable. A new logic board will not come with these two items attached. See Old Turkey's reply to my question on this subject...
Is the logic board assembly available for purchase on this site? This part would include the logic board, possibly the attena, the dock port assembly, the speaker, the home button, and the battery.
It would be nice if a link to a replacement iPod Touch 5th Generation logic board assembly were included, or suggested services where existing iPod Touch 5's logic boards can be repaired. I've seen nothing but dead links online and the only ones that work point towards the iPod Touch 4th generations, or to this digital manual.
Need permision from Apple to change the logic board?
Any repair guides for front camera?
ipod touch 5th generation front camera freezes then returns to rear camera. This happened after replacing battery. Any ideas? Tried hard reset & restoring. Nothing worked.
Libby - 回复