简介
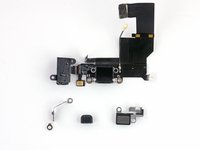
使用本指南来移除无法工作的lighting接口模组 包括耳机口 天线模块 以及 麦克风
您也可以使用本指南来作为更换 耳机插孔互联电缆 麦克风垫片 的参考指南。
下面的视频资料囊括了额外的几个步骤,包括移除逻辑板。
你所需要的
视频概述
-
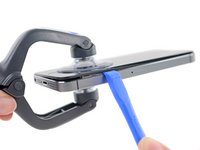
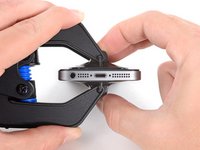
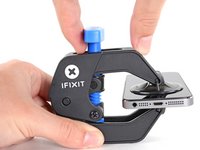
在这个步骤中使用的工具:Clampy - Anti-Clamp$24.95
-
向后拉蓝色手柄以解锁反向钳臂。
-
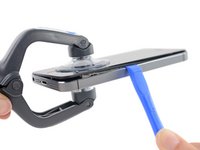
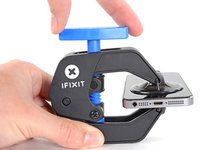
将支撑臂滑过 iPhone 的左边缘或右边缘。
-
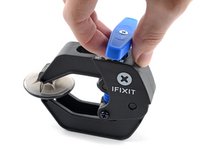
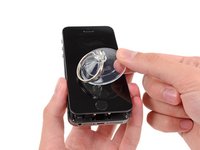
挤压吸盘,将吸力作用于所需部位。
-
-
-
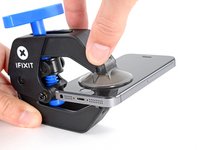
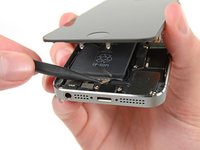
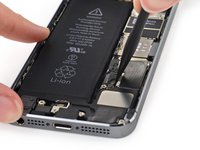
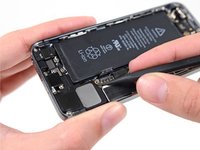
一只手固定好iPhone机身,另一只手轻轻地把机身从前面板底端的home键上分离。
-
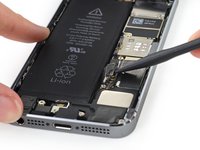
当你左手使用吸盘拉动的时候,右手用塑料撬棒在后机壳边缘处,轻轻地撬动,使屏幕和机身分离。
-
-
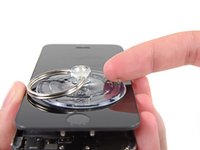
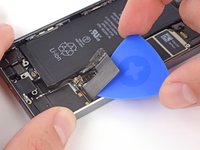
在这个步骤中使用的工具:Tweezers$4.99
-
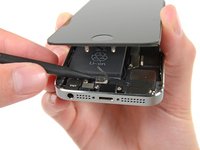
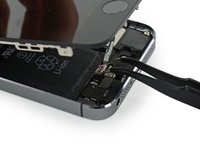
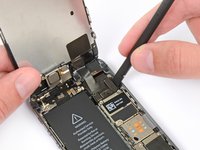
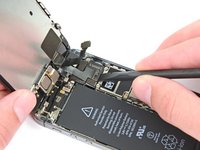
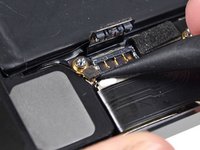
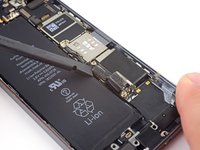
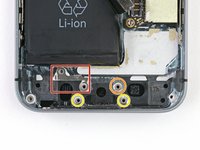
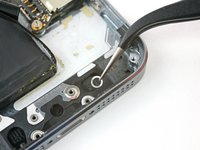
稍微打开屏幕,可以看到盖住home键电线的挡板铁片就可以了。
-
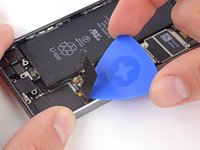
只有手机原装的Home键组件才能使用Touch ID功能。如果你扯断这根电线,装上新的home键只能恢复home键功能,而将失去Touch ID功能。
-
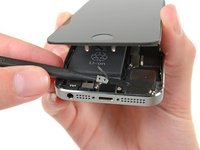
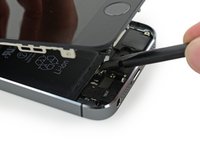
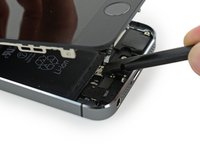
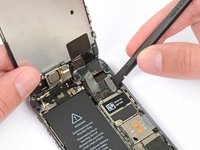
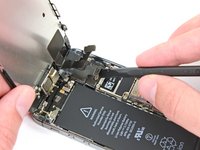
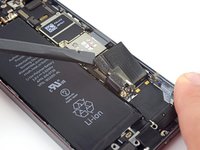
使用手机撬棒推动松下铁片,再用镊子取下来。
-
-
-
-
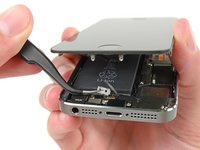
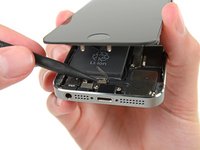
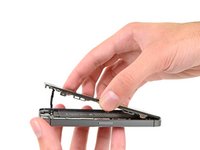
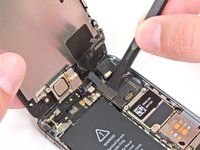
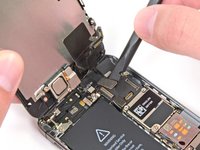
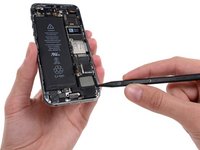
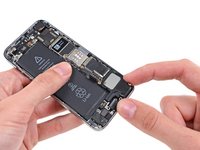
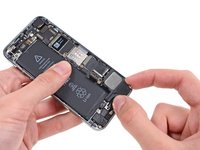
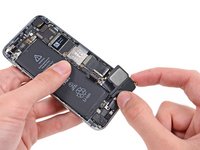
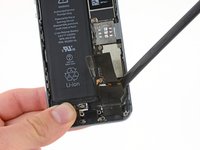
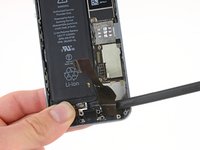
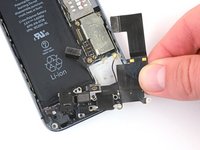
一旦连接器被撬开了后,把home键底端从机身上拉起,把手机顶端当做一个转动支点。
-
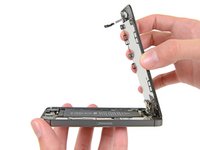
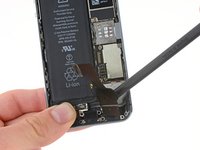
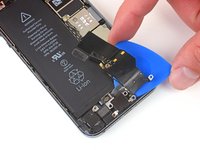
把显示屏立起来,保持跟机身成90度角。在你维修手机的过程中一直保持这个状态。
-
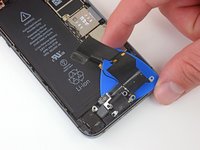
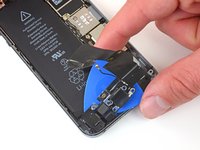
用橡皮筋把显示屏如图三所示固定住。这会避免在维修过程中显示屏电缆的损坏。
-


要重新组装您的设备,请按照本指南的相反顺序进行操作。
399等其他人完成本指南。


43指南评论
Can't you replace just the lightning port itself by soldering on a new one?
Josh Bacon - 回复
It's not even worth soldering another one on when it's pretty cheap to buy another charging port flex assembly.
Ben -
I got through this successfully and it solved my problem (phone wouldn't charge/iTunes wouldn't recognize it when plugged in). With the new part it works perfectly.
Two cautions: I bought a new lightning connector assembly and I had to transfer two items from the old assembly that were not mentioned in the steps.
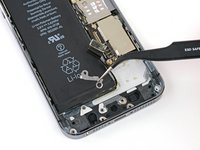
(1) There is a small black rubber "boot" which you can see in the step 38 photo. (on the very bottom between the lightning port and the headphone jack) Pull this off and put it in the same place on your new lightning connector assembly. It attaches to a fitting on the bottom wall of the aluminum case.
(2) There is a bracket that holds the home button connector socket in place. This is the socket that is exposed when you disconnect the home button cable in step 9. When you remove the old lightning connector assembly, this bracket needs to be transferred to the new assembly. It's attached by a small piece of double sided tape that you can salvage/reuse if you're careful!
Right well that wasn't too much fun. In my case the adhesive connecting the lcd/digitiser and the lcd shield/bracket had gone making opening the device quite difficult. The screen and digitizer were coming up with the suction cup but the lcd shield and the metal bracket with all the clips stayed firmly secured to the main case. My solution was to drive a flat metal prying tool on the battery side between the metal bracket and the inside wall of the main casing. Not for the faint of heart but I got there in the end.
No complaints with the rest of the repair and the iFixit replacement lightning assembly works flawlessly (my lighting port and headphone jack had become loose fitting causing headphones to easily pop out and making charging very difficult).
When all is re-assembled remember to do a hard reset to get touch ID working again as only the home button function works immediately after reassembly (security feature?). Thanks a million iFixit, this brick will live to see another year hopefully :)
Hi Barry,
Can you clarify what type of reset you had to do to get your TouchID working again as like you, only my home button is working after reassembly.
Thanks