当前版本的文档还未经巡查,您可以查看最新的已查核版本。
简介
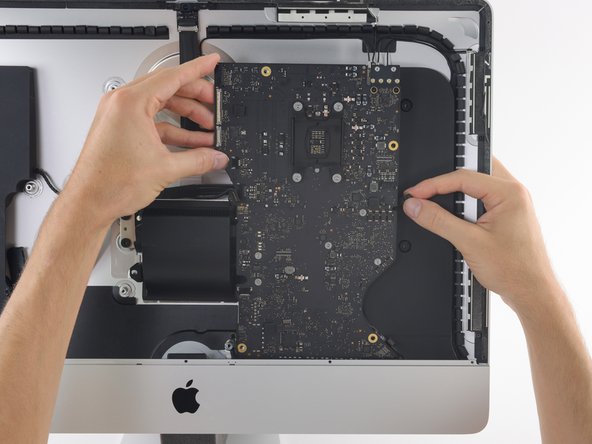
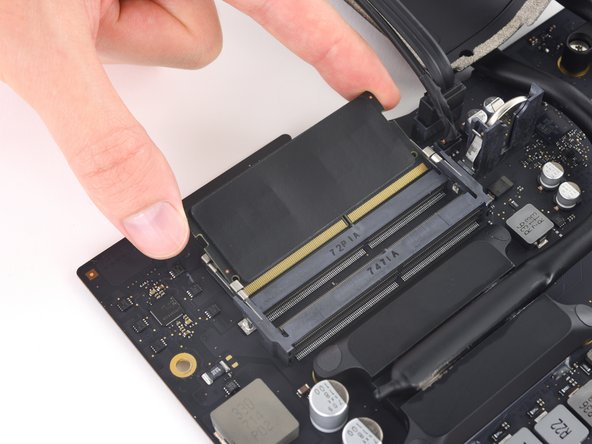
這份指南詳細介紹iMac(2017年, Retina 4K顯示器)的主機板,以便移除及更換內存記憶體。
本指南中的示意圖部分使用的是2015年的iMac,所以有些小小的差異,但這並不影響你修理程序
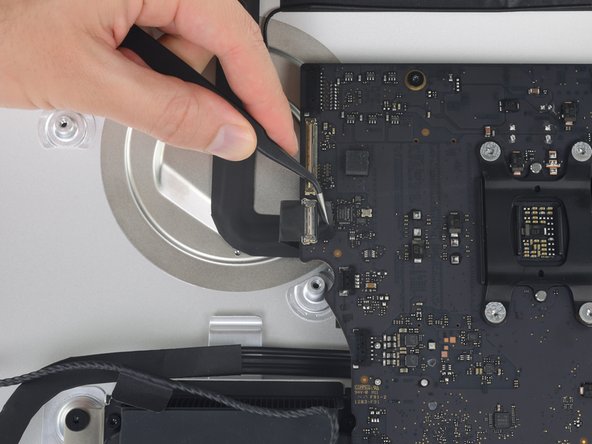
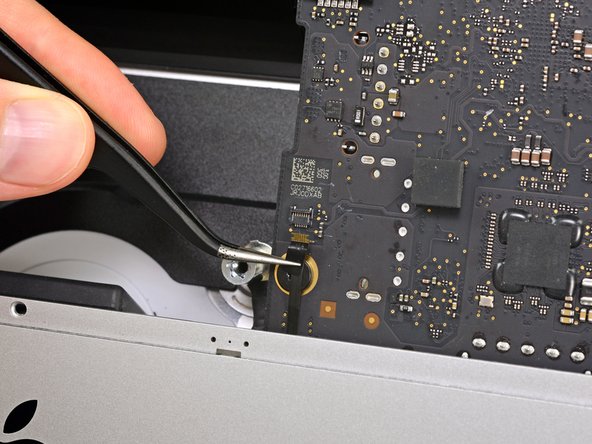
本指南被標記為“潛在危險”,因為修理程序內含有大量電容器電源需要被處理,請拔下電源線後,按住電源鍵約10秒以幫助放電。處理過程中,請把手抓在電路板的邊緣,不要觸碰表面元件。
你所需要的


要重新組裝你的設備,將指南的方法逆向操作即可
要重新組裝你的設備,將指南的方法逆向操作即可
146等其他人完成本指南。


77条评论
An excellent guide - many thanks. The logic board was tricksy to get out - the card reader was jamming on the casing, but it came out with care. It's easy to trap the microphone cable and the power button cables when re-assembling, so they're worth looking out for. Successfully replaced the RAM and installed an SSD at the same time - many thanks.
Can a SSD or fusion drive be put in the place where the normal hard drive was?
An ssd can yes - that's what I did at the same time as upgrading the ram. As long as it's a 2.5" ssd it should be fine. The Samsung ssd I used was a but thinner than the hard drive that came out but that doesn't affect anything really. You'll need to either have a bootable clone of your drive, or install Sierra from a USB stick you've already prepared (which is what I did).
A Fusion drive is the terminology used by Apple when the use a board soldered 120ish Gb storage and a standard 1Tb 2.5 inch drive, and bind them together, if you throw in a 1Tb SSD in place of the existing standard hard drive you end up with 2 drives when you begin installation, you can find the instructions to merge the onboard and the new SSD back together again, and boy does it transform these machines, absolute pig with a factory fusion setup.
I also upgraded my hard-drive to a 512 GB Samsung SSD successfully along with installing the 32 GB of RAM. The guide was great, but I have a two comments.
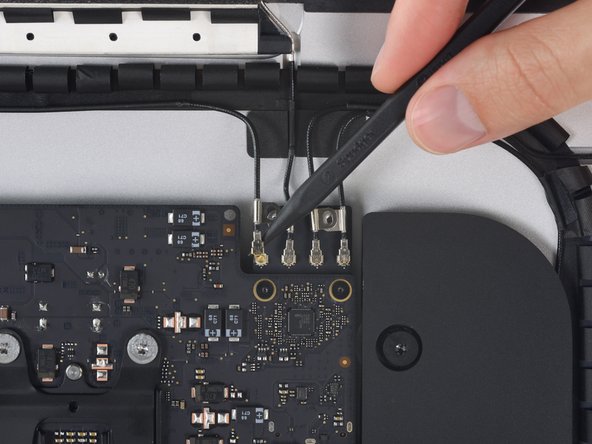
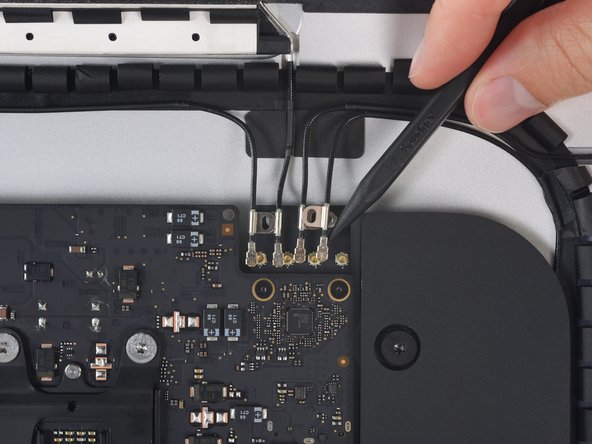
1) The screws that hold the antenna connectors (Step 52) are were very tightly screwed into the board, and it is easy to strip the head of the screw. I stripped one of the screws… Luckily, it was easy to just pull up on the bluetooth/AirPort card and slide it out from its slot on the main board. Thus, an option to removing all the antenna wires, is to just pull the bluetooth/Airport card out. It was quite easy to slip back into the correct spot when reassembling as well.
2) It was only after I completed the repair that I realized that the top of the nice screwdriver provided in the repair kit contained more hidden bits!
Brad Doble - 回复