简介
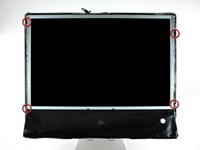
Remove the display to access most of your iMac's internals.
你所需要的
-
-
Orient the iMac face-side down on a table with the bottom edge facing yourself.
-
Remove the two Phillips screws securing the access door to the bottom grille of your iMac.
-
-
-
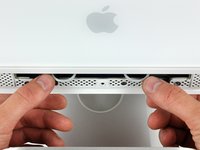
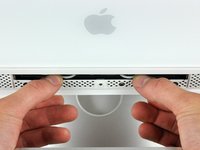
Remove the three T8 Torx screws securing the front bezel to the rear case along the lower edge of the iMac.
-
-
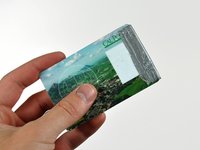
在这个步骤中使用的工具:Plastic Cards$2.99
-
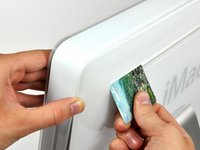
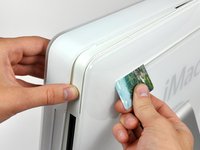
Insert a plastic card up into the corner of the air vent slot near the top of the rear case.
-
Push the card toward the top of the iMac to release the front bezel latch.
-
Pull the front bezel away from the rear case.
-
Repeat this process for the other side of the front bezel.
-
If the bezel refuses to release, try pressing the lower edge back onto the rear case and repeat this opening process.
-
-
-
-
Peel the lower EMI shield off the lower edge of the iMac and off the two vertical 4" sections on either side of the iMac.
-
-
-
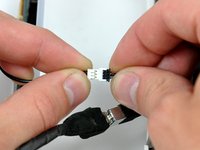
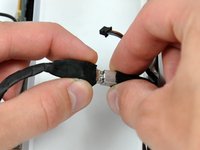
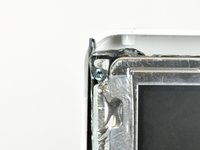
Remove the two T6 Torx screws securing the display data cable connector to the logic board.
-


To reassemble your device, follow these instructions in reverse order.
11等其他人完成本指南。
