跳转到主内容
Toilet Tree TTP-TRIM-1 Power button Replacement

Toilet Tree TTP-TRIM-1 Power button Replacement

samuel fontanez

samuel fontanez2 其他贡献者

最后更新于 July 14, 2024

3分钟
中等

The following guide steps through the process of removing the power button and its components for replacement.

你所需要的

配件

工具

查看更多...

当你通过这些链接购买商品时,iFixit 会赚取佣金。
  1. Toilet Tree TTP-TRIM-1 Power button Replacement, Battery: 步骤 1 中的图像 1,2 Toilet Tree TTP-TRIM-1 Power button Replacement, Battery: 步骤 1 中的图像 2,2
    • Twist the battery cap found on the bottom of the device counterclockwise.

  2. Toilet Tree TTP-TRIM-1 Power button Replacement: 步骤 2 中的图像 1,1
    • Remove the battery

  3. Toilet Tree TTP-TRIM-1 Power button Replacement, Power button: 步骤 3 中的图像 1,2 Toilet Tree TTP-TRIM-1 Power button Replacement, Power button: 步骤 3 中的图像 2,2
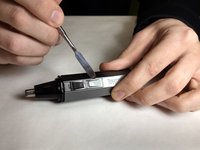
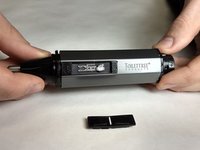
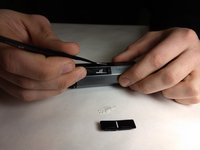
    • Using the metal spudger, wedge underneath the button and gently pry it out.

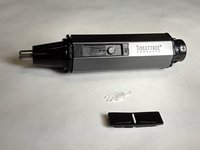
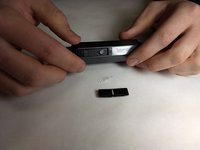
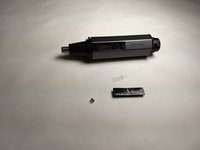
    • Note orientation of the switch, so that it can be replaced properly.

  4. Toilet Tree TTP-TRIM-1 Power button Replacement: 步骤 4 中的图像 1,3 Toilet Tree TTP-TRIM-1 Power button Replacement: 步骤 4 中的图像 2,3 Toilet Tree TTP-TRIM-1 Power button Replacement: 步骤 4 中的图像 3,3
    • Underneath the button lies two small components. We will reference them as the o-ring assembly and clear tab. Take note of their orientation.

    • Continue disassembly by prying the clear tab upwards.

  5. Toilet Tree TTP-TRIM-1 Power button Replacement: 步骤 5 中的图像 1,3 Toilet Tree TTP-TRIM-1 Power button Replacement: 步骤 5 中的图像 2,3 Toilet Tree TTP-TRIM-1 Power button Replacement: 步骤 5 中的图像 3,3
    在这个步骤中使用的工具:
    Tweezers
    $4.99
    • Using the tweezers, take the o-ring switch assembly out of the trimmer.

结论

To reassemble your device, follow these instructions in reverse order.

samuel fontanez

于11/06/17注册

301 声望

创作了3篇指南

团队

IUPUI, Team S1-G5, Harley Fall 2017 IUPUI, Team S1-G5, Harley Fall 2017 的会员

IUPUI-HARLEY-F17S1G5

4 名成员

创作了6篇指南

0条评论

添加评论

浏览统计数据:

过去 24 小时: 0

过去 7 天: 0

过去 30 天: 1

总计 250