简介
Use this guide to replace the rear camera on your Samsung Galaxy S21 Ultra.
This guide was performed on the SM-G998B/DS (international) model. Other models have an additional antenna cable sitting in the edge of the midframe.
Although it’s not necessary to remove the interconnect cables to replace the screen we advise doing so. It makes the required motherboard removal and the reassembly way easier.
If you do not replace the adhesive seals when reassembling, your device will function normally, but will most likely lose its water protection.
You’ll need replacement adhesive to reattach components when reassembling the device.
你所需要的
-
-
Prepare an iOpener and apply it to the back cover for at least three minutes to loosen the adhesive underneath.
-
-
-
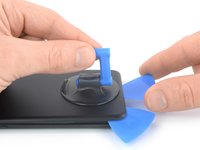
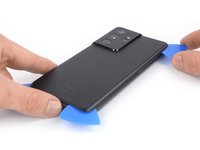
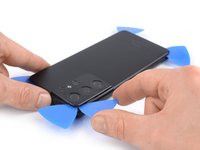
Secure a suction handle to the bottom edge of the back cover, as close to the edge as possible.
-
Lift the back cover with the suction handle to create a small gap between the back cover and the frame.
-
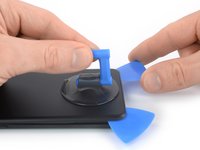
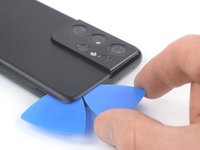
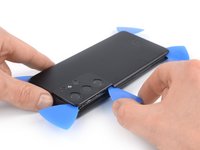
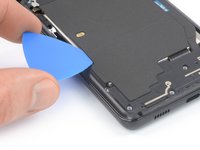
Insert an opening pick into the gap you created.
-
Slide the opening pick to the bottom left corner to slice the adhesive.
-
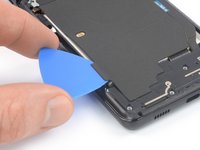
Leave the opening pick in place to prevent the adhesive from resealing.
-
-
-
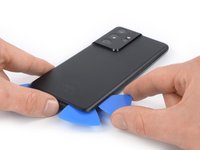
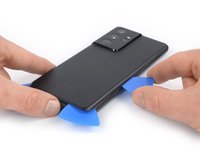
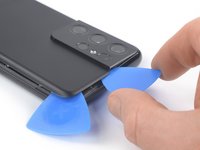
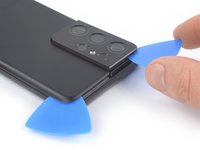
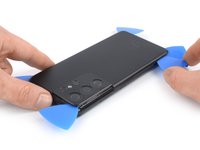
Insert a second opening pick at the bottom edge of your phone.
-
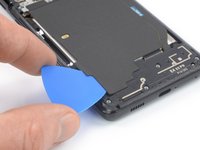
Slide the opening pick to the bottom right corner to slice the adhesive.
-
Leave the opening picks in place to prevent the adhesive from resealing.
-
-
在这个步骤中使用的工具:Tweezers$4.99
-
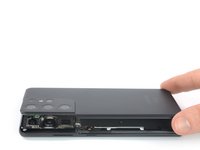
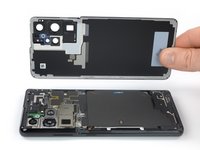
Remove the back cover.
-
This is a good point to power on your phone and test all functions before sealing it up. Be sure to power your phone back down completely before you continue working.
-
Remove any adhesive chunks with a pair of tweezers or your fingers.
-
Use some high concentration (over 90%) isopropyl alcohol to wipe away any adhesive residue.
-
If you're using custom-cut adhesives, follow this guide.
-
If you're using double-sided tape, follow this guide.
-
-
-
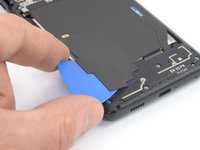
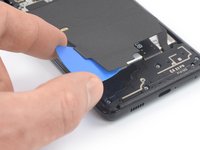
Insert an opening pick underneath the left bottom end of the NFC antenna and charging coil assembly.
-
Carefully slide the opening pick along the bottom left edge of the assembly to separate it from the battery.
-
-
-
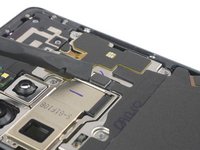
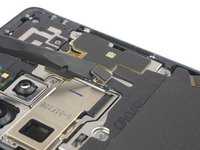
Use a spudger to disconnect the charging coil by prying the connector straight up from its socket.
-
-
-
Use a spudger to disconnect the NFC antenna by prying the connector straight up from its socket.
-
-
-
Use a Phillips screwdriver to remove the five 3.9 mm-long screws securing the NFC antenna and charging coil assembly.
Falls die Schrauben mit LOCTITE Kleber gesichert sind (bei mir der blaue), dann Vorsicht mit dem Kreuzschlitz der kleinen Schraubenköpfe. Unbedingt den richtigen Kreuzschlitz-Bit oder -Schraubendreher verwenden, der gut sitzt. Beherzte, aber dennoch vorsichtige auf- und zudrehversuche (!) bei gleichzeitigem drücken helfen, den LOCTITE zu brechen/lösen, bevor die Schrauben sich leicht herausdrehen lassen.
-
-
-
在这个步骤中使用的工具:Tweezers$4.99
-
Use a pair of tweezers or your fingers to carefully remove the NFC antenna and charging coil assembly.
-
-
-
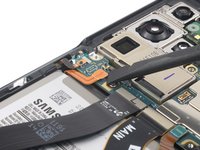
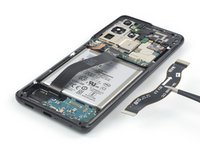
Use a spudger to disconnect the battery cable by prying the connector straight up from its socket.
-
-
-
Use a Phillips screwdriver to remove the four 3.9 mm-long screws securing the loudspeaker assembly.
No need to remove lower speaker to replace camera , just disconnect 3 flat flex cables from motherboard.
-
-
-
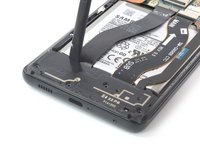
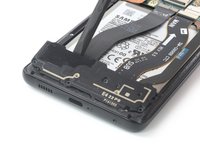
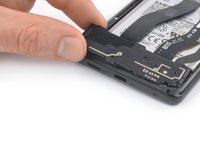
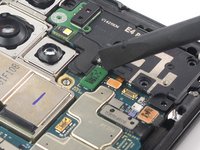
Insert a spudger into the gap between the top edge of the loudspeaker assembly and the midframe.
-
Use your spudger to pry up the loudspeaker assembly by tilting it downwards.
-
-
-
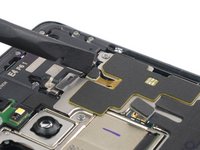
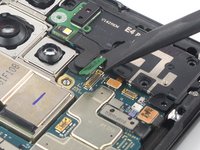
Use a spudger to disconnect the display flex cable by prying the connector straight up from its socket.
-
-
-
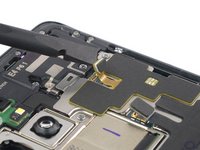
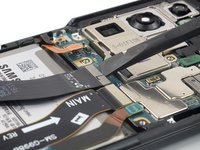
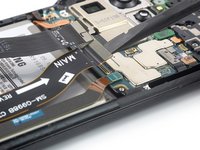
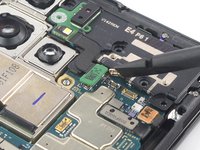
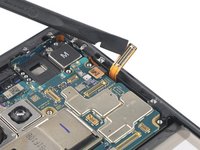
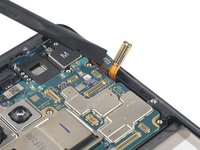
Use a spudger to disconnect the main and interconnect flex cables from the motherboard by prying their upper connectors straight up from their sockets.
-
-
在这个步骤中使用的工具:Tweezers$4.99
-
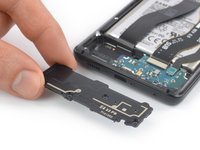
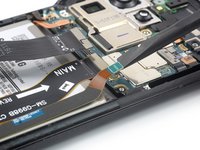
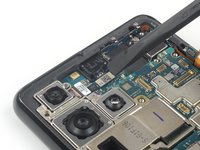
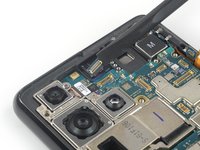
Use a spudger to disconnect the interconnect flex cable from the daughterboard by prying its bottom connector straight up from its socket.
-
Use your fingers or a pair of tweezers to carefully remove the interconnect flex cable.
-
-
-
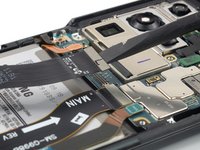
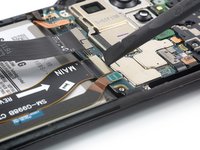
Use a spudger to disconnect the main flex cable from the daughterboard by prying its bottom connector straight up from its socket.
-
Use your fingers or a pair of tweezers to carefully remove the main flex cable.
-
-
-
Use a Phillips screwdriver to remove the four 3.9 mm-long screws securing the earpiece speaker and laser AF module assembly.
-
-
-
Use a spudger to disconnect the laser AF module and earpiece speaker flex cables by prying the connectors straight up from their socket.
Didn't know there was a smaller cable attached. Ear piece flex cable connection should be a separate paragraph showing removal of the cable.
-
-
在这个步骤中使用的工具:Tweezers$4.99
-
Grab the bottom right corner of the earpiece speaker and laser AF module assembly with a pair of blunt nose tweezers and carefully lift it upwards.
-
Remove the earpiece speaker and laser AF module assembly.
-
-
-
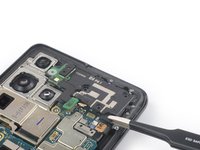
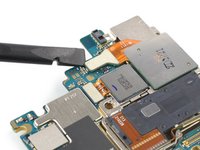
Use a spudger to disconnect the in-display fingerprint and antenna flex cables by prying the connectors straight up from their socket.
-
Carefully bend both connectors to the side to free the motherboard.
-
-
-
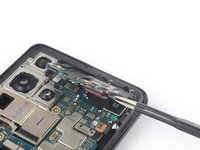
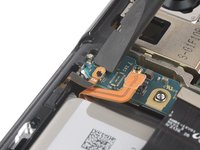
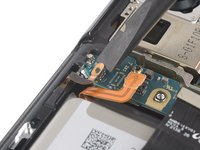
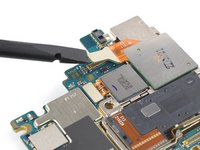
Use a spudger to disconnect the front facing camera cable by prying the connector straight up from its socket.
Be prepared if you take this out, keep the glue attached to the side of it and the little blue piece of plastic....otherwise it will be a nightmare.
-
-
-
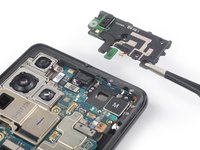
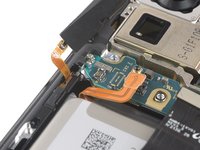
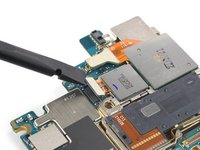
Use a spudger to disconnect the power button flex cable by prying the connector straight up from its socket.
-
Carefully bend the connector to the side to free the motherboard.
-
-
-
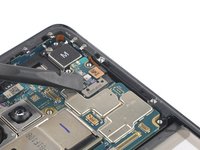
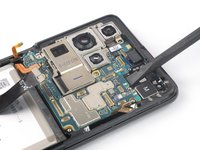
Use a Phillips screwdriver to remove the 3.9 mm-long screw securing the camera module.
-
-
-
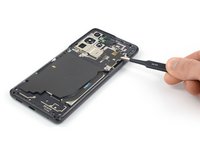
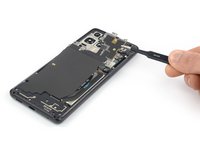
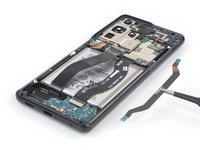
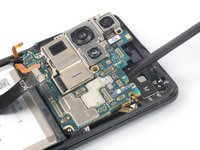
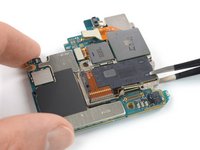
Insert an spudger underneath the top edge of the motherboard next to the vibration motor.
-
Use your spudger to pry up the motherboard by tilting it downwards and twisting it to the side at the same time.
-
-
-
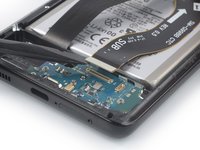
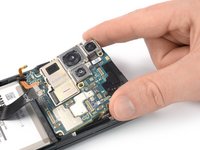
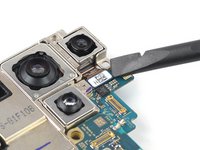
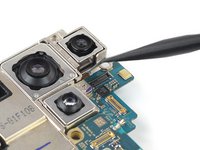
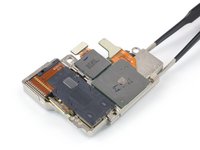
Use a spudger to disconnect the ultra wide camera flex cable by prying its connector straight up from its socket.
-
-
-
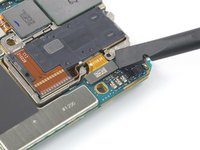
Use a spudger to disconnect the telephoto camera flex cable on the rear side of the motherboard by prying its connector straight up from its socket.
-
-
-
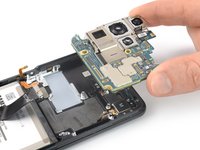
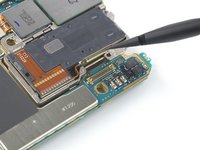
Use a spudger to disconnect the wide and the second telephoto camera flex cables by prying their connectors straight up from their sockets.
-
-
在这个步骤中使用的工具:Tweezers$4.99
-
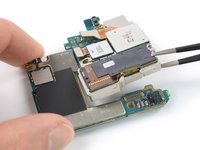
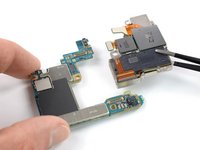
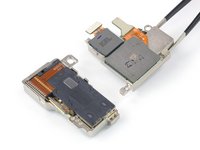
Use a pair of tweezers to separate the motherboard from the rear camera assembly.
-
-
-
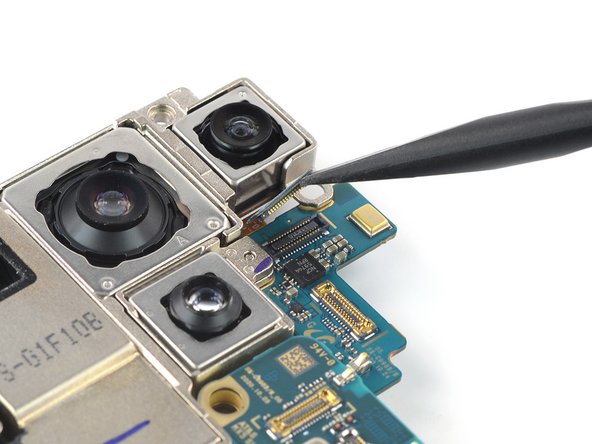
Use a Phillips screwdriver to remove the 3.5 mm-long screw securing the rear camera assembly.
-
-
在这个步骤中使用的工具:Tweezers$4.99
-
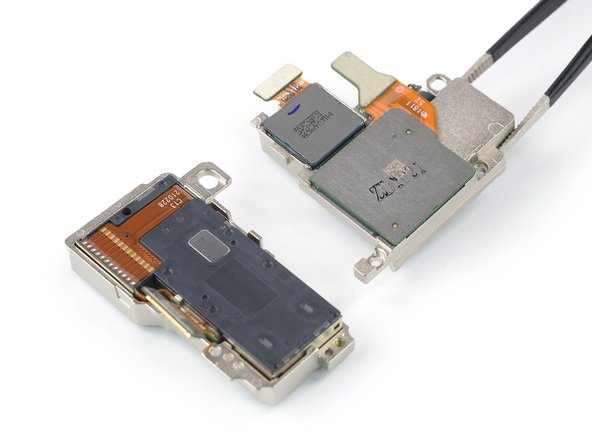
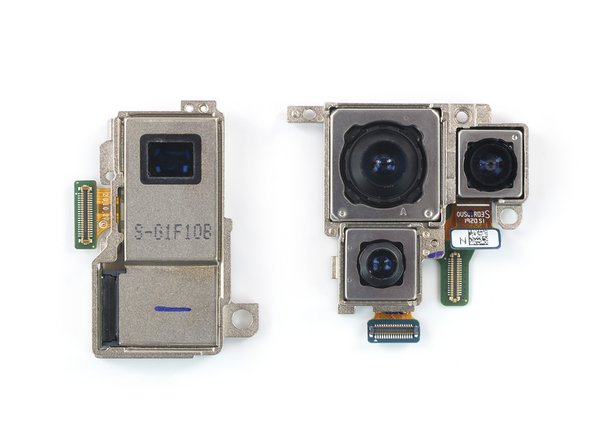
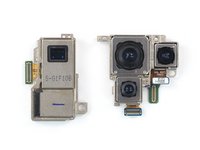
Use a pair of blunt tweezers or your fingers to carefully separate the triple lens assembly from the telephoto camera.
-


If possible, turn on your device and test your repair before installing new adhesive and resealing.
Compare your new replacement part to the original part—you may need to transfer remaining components or remove adhesive backings from the new part before installing.
To reassemble your device, follow these instructions in reverse order.
After you've completed the repair, follow this guide to test your repair.
Take your e-waste to an R2 or e-Stewards certified recycler.
Repair didn’t go as planned? Try some basic troubleshooting, or ask our Answers community for help.
2等其他人完成本指南。


6条评论
does 3x camera can be seperated too?
Hi Watcher,
you can detach the telephoto camera from the assembly easily including its frame. It is only held to the assembly by a small metal pin. However separating the cameras from their frame is very difficult. The frame sits very tight around them and in case of the ultra-wide and wide cameras you risk damaging both when trying to remove one.
hey, can you please tell me where I can buy these cameras?
unfortunately I was taking a video of a stone blast which shattered all three camera glasses and the lenses were damaged too. even though all three cameras are working but the pictures come out blur, so I need to purchase the whole set of cameras so I can replace them with the old ones.
Im from Pakistan!!
The telephoto camera has a real mechanical assembly that moves a physical lens according to the zoom setting, up to 100x. I took a picture of the August 2023 Blue Supermoon with it. The image on the screen is about 2.5 inches or 63 mm in diameter. This is excellent for a smartphone with no added lenses.
Hello, my camera 10x zoom has been causing the failed camera notification. i swapped cameras and tried reseating anything i should know? everything else works fine